VFX Engine
これまで、3D シーンでパーティクルを作成するためのカスタムコンポーネントを作成してきました。たいていの場合、空間の一点からパーティクルを放出し、それらを時間とともに(色、サイズ、位置など)アニメーションさせることをほぼ同じことをしたいと考えます。
同じコードを何度も複製する代わりに、さまざまなタイプのパーティクル効果を作成するために使用できる比較的汎用的な VFX エンジンを作成できます。
これには多くの利点があります:
- 再利用性: 異なる種類のパーティクル効果をプロジェクト内で作成するために同じエンジンを使用できます。
- パフォーマンス: エンジンは大量のパーティクルを効率的に処理し、複数のパーティクルシステムを1つに統合するよう最適化できます。
- 柔軟性: エンジンのパラメータを変更することで、パーティクルの動作を簡単にカスタマイズできます。
- 使いやすさ: わずか数行のコードで複雑なパーティクル効果を作成できます。
- コードの重複を避ける: 同じコードを複数回書く必要はありません。
次のレッスンでは、さまざまな効果を作成するためにこの VFX エンジンを使用します。このレッスンをスキップしてエンジンを直接使用することはできますが、その仕組みを理解することで、3D プロジェクトにおけるパフォーマンスと柔軟性をより深くマスターするのに役立ちます。
VFX エンジンを構築する準備はできましたか? さっそく始めましょう!
GPU パーティクル
前のレッスンでは、drei の <Instances /> コンポーネントを使用して 3D シーンで制御されたパーティクルを作成する方法を学びました。
しかし、このアプローチには主な制限があります。それは、処理できるパーティクルの数が CPU に制限されていることです。パーティクルの数が増えるほど、CPU がそれらを処理しなければならず、パフォーマンスの問題が発生する可能性があります。
これは、内部的に <Instances /> コンポーネントが各 <Instance /> の位置、色、サイズを取得するための計算を useFrame ループで行うためです。コードは こちら で確認できます。
VFX Engine では、<Instances /> コンポーネントでは処理できないほど多くのパーティクルをスムーズにスポーンできるようにしたいと考えています。パーティクルの位置、色、サイズを GPU で処理し、パフォーマンスの問題なく数十万、あるいは (何百万? 👀) のパーティクルを扱えるようにします。
Instanced Mesh
Sprite や Points を使用してパーティクルを作成することもできますが、ここでは InstancedMesh を使用します。
これにより、ポイントやスプライトのような単純な形状だけでなく、立方体や球体、カスタムジオメトリのような3D形状もレンダリングすることができます。
新しい vfxs フォルダ内に VFXParticles.jsx というコンポーネントを作成しましょう:
import { useMemo, useRef } from "react"; import { PlaneGeometry } from "three"; export const VFXParticles = ({ settings = {} }) => { const { nbParticles = 1000 } = settings; const mesh = useRef(); const defaultGeometry = useMemo(() => new PlaneGeometry(0.5, 0.5), []); return ( <> <instancedMesh args={[defaultGeometry, null, nbParticles]} ref={mesh}> <meshBasicMaterial color="orange" /> </instancedMesh> </> ); };
各パーティクルに使用されるgeometryを作成します。この場合、0.5 のサイズのシンプルな平面ジオメトリを使用しています。後で使用するジオメトリを渡すためのプロップを追加します。
instancedMesh コンポーネントは3つの引数を取ります:
- パーティクルのgeometry。
- パーティクルのmaterial。宣言的にコンポーネント内で定義するために
nullを渡しました。 - コンポーネントが処理できるインスタンスの数。これは同時に表示できるパーティクルの最大数を表します。
Experience.jsx ファイル内のオレンジ色のキューブを VFXParticles コンポーネントに置き換えましょう:
// ... import { VFXParticles } from "./vfxs/VFXParticles"; export const Experience = () => { return ( <> {/* ... */} <VFXParticles /> </> ); };

シーンの中央に1つのオレンジ色のパーティクルが見えます。これが私たちの VFXParticles コンポーネントです。
パーティクルの数は 1000 に設定されていますが、一つしか見えません。これは全てが同じ位置 (0, 0, 0) にレンダリングされているためです。これを変更してみましょう。
インスタンス行列
インスタンス化されたメッシュは、各インスタンスの位置、回転、スケールを定義するために行列を使用します。メッシュの instanceMatrix プロパティを更新することにより、各パーティクルを個別に移動、回転、スケールすることができます。
各インスタンスにおいて、行列はパーティクルの変換を表す4x4の行列です。Three.js の Matrix4 クラスを使用すると、行列を compose と decompose することで、パーティクルの位置、回転、スケールをより人間が読みやすい形で設定/取得することができます。
VFXParticles の宣言の上部で、頻繁にベクトルや行列を再作成せずにパーティクルを操作するためのダミー変数を宣言しましょう:
// ... import { Euler, Matrix4, PlaneGeometry, Quaternion, Vector3 } from "three"; const tmpPosition = new Vector3(); const tmpRotationEuler = new Euler(); const tmpRotation = new Quaternion(); const tmpScale = new Vector3(1, 1, 1); const tmpMatrix = new Matrix4();
次に、パーティクルをセットアップする emit 関数を作成しましょう:
// ... import { useEffect } from "react"; // ... export const VFXParticles = ({ settings = {} }) => { // ... const emit = (count) => { for (let i = 0; i < count; i++) { const position = [ randFloatSpread(5), randFloatSpread(5), randFloatSpread(5), ]; const scale = [ randFloatSpread(1), randFloatSpread(1), randFloatSpread(1), ]; const rotation = [ randFloatSpread(Math.PI), randFloatSpread(Math.PI), randFloatSpread(Math.PI), ]; tmpPosition.set(...position); tmpRotationEuler.set(...rotation); tmpRotation.setFromEuler(tmpRotationEuler); tmpScale.set(...scale); tmpMatrix.compose(tmpPosition, tmpRotation, tmpScale); mesh.current.setMatrixAt(i, tmpMatrix); } }; useEffect(() => { emit(nbParticles); }, []); // ... };
emit 関数は放出したいパーティクルの数をループして、それぞれのパーティクルにランダムな位置、回転、スケールを設定します。これらの値で行列を構成し、現在のインデックスのインスタンスに設定します。

シーン中のランダムなパーティクルを見ることができます。各パーティクルにはランダムな位置、回転、およびスケールがあります。
パーティクルをアニメーションさせるために、lifetime、speed、direction といった属性を定義し、それにより GPU で演算を行うことができます。
その前に、meshBasicMaterial の属性にアクセスおよび制御を行うことができないため、これらの属性を処理するカスタムシェーダーマテリアルに切り替える必要があります。
パーティクル マテリアル
最初の目標は、meshBasicMaterial と新しい shaderMaterial の間で何の変化も見えないようにすることです。meshBasicMaterial が現在レンダリングしているのと同じ方法でパーティクルをレンダリングするシンプルなシェーダーマテリアルを作成します。
VFXParticles コンポーネントで、新しいシェーダーマテリアルを作成しましょう:
// ... import { shaderMaterial } from "@react-three/drei"; import { extend } from "@react-three/fiber"; import { Color } from "three"; const ParticlesMaterial = shaderMaterial( { color: new Color("white"), }, /* glsl */ ` varying vec2 vUv; void main() { gl_Position = projectionMatrix * modelViewMatrix * vec4(instanceMatrix * vec4(position, 1.0)); vUv = uv; } `, /* glsl */ ` uniform vec3 color; varying vec2 vUv; void main() { gl_FragColor = vec4(color, 1.0); }` ); extend({ ParticlesMaterial });
このシェーダーマテリアルは非常にシンプルで、color ユニフォームを受け取り、その色でパーティクルをレンダリングします。ここで新しい要素は、instanceMatrix を使用して各パーティクルの position、rotation、scale を取得することです。
instanceMatrix属性を宣言する必要がないことに注意してください。これは instancing を使用する際のWebGLProgramの組み込み属性の1つです。詳細はこちらで確認できます。
meshBasicMaterial を新しい ParticlesMaterial に置き換えましょう:
<instancedMesh args={[defaultGeometry, null, nbParticles]} ref={mesh}> <particlesMaterial color="orange" /> </instancedMesh>
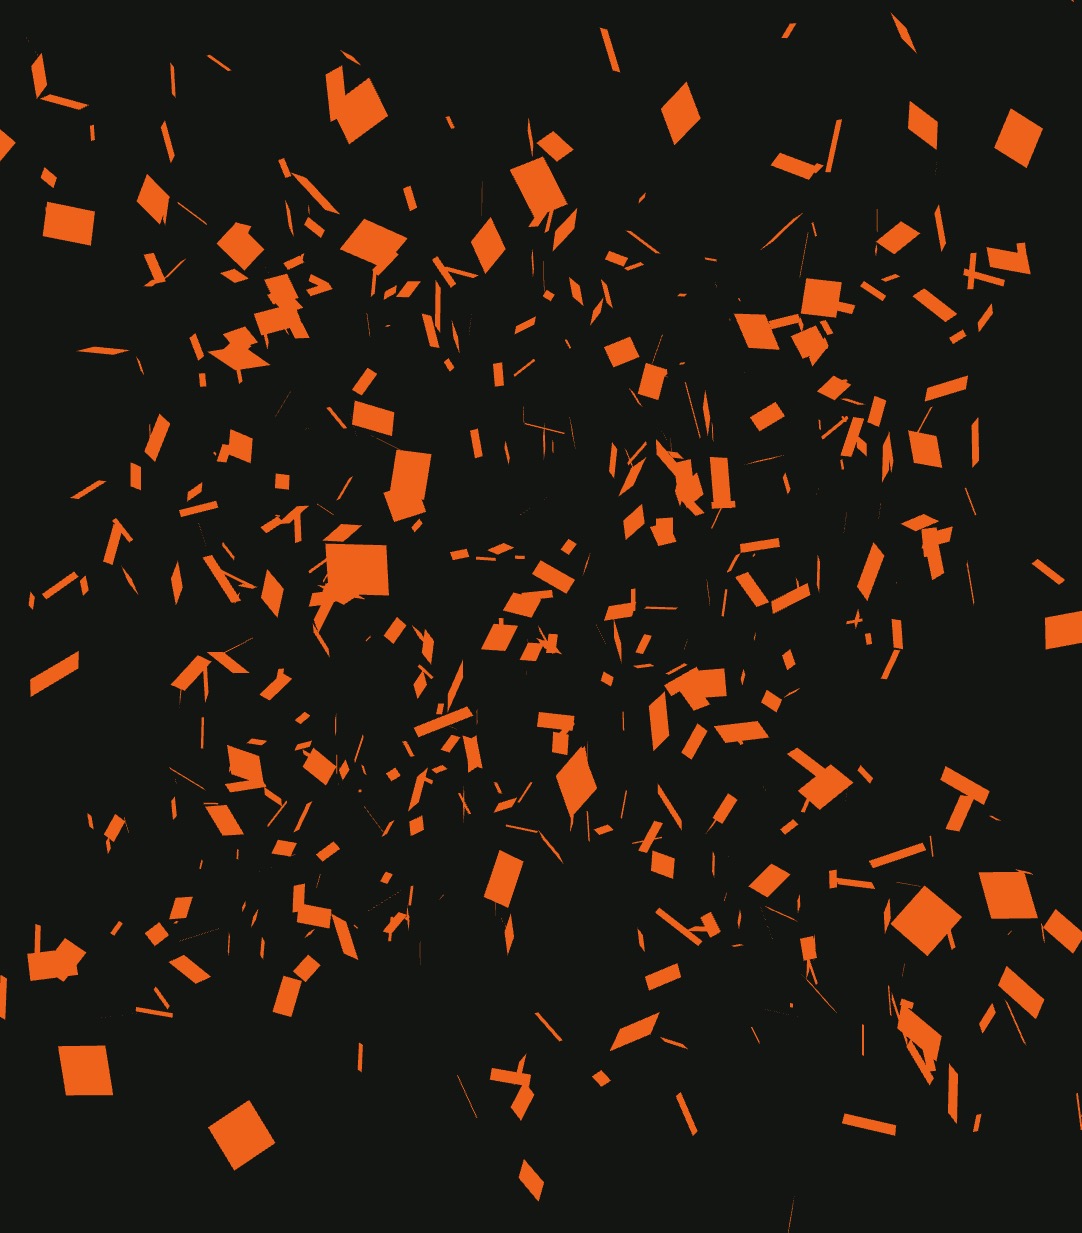
完璧です!position、rotation、および scale は依然として期待通りに動作しています。パーティクルはやや異なるオレンジ色でレンダリングされています。これは、シェーダーマテリアルで 環境 を考慮していないためです。シンプルさを保つために、このままで進めます。
これで、パーティクルにカスタム属性を追加してアニメーション化する準備が整いました。
インスタンス化されたバッファ属性
これまで、instanceMatrix 属性のみを使用してきましたが、ここで各パーティクルをより制御するためにカスタム属性を追加します。
このためには、Three.js の InstancedBufferAttribute を使用します。
パーティクルに次の属性を追加します。
instanceColor: パーティクルの色を表す vector3。instanceColorEnd: 時間とともに変化する色を表す vector3。instanceDirection: パーティクルが移動する方向を表す vector3。instanceSpeed: パーティクルがその方向にどれくらい速く移動するかを定義する float。instanceRotationSpeed: パーティクルの各軸ごとの回転速度を決定する vector3。instanceLifetime: パーティクルの寿命を定義する vector2。最初の値 (x) は開始時間で、2 番目の値 (y) は寿命/期間です。時間の一様な計算方法と組み合わせることで、パーティクルが エイジ 、進行、および 生存 か 死亡 かを計算できます。
属性用の異なるバッファを作成しましょう:
// ... import { useState } from "react"; // ... export const VFXParticles = ({ settings = {} }) => { // ... const [attributeArrays] = useState({ instanceColor: new Float32Array(nbParticles * 3), instanceColorEnd: new Float32Array(nbParticles * 3), instanceDirection: new Float32Array(nbParticles * 3), instanceLifetime: new Float32Array(nbParticles * 2), instanceSpeed: new Float32Array(nbParticles * 1), instanceRotationSpeed: new Float32Array(nbParticles * 3), }); // ... }; // ...
useState を使用して属性用の異なるバッファを作成し、レンダーごとに再作成するのを避けます。コンポーネントのライフサイクルの間にパーティクルの最大数を変更することは考慮していないため、useMemo フックは使用しませんでした。
Float32Array は属性の値を格納するために使用されます。パーティクルの数に属性のコンポーネント数を掛けて、配列内の合計値数を取得します。
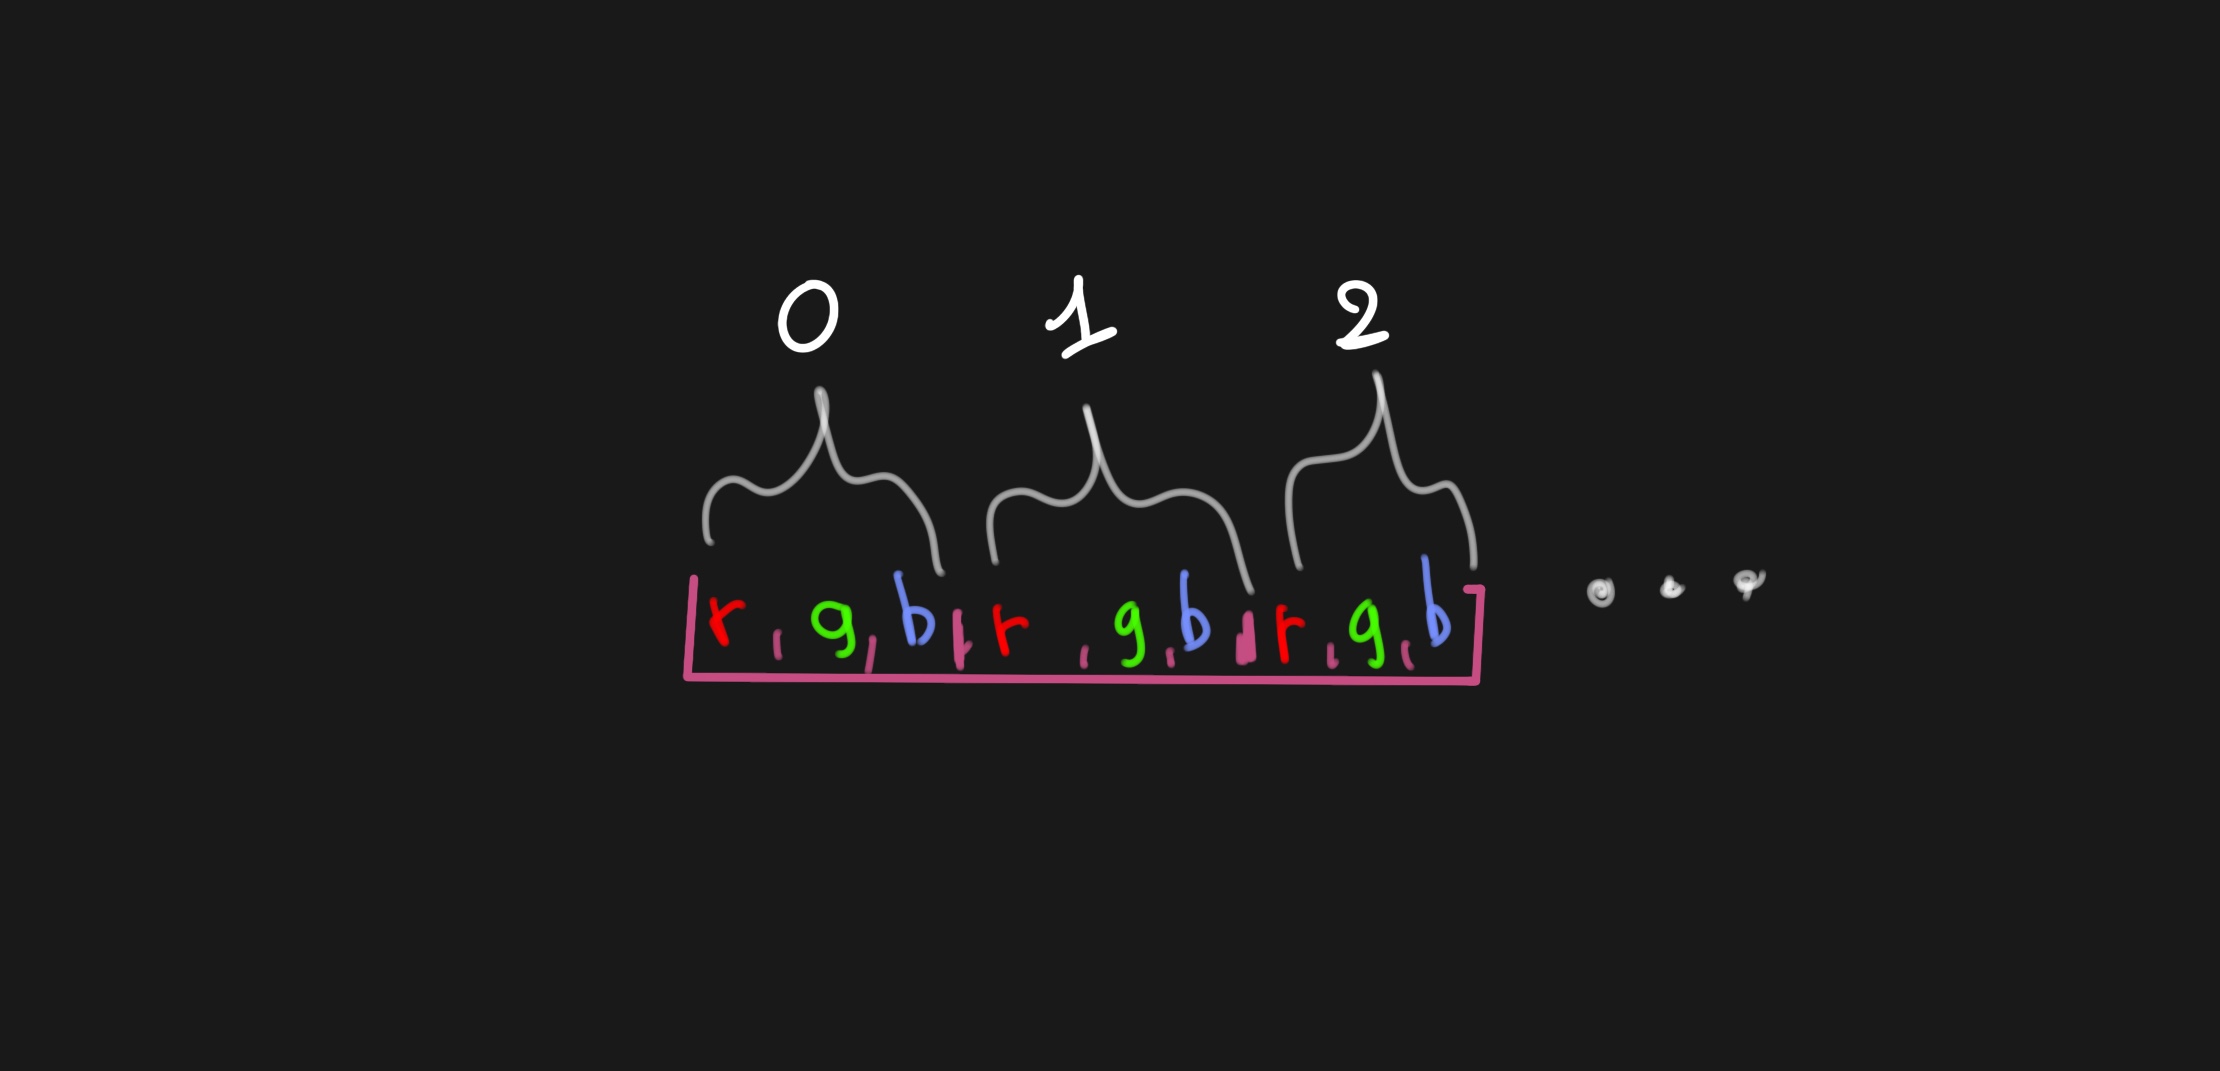
instanceColor 属性では、最初の 3 つの値は最初のパーティクルの色を表し、次の 3 つの値は 2 番目のパーティクルの色を表します。
InstancedBufferAttribute を使用する方法に慣れることから始めます。そのために、instanceColor 属性を実装します:
// ... import { DynamicDrawUsage } from "three"; export const VFXParticles = ({ settings = {} }) => { // ... return ( <> <instancedMesh args={[defaultGeometry, null, nbParticles]} ref={mesh}> <particlesMaterial color="orange" /> <instancedBufferAttribute attach={"geometry-attributes-instanceColor"} args={[attributeArrays.instanceColor]} itemSize={3} count={nbParticles} usage={DynamicDrawUsage} /> </instancedMesh> </> ); };
<instancedMesh /> の中で、<instancedBufferAttribute /> コンポーネントを追加して instanceColor 属性を定義します。メッシュの geometry-attributes-instanceColor 属性にアタッチします。attributeArrays.instanceColor 配列をデータソースとして渡し、itemSize を 3 に設定し、count を nbParticles に設定します。
usage プロップは、データが頻繁に更新されることをレンダラーに知らせるために DynamicDrawUsage に設定されています。他の可能な値や詳細についてはこちらで確認できます。
それらを毎フレーム更新するわけではありませんが、新しいパーティクルを生成するたびにデータは更新されます。そのため、DynamicDrawUsage として考慮するのに十分です。
完璧です。パーティクルの色を操作するためにファイルの先頭にダミーの tmpColor 変数を作成しましょう:
// ... const tmpColor = new Color();
次に、emit 関数を更新して instanceColor 属性を設定します:
const emit = (count) => { const instanceColor = mesh.current.geometry.getAttribute("instanceColor"); for (let i = 0; i < count; i++) { // ... tmpColor.setRGB(Math.random(), Math.random(), Math.random()); instanceColor.set([tmpColor.r, tmpColor.g, tmpColor.b], i * 3); } };
メッシュのジオメトリから instanceColor 属性を取得することから始めます。次に、生成したいパーティクルの数をループし、各パーティクルにランダムな色を設定します。
uniformの色の代わりに instanceColor 属性を使用するように particlesMaterial を更新します:
const ParticlesMaterial = shaderMaterial( { // color: new Color("white"), }, /* glsl */ ` varying vec2 vUv; varying vec3 vColor; attribute vec3 instanceColor; void main() { gl_Position = projectionMatrix * modelViewMatrix * vec4(instanceMatrix * vec4(position, 1.0)); vUv = uv; vColor = instanceColor; } `, /* glsl */ ` varying vec3 vColor; varying vec2 vUv; void main() { gl_FragColor = vec4(vColor, 1.0); }` ); // ...
頂点シェーダに attribute vec3 instanceColor; を追加し、色をフラグメントシェーダに渡すために vColor を設定しました。そして、gl_FragColor を vColor に設定して、パーティクルを各自の色でレンダリングします。
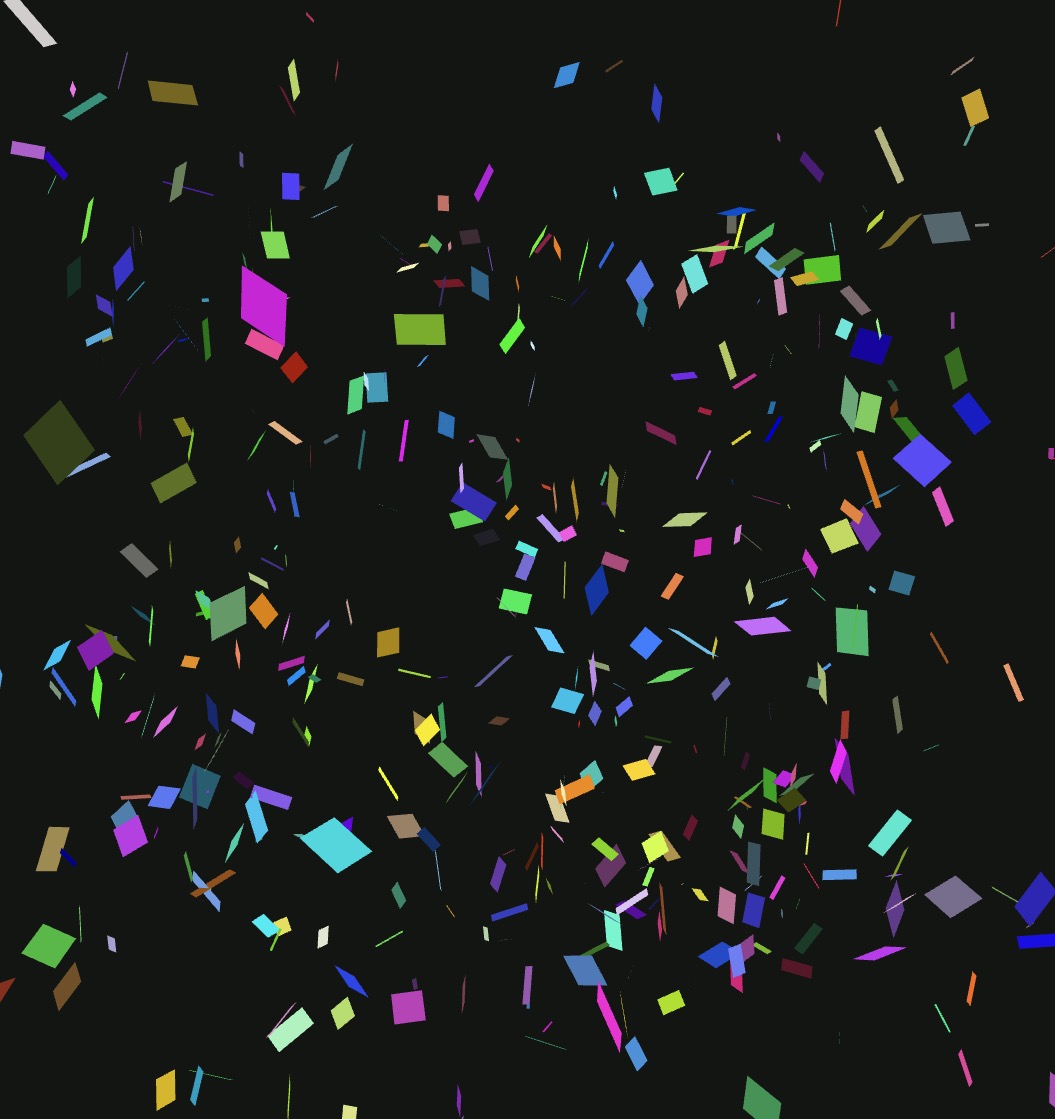
各パーティクルにランダムな色を設定することに成功しました。パーティクルはそれぞれの色でレンダリングされています。
完璧です。他の属性をパーティクルに追加しましょう。まず、emit 関数を更新して、ランダムな値で instanceColorEnd、instanceDirection、instanceLifetime、instanceSpeed、および instanceRotationSpeed の属性を設定します:
const emit = (count) => { const instanceColor = mesh.current.geometry.getAttribute("instanceColor"); const instanceColorEnd = mesh.current.geometry.getAttribute("instanceColorEnd"); const instanceDirection = mesh.current.geometry.getAttribute("instanceDirection"); const instanceLifetime = mesh.current.geometry.getAttribute("instanceLifetime"); const instanceSpeed = mesh.current.geometry.getAttribute("instanceSpeed"); const instanceRotationSpeed = mesh.current.geometry.getAttribute( "instanceRotationSpeed" ); for (let i = 0; i < count; i++) { // ... tmpColor.setRGB(Math.random(), Math.random(), Math.random()); instanceColor.set([tmpColor.r, tmpColor.g, tmpColor.b], i * 3); tmpColor.setRGB(Math.random(), Math.random(), Math.random()); instanceColorEnd.set([tmpColor.r, tmpColor.g, tmpColor.b], i * 3); const direction = [ randFloatSpread(1), randFloatSpread(1), randFloatSpread(1), ]; instanceDirection.set(direction, i * 3); const lifetime = [randFloat(0, 5), randFloat(0.1, 5)]; instanceLifetime.set(lifetime, i * 2); const speed = randFloat(5, 20); instanceSpeed.set([speed], i); const rotationSpeed = [ randFloatSpread(1), randFloatSpread(1), randFloatSpread(1), ]; instanceRotationSpeed.set(rotationSpeed, i * 3); } };
そして各属性のための instancedBufferAttribute コンポーネントを作成します:
<instancedMesh args={[defaultGeometry, null, nbParticles]} ref={mesh}> <particlesMaterial color="orange" /> <instancedBufferAttribute attach={"geometry-attributes-instanceColor"} args={[attributeArrays.instanceColor]} itemSize={3} count={nbParticles} usage={DynamicDrawUsage} /> <instancedBufferAttribute attach={"geometry-attributes-instanceColorEnd"} args={[attributeArrays.instanceColorEnd]} itemSize={3} count={nbParticles} usage={DynamicDrawUsage} /> <instancedBufferAttribute attach={"geometry-attributes-instanceDirection"} args={[attributeArrays.instanceDirection]} itemSize={3} count={nbParticles} usage={DynamicDrawUsage} /> <instancedBufferAttribute attach={"geometry-attributes-instanceLifetime"} args={[attributeArrays.instanceLifetime]} itemSize={2} count={nbParticles} usage={DynamicDrawUsage} /> <instancedBufferAttribute attach={"geometry-attributes-instanceSpeed"} args={[attributeArrays.instanceSpeed]} itemSize={1} count={nbParticles} usage={DynamicDrawUsage} /> <instancedBufferAttribute attach={"geometry-attributes-instanceRotationSpeed"} args={[attributeArrays.instanceRotationSpeed]} itemSize={3} count={nbParticles} usage={DynamicDrawUsage} /> </instancedMesh>
次に、パーティクルの動き、色、寿命のロジックを実装して、パーティクルに命を吹き込む時間です。
Particles lifetime
私たちのパーティクルの動作を計算するために、経過時間をシェーダーに渡す必要があります。shaderMaterialのuniformsプロップを使用して時間を渡します。
ParticlesMaterialを更新してuTimeユニフォームを追加しましょう:
const ParticlesMaterial = shaderMaterial( { uTime: 0, }, /* glsl */ ` uniform float uTime; // ... `, /* glsl */ ` // ... ` );
そして、useFrameループで、uTimeユニフォームを更新します:
// ... import { useFrame } from "@react-three/fiber"; // ... export const VFXParticles = ({ settings = {} }) => { // ... useFrame(({ clock }) => { if (!mesh.current) { return; } mesh.current.material.uniforms.uTime.value = clock.elapsedTime; }); // ... };
頂点シェーダーでは、uTimeユニフォームとinstanceLifetime属性に基づいて各パーティクルの年齢と進捗を計算します。進捗をvaryingであるvProgressにしてフラグメントシェーダーに渡し、パーティクルをアニメーション化します。
uniform float uTime; varying vec2 vUv; varying vec3 vColor; varying vec3 vColorEnd; varying float vProgress; attribute float instanceSpeed; attribute vec3 instanceRotationSpeed; attribute vec3 instanceDirection; attribute vec3 instanceColor; attribute vec3 instanceColorEnd; attribute vec2 instanceLifetime; // x: startTime, y: duration void main() { float startTime = instanceLifetime.x; float duration = instanceLifetime.y; float age = uTime - startTime; vProgress = age / duration; gl_Position = projectionMatrix * modelViewMatrix * vec4(instanceMatrix * vec4(position, 1.0)); vUv = uv; vColor = instanceColor; vColorEnd = instanceColorEnd; }
年齢はstartTimeをuTimeから引くことで計算されます。その後、進捗は年齢をdurationで割ることで計算されます。
次に、フラグメントシェーダーで、パーティクルの色をinstanceColorとinstanceColorEndの間で進捗に基づいて補間します:
varying vec3 vColor; varying vec3 vColorEnd; varying float vProgress; varying vec2 vUv; void main() { vec3 finalColor = mix(vColor, vColorEnd, vProgress); gl_FragColor = vec4(finalColor, 1.0); }

時間と共に色が変化するパーティクルが確認できますが、問題があります。すべてのパーティクルが開始時に表示されているのに対し、実際には開始時間はランダムです。まだ生まれていないパーティクルは非表示にする必要があります。
生まれていないまたは死んだパーティクルがレンダリングされるのを防ぐために、フラグメントシェーダーでdiscardキーワードを使用します:
// ... void main() { if (vProgress < 0.0 || vProgress > 1.0) { discard; } // ... }
discardキーワードは、現在のフラグメントを破棄し、レンダリングしないようにレンダラーに指示します。
完璧です。これでパーティクルは生まれ、時間と共に生き、そして消えていきます。次は動きと回転のロジックを追加します。
パーティクルの動き
パーティクルの方向、速度、および年齢(エイジ)を使用して、時間とともにパーティクルの位置を計算できます。
Vertex Shaderで、パーティクルの方向と速度を考慮してgl_Positionを調整しましょう。
まず、方向が単位ベクトルでないときにパーティクルが速く動かないように、方向を正規化します。
vec3 normalizedDirection = length(instanceDirection) > 0.0 ? normalize(instanceDirection) : vec3(0.0);
次に、速度と年齢を基に、パーティクルのオフセットを計算します。
vec3 offset = normalizedDirection * age * instanceSpeed;
インスタンス位置を取得します。
vec4 startPosition = modelMatrix * instanceMatrix * vec4(position, 1.0); vec3 instancePosition = startPosition.xyz;
そして、それにオフセットを適用します。
vec3 finalPosition = instancePosition + offset;
最後に、modelViewMatrixをfinalPositionに適用して、世界座標に変換し、モデルビュー位置mvPositionを取得します。
vec4 mvPosition = modelViewMatrix * vec4(finalPosition, 1.0);
そして、カメラスペースに世界位置を変換するためにprojectionMatrixを適用します。
gl_Position = projectionMatrix * mvPosition;
これがこれまでの完全なvertex shaderです。
uniform float uTime; varying vec2 vUv; varying vec3 vColor; varying vec3 vColorEnd; varying float vProgress; attribute float instanceSpeed; attribute vec3 instanceRotationSpeed; attribute vec3 instanceDirection; attribute vec3 instanceColor; attribute vec3 instanceColorEnd; attribute vec2 instanceLifetime; // x: startTime, y: duration void main() { float startTime = instanceLifetime.x; float duration = instanceLifetime.y; float age = uTime - startTime; vProgress = age / duration; vec3 normalizedDirection = length(instanceDirection) > 0.0 ? normalize(instanceDirection) : vec3(0.0); vec3 offset = normalizedDirection * age * instanceSpeed; vec4 startPosition = modelMatrix * instanceMatrix * vec4(position, 1.0); vec3 instancePosition = startPosition.xyz; vec3 finalPosition = instancePosition + offset; vec4 mvPosition = modelViewMatrix * vec4(finalPosition, 1.0); gl_Position = projectionMatrix * mvPosition; vUv = uv; vColor = instanceColor; vColorEnd = instanceColorEnd; }
パーティクルは今、さまざまな方向に異なる速度で移動しています。これはランダムな値のために混沌としています。
パーティクルの動きをより明確に見るために、emit関数でランダムな値を調整しましょう。
for (let i = 0; i < count; i++) { const position = [ randFloatSpread(0.1), randFloatSpread(0.1), randFloatSpread(0.1), ]; const scale = [randFloatSpread(1), randFloatSpread(1), randFloatSpread(1)]; const rotation = [ randFloatSpread(Math.PI), randFloatSpread(Math.PI), randFloatSpread(Math.PI), ]; tmpPosition.set(...position); tmpRotationEuler.set(...rotation); tmpRotation.setFromEuler(tmpRotationEuler); tmpScale.set(...scale); tmpMatrix.compose(tmpPosition, tmpRotation, tmpScale); mesh.current.setMatrixAt(i, tmpMatrix); tmpColor.setRGB(1, 1, 1); instanceColor.set([tmpColor.r, tmpColor.g, tmpColor.b], i * 3); tmpColor.setRGB(0, 0, 0); instanceColorEnd.set([tmpColor.r, tmpColor.g, tmpColor.b], i * 3); const direction = [randFloatSpread(0.5), 1, randFloatSpread(0.5)]; instanceDirection.set(direction, i * 3); const lifetime = [randFloat(0, 5), randFloat(0.1, 5)]; instanceLifetime.set(lifetime, i * 2); const speed = randFloat(1, 5); instanceSpeed.set([speed], i); const rotationSpeed = [ randFloatSpread(1), randFloatSpread(1), randFloatSpread(1), ]; instanceRotationSpeed.set(rotationSpeed, i * 3); }
形が整い始めています!
後で変数を調整するための簡単なUIコントロールを追加します。次に、回転ロジックを追加してパーティクルを完成させましょう。
動きのために方向と速度を分けましたが、回転のためにinstanceRotationSpeed属性を使用して軸ごとの回転速度を定義します。
Vertex Shaderで、回転速度と年齢に基づいてパーティクルの回転を計算できます。
vec3 rotationSpeed = instanceRotationSpeed * age;
次に、この「オフセット回転」をパーティクルに適用できるように、回転行列に変換する必要があります。
mat4 rotX = rotationX(rotationSpeed.x); mat4 rotY = rotationY(rotationSpeed.y); mat4 rotZ = rotationZ(rotationSpeed.z); mat4 rotationMatrix = rotZ * rotY * rotX;
rotationX、rotationY、およびrotationZは、それぞれX、Y、Z軸の回転行列を返す関数です。Vertex Shaderでmain関数の上にこれを定義します。
mat4 rotationX(float angle) { float s = sin(angle); float c = cos(angle); return mat4( 1, 0, 0, 0, 0, c, -s, 0, 0, s, c, 0, 0, 0, 0, 1 ); } mat4 rotationY(float angle) { float s = sin(angle); float c = cos(angle); return mat4( c, 0, s, 0, 0, 1, 0, 0, -s, 0, c, 0, 0, 0, 0, 1 ); } mat4 rotationZ(float angle) { float s = sin(angle); float c = cos(angle); return mat4( c, -s, 0, 0, s, c, 0, 0, 0, 0, 1, 0, 0, 0, 0, 1 ); }
回転行列について詳しく知りたい場合は、このWikipediaの記事、Simon Devによる素晴らしいGame Math Explained Simply、またはThe Book of Shadersの行列セクションをチェックしてください。
最後に、パーティクルの開始位置に回転行列を適用できます。
vec4 startPosition = modelMatrix * instanceMatrix * rotationMatrix * vec4(position, 1.0);
試してみましょう。
パーティクルは今、動き、色を変え、回転しています! ✨
完璧です。VFX Engineの堅実な基盤ができました。もっと多くの機能とコントロールを追加する前に、エンジンのもう一つの重要な部分であるEmitterを準備しましょう。
エミッター
例やチュートリアルでは、パーティクルシステムの一部として見逃されがちなエミッター。しかし、プロジェクトにパーティクルを簡単かつ効率的に統合するための重要な部分です。
- 簡単に:
<VFXParticles />コンポーネントが階層のトップにあることで、エミッターはシーン内の任意のサブコンポーネントからパーティクルを生成できます。これにより、特定のポイントから、移動するオブジェクトに、または動くボーンに簡単にパーティクルを生成できます。 - 効率的に:パーティクルを生成するたびにインスタンス化されたメッシュを再作成したり、シェーダーマテリアルをコンパイルしたり、属性を設定するのではなく、同じVFXParticlesコンポーネントを再利用して、希望の設定でパーティクルを生成する関数を呼び出すことができます。
useVFX
VFXParticles コンポーネントから emit 関数をプロジェクトのどこからでも呼び出せるようにしたいです。このために、useVFX というカスタムフックを作成し、VFXParticles コンポーネントからエミッターを登録および解除する処理を行います。
Zustand を使用します。これは、Reactでグローバルな状態を効率的に管理するシンプルでパフォーマンスの高い方法です。
プロジェクトに追加しましょう:
yarn add zustand
vfxs フォルダに VFXStore.js ファイルを作成します:
import { create } from "zustand"; export const useVFX = create((set, get) => ({ emitters: {}, registerEmitter: (name, emitter) => { if (get().emitters[name]) { console.warn(`Emitter ${name} already exists`); return; } set((state) => { state.emitters[name] = emitter; return state; }); }, unregisterEmitter: (name) => { set((state) => { delete state.emitters[name]; return state; }); }, emit: (name, ...params) => { const emitter = get().emitters[name]; if (!emitter) { console.warn(`Emitter ${name} not found`); return; } emitter(...params); }, }));
含んでいる内容:
- emitters:
VFXParticlesコンポーネントからのすべてのエミッターを格納するオブジェクト。 - registerEmitter: エミッターを指定の名前で登録するための関数。
- unregisterEmitter: エミッターを指定の名前で登録解除するための関数。
- emit: プロジェクトのどこからでも、指定の名前とパラメータでエミッターを呼び出すための関数。
VFXParticles コンポーネントに組み込みましょう:
// ... import { useVFX } from "./VFXStore"; // ... export const VFXParticles = ({ name, settings = {} }) => { // ... const registerEmitter = useVFX((state) => state.registerEmitter); const unregisterEmitter = useVFX((state) => state.unregisterEmitter); useEffect(() => { // emit(nbParticles); registerEmitter(name, emit); return () => { unregisterEmitter(name); }; }, []); // ... }; // ...
VFXParticles コンポーネントに name prop を追加し、エミッターを識別します。その後、useVFX フックを使用して registerEmitter および unregisterEmitter 関数を取得します。
useEffect フック内で name と emit 関数を使用して registerEmitter を呼び出し、コンポーネントがマウントされるときにエミッターを登録し、アンマウントされるときに登録解除します。
Experience コンポーネントで、VFXParticles コンポーネントに name prop を追加しましょう:
// ... import { VFXParticles } from "./vfxs/VFXParticles"; export const Experience = () => { return ( <> {/* ... */} <VFXParticles name="sparks" /> </> ); };
VFXEmitter
useVFXフックが用意できたところで、このフックを使ってVFXEmitterコンポーネントを作成します。このコンポーネントは、VFXParticlesコンポーネントからパーティクルを生成する役割を担います。
まずはvfxsフォルダー内にVFXEmitter.jsxというファイルを作成します。
import { forwardRef, useImperativeHandle, useRef } from "react"; import { useVFX } from "./VFXStore"; export const VFXEmitter = forwardRef( ({ emitter, settings = {}, ...props }, forwardedRef) => { const { duration = 1, nbParticles = 1000, spawnMode = "time", // time, burst loop = false, delay = 0, } = settings; const emit = useVFX((state) => state.emit); const ref = useRef(); useImperativeHandle(forwardedRef, () => ref.current); return ( <> <object3D {...props} ref={ref} /> </> ); } );
React Three Fiber: The Ultimate Guide to 3D Web Development
✨ You have reached the end of the preview ✨
Go to the next level with Three.js and React Three Fiber!
Get full access to this lesson and the complete course when you enroll:
- 🔓 Full lesson videos with no limits
- 💻 Access to the final source code
- 🎓 Course progress tracking & completion
- 💬 Invite to our private Discord community
One-time payment. Lifetime updates included.