Trails
让我们深入探索 trails 的世界!Trails 是为场景添加运动感的绝佳方式。它们可以用于创建各种效果,例如光 trails、烟 trails,甚至是移动物体的 trails。
这是我们将一起构建的最终项目:
我们将从使用自定义 trail 光标创建一个简单的 trail 效果开始。然后我们将探索 drei 的 Trail 组件 来制作您在预览中看到的彗星效果。
初始项目
初始项目包含许多我们在之前课程中已经介绍过的内容:
- 使用 ScrollControls 组件 来处理滚动及相关的相机运动和动画。如果您需要复习,可以查看专门的滚动课程。
- 后处理效果如 Bloom 和 Vignette,以及引人入胜的 GodRays 效果。如果需要复习,请查看后处理课程。
- 在 Particles 课程 中构建的
<StarrySky />,并调整了参数。
此外,我使用 Tailwind CSS 快速设计了 UI。如果您不熟悉 Tailwind CSS,可以跳过 UI 部分,专注于 Three.js 部分。
WawaCoin 和 WawaCard 模型是我们内部制作的,并在初始项目中可用。我使用了 drei 的 MeshTransmissionMaterial 来创造这个未来感的外观。
随意根据您的喜好转换场景。您可以自由地在自己的项目中重用项目的任何部分。
我忘了提,但网站的内容纯属虚构。我并没有在推出一种新加密货币。(还没有?👀)
定制轨迹光标
我们先从创建一个简单的跟随光标的轨迹效果开始。
创建一个新的 components/Cursor.jsx 文件,并添加以下代码:
import { useFrame } from "@react-three/fiber"; import { useControls } from "leva"; import { useRef } from "react"; export const Cursor = () => { const { color, intensity, opacity, size } = useControls("Cursor", { size: { value: 0.2, min: 0.1, max: 3, step: 0.01 }, color: "#dfbcff", intensity: { value: 4.6, min: 1, max: 10, step: 0.1 }, opacity: { value: 0.5, min: 0, max: 1, step: 0.01 }, }); const target = useRef(); useFrame(({ clock }) => { if (target.current) { const elapsed = clock.getElapsedTime(); target.current.position.x = Math.sin(elapsed) * 5; target.current.position.y = Math.cos(elapsed * 2) * 4; target.current.position.z = Math.sin(elapsed * 4) * 10; } }); return ( <> <group ref={target}> <mesh> <sphereGeometry args={[size / 2, 32, 32]} /> <meshStandardMaterial color={color} transparent opacity={opacity} emissive={color} emissiveIntensity={intensity} /> </mesh> </group> </> ); };
这是一简单的跟随正弦波的球体。您可以使用 Leva controls 来调整光标的大小、颜色、强度和不透明度。
目前我们使用固定的运动,这将简化轨迹的可视化。稍后我们会将其替换为鼠标位置。
将 Cursor 组件添加到 Experience 组件中:
// ... import { Cursor } from "./Cursor"; export const Experience = () => { // ... return ( <> <Cursor /> {/* ... */} </> ); }; // ...
我们可以看到一个移动的球体,它将成为我们轨迹的目标。
SimpleTrail 组件
group 是我们的 trail 将要跟随的目标。我们将创建一个新组件 components/SimpleTrail.jsx 来实现 trail 效果:
import { useRef } from "react"; import * as THREE from "three"; export function SimpleTrail({ target = null, color = "#ffffff", intensity = 6, numPoints = 20, height = 0.42, minDistance = 0.1, opacity = 0.5, duration = 20, }) { const mesh = useRef(); return ( <> <mesh ref={mesh}> <planeGeometry args={[1, 1, 1, numPoints - 1]} /> <meshBasicMaterial color={color} side={THREE.DoubleSide} transparent={true} opacity={opacity} depthWrite={false} /> </mesh> </> ); }
参数说明如下:
- target: 要跟随的目标的 ref。
- color: trail 的颜色。
- intensity: trail 的发光强度。
- numPoints: 将存储在 trail 中的位置数量。(数量越多,trail 越长)。
- height: trail 的高度。
- minDistance: 两个点之间的最小距离。
- opacity: trail 的不透明度。
- duration: trail 结束后开始消退的时间。
如果您还不理解所有参数,请不用担心。我们将在实现 trail 时进行解释。
在 Cursor 组件中导入 SimpleTrail 组件:
// ... import { SimpleTrail } from "./SimpleTrail"; export const Cursor = () => { // ... return ( <> <group ref={target}>{/* ... */}</group> <SimpleTrail target={target} color={color} intensity={intensity} opacity={opacity} height={size} /> </> ); };
mesh 由一个 <planeGeometry /> 组成,其段数等于 numPoints。我们将更新每个段的位置以跟随目标。

从视觉上看,由于我们的平面尺寸是 1x1,我们可以看到一个正方形,但是因为段数,我们可以操作顶点以创建 trail 效果。
让我们来看看一个有一个段的 plane 和一个有 20 个段的 plane :
<group position-x={5}> <mesh position-x={4} scale-y={5}> <planeGeometry args={[1, 1, 1, numPoints - 1]} /> <meshBasicMaterial color={"red"} wireframe /> </mesh> <mesh position-x={2} scale-y={5}> <planeGeometry args={[1, 1, 1, 1]} /> <meshBasicMaterial color={"red"} wireframe /> </mesh> </group>
这段代码仅用于视觉化理解。理解概念后可以将其移除。
我们在 y 轴 上缩放它们,以便看到段数的区别。
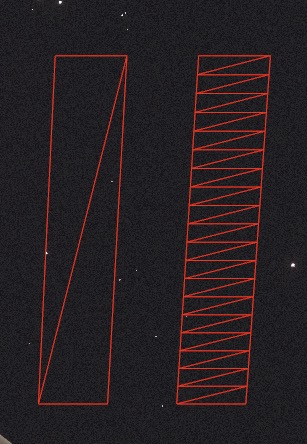
您可以看到左侧平面只有 4 个顶点,而右侧平面有更多。我们将操控这些顶点来构建 trail 效果。
我们可以使用 line 来代替 plane 创建 trail,但使用 plane 可以创造出更有趣的效果(例如在模拟风的时候效果更好)。
drei 中的 Trail 组件使用的是 line,我们不想重复编写相同的东西。
操控顶点
我们将更新平面的顶点位置,以便让它随时间跟随目标。
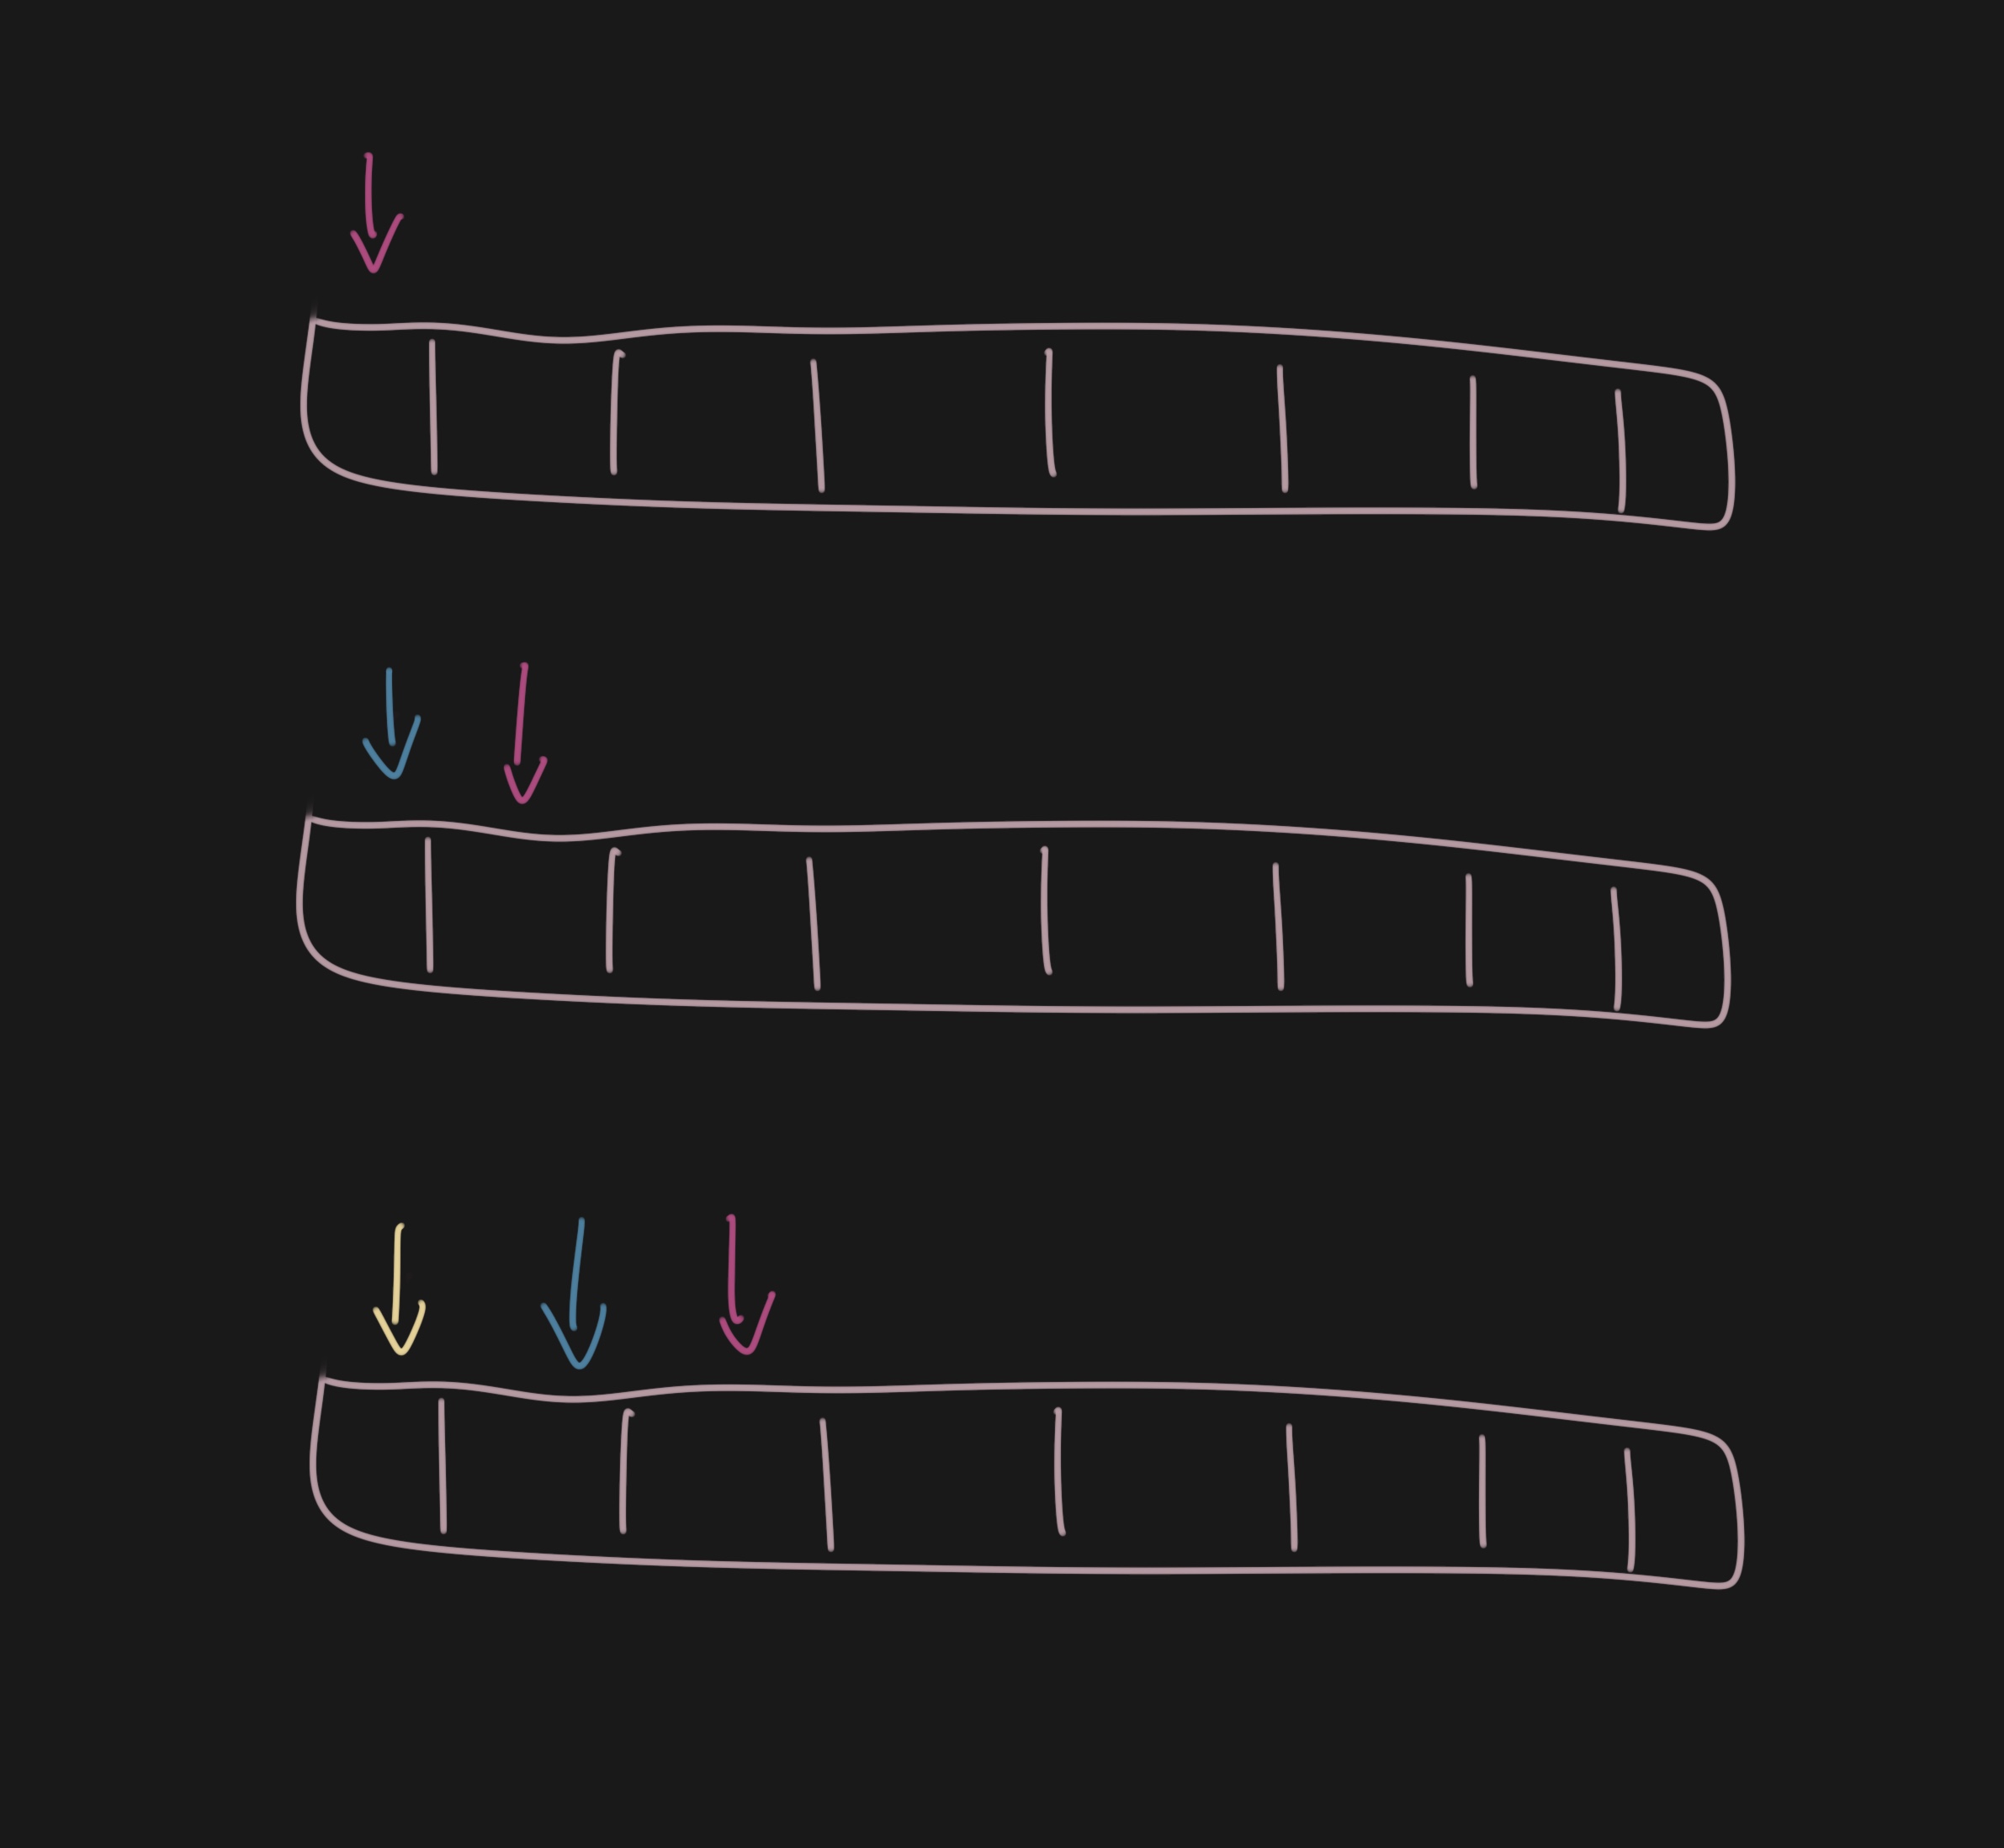
首先,我们需要在数组中存储目标的所有位置。我们将使用一个 ref 来存储这些位置。
// ... import * as THREE from "three"; export function SimpleTrail( { // ... } ) { const mesh = useRef(); const positions = useRef( new Array(numPoints).fill(new THREE.Vector3(0, 0, 0)) ); // ... }
这个数组的长度总是保持为 numPoints,用于存储目标的位置。
当目标移动时,我们会将新的位置添加到数组的前面,并将其他位置向后推。
为了实现这个功能,我们将使用 useFrame 钩子来更新顶点的位置。
// ... import { useFrame } from "@react-three/fiber"; export function SimpleTrail( { // ... } ) { // ... useFrame(() => { if (!mesh.current || !target?.current) { return; } const curPoint = target.current.position; const lastPoint = positions.current[0]; const distanceToLastPoint = lastPoint.distanceTo(target.current.position); if (distanceToLastPoint > minDistance) { positions.current.unshift(curPoint.clone()); positions.current.pop(); } }); // ... }
首先,我们计算最后一个点和当前点之间的距离。如果距离大于 minDistance,我们就使用 unshift 将当前点添加到数组前面,并使用 pop 移除最后一个点。
现在我们需要更新平面的顶点位置以跟随目标的位置。
React Three Fiber: The Ultimate Guide to 3D Web Development
✨ You have reached the end of the preview ✨
Go to the next level with Three.js and React Three Fiber!
Get full access to this lesson and the complete course when you enroll:
- 🔓 Full lesson videos with no limits
- 💻 Access to the final source code
- 🎓 Course progress tracking & completion
- 💬 Invite to our private Discord community
One-time payment. Lifetime updates included.