Fuegos Artificiales
¡Bienvenido a Sky Adventure, una compañía futurista que ofrece los mejores fuegos artificiales de la galaxia! 🎇
Vamos a crear un sitio web 3D para mostrar nuestros fuegos artificiales usando Three.js, React Three Fiber y nuestro motor VFX.
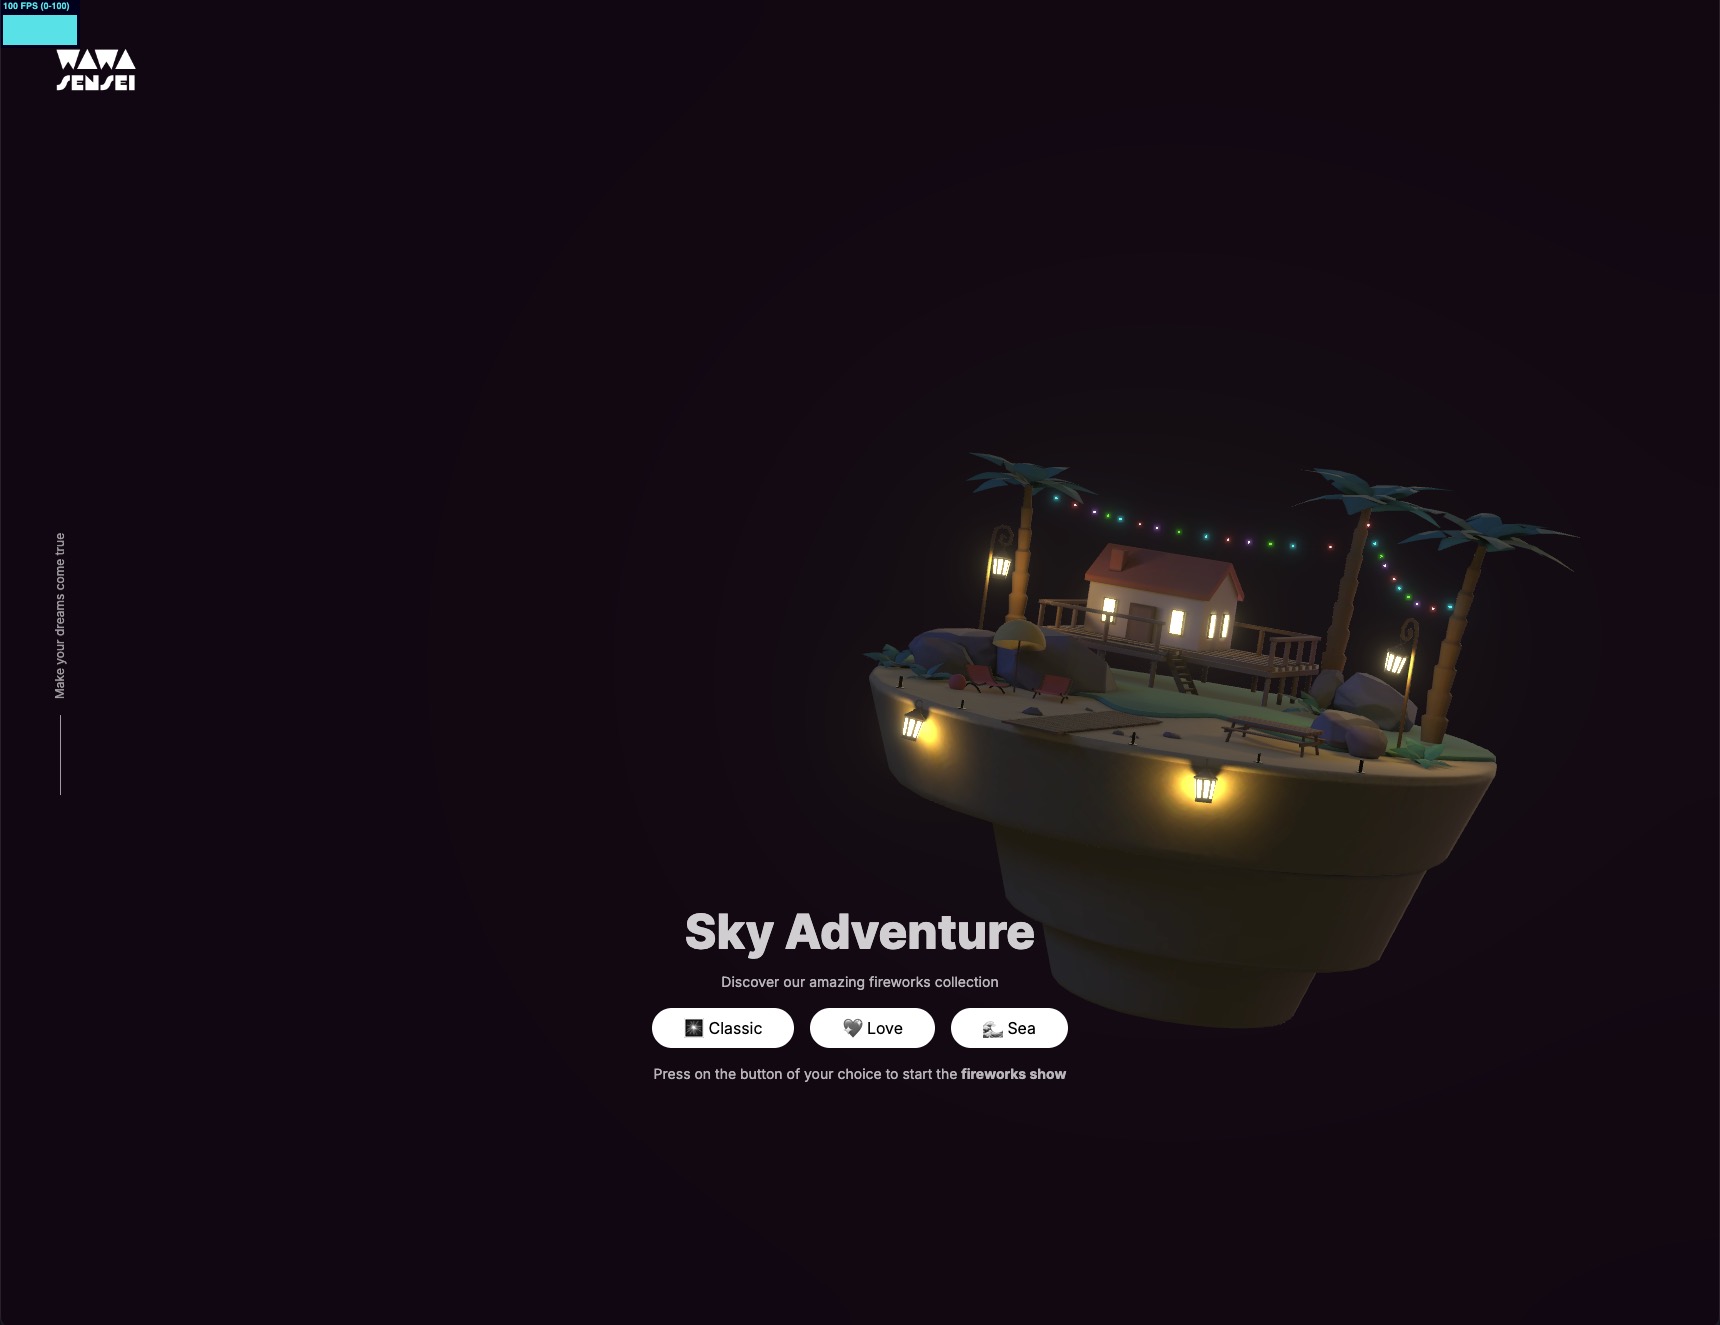
¡Esto es lo que vamos a construir juntos!
Proyecto Inicial
Nuestro proyecto inicial ya incluye lo siguiente:
- Una configuración básica de React Three Fiber con una encantadora isla flotante desde donde lanzaremos nuestros fuegos artificiales.
- Efectos de postprocesado para hacer que las luces del modelo (y más tarde los fuegos artificiales) brillen.
- Una interfaz simple hecha con Tailwind CSS con tres botones para lanzar los fuegos artificiales más tarde.

Esto es lo que obtenemos al ejecutar el proyecto inicial.
Fuegos Artificiales
Para crear los fuegos artificiales, utilizaremos el motor VFX que construimos en la lección anterior. Este motor nos permite crear y gestionar múltiples sistemas de partículas con diferentes comportamientos.
useFireworks
Para gestionar eficientemente los fuegos artificiales, crearemos un hook personalizado llamado useFireworks. Este hook se encargará de la creación y gestión de los fuegos artificiales.
Agreguemos la biblioteca zustand a nuestro proyecto:
yarn add zustand
Ahora, en una carpeta llamada hooks, crea un nuevo archivo denominado useFireworks.js:
import { create } from "zustand"; const useFireworks = create((set, get) => { return { fireworks: [], }; }); export { useFireworks };
Una tienda simple con un array vacío de fuegos artificiales.
Agreguemos un método para crear un fuego artificial:
// ... import { randFloat, randInt } from "three/src/math/MathUtils.js"; const useFireworks = create((set) => { return { fireworks: [], addFirework: () => { set((state) => { return { fireworks: [ ...state.fireworks, { id: `${Date.now()}-${randInt(0, 100)}-${state.fireworks.length}`, position: [0, 0, 0], velocity: [randFloat(-8, 8), randFloat(5, 10), randFloat(-8, 8)], delay: randFloat(0.8, 2), color: ["skyblue", "pink"], }, ], }; }); }, }; }); // ...
addFirework añadirá un nuevo fuego artificial a la tienda con:
id: un identificador único para usar como clave en el componente de React.position: dónde empezará el fuego artificial.velocity: la dirección y velocidad del fuego artificial antes de explotar.delay: el tiempo antes de que el fuego artificial explote.color: un array de colores para usar en las partículas de explosión del fuego artificial.
Ahora podemos conectar este hook a nuestra UI para lanzar fuegos artificiales.
Abre UI.jsx y conectemos el método addFirework a los botones:
import { useFireworks } from "../hooks/useFireworks"; export const UI = () => { const addFirework = useFireworks((state) => state.addFirework); return ( <section className="fixed inset-0 z-10 flex items-center justify-center"> {/* ... */} <div // ... > {/* ... */} <div className="flex gap-4"> <button // .. onClick={addFirework} > 🎆 Classic </button> <button // .. onClick={addFirework} > 💖 Love </button> <button // .. onClick={addFirework} > 🌊 Sea </button> </div> {/* ... */} </div> </section> ); };
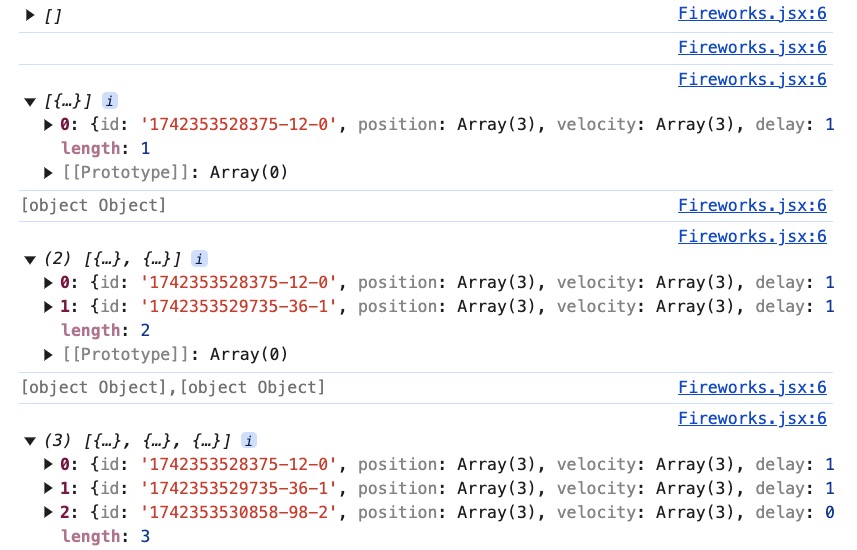
Para comprobar si funciona, creemos un componente Fireworks.jsx. Simplemente registraremos los fuegos artificiales en la consola por ahora:
import { useFireworks } from "../hooks/useFireworks"; export const Fireworks = () => { const fireworks = useFireworks((state) => state.fireworks); console.log(fireworks); };
Y añadámoslo al componente Experience:
// ... import { Fireworks } from "./Fireworks"; export const Experience = () => { // ... return ( <> {/* ... */} <Float speed={0.6} rotationIntensity={2} position-x={4} floatIntensity={2} > <Fireworks /> <Gltf src="/models/SkyIsland.glb" /> </Float> {/* ... */} </> ); };
Importamos el componente Fireworks y lo añadimos junto al SkyIsland en nuestro componente <Float />.

Al presionar los botones, podemos ver en la consola que los fuegos artificiales se añaden correctamente a la tienda.
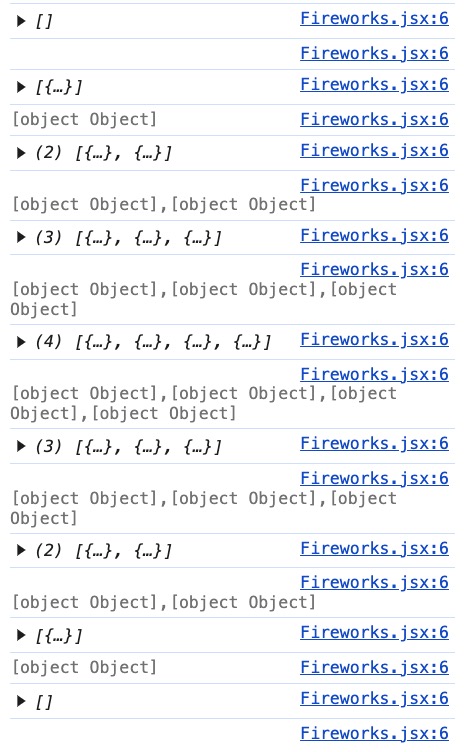
Antes de representarlos en la escena, necesitamos manejar el ciclo de vida de los fuegos artificiales. Actualmente, se añaden pero nunca se eliminan.
En el addFirework en nuestro hook useFireworks, podemos añadir un setTimeout para eliminar el fuego artificial después de cierto tiempo.
Primero, necesitamos saber cuándo se genera el fuego artificial. Podemos agregar una propiedad time al objeto del fuego artificial:
{ id: `${Date.now()}-${randInt(0, 100)}-${state.fireworks.length}`, // ... time: Date.now(), },
Luego, llamamos a setTimeout para eliminar los fuegos artificiales que han explotado y se han desvanecido:
addFirework: () => { set((state) => { // ... }); setTimeout(() => { set((state) => ({ fireworks: state.fireworks.filter( (firework) => Date.now() - firework.time < 4000 // Max delay of 2 seconds + Max lifetime of particles of 2 seconds ), })); }, 4000); },
Filtramos los fuegos artificiales que se añadieron hace más de 4 segundos. De esta forma, conservamos los fuegos artificiales que aún están activos.
Ajusta el tiempo según la configuración final que utilizarás para los fuegos artificiales.

Al presionar los botones, podemos ver en la consola que los fuegos artificiales se eliminan correctamente después de cierto tiempo.
¡Ahora podemos sumergirnos en la parte que has estado esperando: crear los fuegos artificiales en la escena!
Motor de VFX (Wawa VFX)
Para no copiar/pegar el componente de la lección anterior, publiqué el motor VFX como un paquete en npm: Wawa VFX. Puedes instalarlo ejecutando:
yarn add wawa-vfx@^1.0.0
Al usar
@^1.0.0, nos aseguramos de que siempre usaremos la versión principal 1 del paquete, pero incluyendo las últimas versiones menores y de parches. De esta manera, podemos beneficiarnos de las últimas características y correcciones de errores sin cambios disruptivos.
¡Ahora podemos usar los componentes <VFXParticles /> y <VFXEmitter /> en nuestro proyecto!
En la experiencia, vamos a añadir el componente VFXParticles a la escena:
// ... import { VFXParticles } from "wawa-vfx"; export const Experience = () => { const controls = useRef(); return ( <> {/* ... */} <VFXParticles name="firework-particles" settings={{ nbParticles: 100000, gravity: [0, -9.8, 0], renderMode: "billboard", intensity: 3, }} /> <EffectComposer> <Bloom intensity={1.2} luminanceThreshold={1} mipmapBlur /> </EffectComposer> </> ); };
Añadimos el componente VFXParticles con las siguientes configuraciones:
100000partículas. Como cuando alcanzamos el límite, las partículas más antiguas serán eliminadas, debería ser más que suficiente para varios fuegos artificiales al mismo tiempo.gravitypara simular la gravedad en las partículas.-9.8es la gravedad en la Tierra. (¡Pero espera, estamos en el espacio! 👀)renderModeenbillboardpara que siempre apunte a la cámara.intensitya3para hacer que las partículas brillen en el cielo nocturno.
Dónde coloques el componente
<VFXParticles />no es muy importante. Solo asegúrate de que esté en el nivel superior de la escena.
Y vamos a añadir un componente VFXEmitter junto a VFXParticles para dar forma a la explosión en modo debug y tener acceso a los controles visuales:
// ... import { VFXEmitter, VFXParticles } from "wawa-vfx"; export const Experience = () => { const controls = useRef(); return ( <> {/* ... */} <VFXParticles name="firework-particles" settings={{ nbParticles: 100000, gravity: [0, -9.8, 0], renderMode: "billboard", intensity: 3, }} /> <VFXEmitter emitter="firework-particles" debug /> {/* ... */} </> ); };
Asegúrate de establecer la propiedad emitter con el mismo name que el componente VFXParticles y de establecer debug en true para ver los controles.
Prepara una primera versión de la explosión de fuegos artificiales. 💥
Una vez que estés satisfecho con las configuraciones, puedes eliminar la propiedad debug del componente VFXEmitter, presionar el botón de exportar y pegar las configuraciones en el componente VFXEmitter.
<VFXEmitter emitter="firework-particles" settings={{ nbParticles: 5000, delay: 0, spawnMode: "burst", colorStart: ["skyblue", "pink"], particlesLifetime: [0.1, 2], size: [0.01, 0.4], startPositionMin: [-0.1, -0.1, -0.1], startPositionMax: [0.1, 0.1, 0.1], directionMin: [-1, -1, -1], directionMax: [1, 1, 1], startRotationMin: [degToRad(-90), 0, 0], startRotationMax: [degToRad(90), 0, 0], rotationSpeedMin: [0, 0, 0], rotationSpeedMax: [3, 3, 3], speed: [1, 12], }} />
¡Tenemos todo listo para conectar los fuegos artificiales al motor de VFX!
Explosión de fuegos artificiales
Dentro del archivo Fireworks.jsx, vamos a crear un componente Firework que representará un fuego artificial:
// ... import { useRef } from "react"; import { VFXEmitter } from "wawa-vfx"; export const Fireworks = () => { // ... }; const Firework = ({ velocity, delay, position, color }) => { const ref = useRef(); return ( <> <group ref={ref} position={position}> <VFXEmitter emitter="firework-particles" settings={{ nbParticles: 5000, delay: 0, spawnMode: "burst", colorStart: ["skyblue", "pink"], particlesLifetime: [0.1, 2], size: [0.01, 0.4], startPositionMin: [-0.1, -0.1, -0.1], startPositionMax: [0.1, 0.1, 0.1], directionMin: [-1, -1, -1], directionMax: [1, 1, 1], startRotationMin: [degToRad(-90), 0, 0], startRotationMax: [degToRad(90), 0, 0], rotationSpeedMin: [0, 0, 0], rotationSpeedMax: [3, 3, 3], speed: [1, 12], }} /> </group> </> ); };
Simplemente corta/pega el VFXEmitter del componente Experience al componente Firework.
Lo envolvemos en un <group /> para poder mover el fuego artificial en la escena basándonos en la position y velocity.
React Three Fiber: The Ultimate Guide to 3D Web Development
✨ You have reached the end of the preview ✨
Go to the next level with Three.js and React Three Fiber!
Get full access to this lesson and the complete course when you enroll:
- 🔓 Full lesson videos with no limits
- 💻 Access to the final source code
- 🎓 Course progress tracking & completion
- 💬 Invite to our private Discord community
One-time payment. Lifetime updates included.