Trails
Plongeons dans le monde des trails ! Les trails sont un excellent moyen d'ajouter une sensation de mouvement à votre scène. Ils peuvent être utilisés pour créer une variété d'effets, tels que des trails lumineux, des trails de fumée ou même le trail d'un objet en mouvement.
Voici le projet final que nous allons construire ensemble :
Nous allons commencer par créer un simple effet de trail en utilisant un curseur personnalisé. Ensuite, nous explorerons le composant Trail de drei pour réaliser les comètes que vous avez vues dans l'aperçu.
Projet de départ
Le projet de départ contient de nombreux éléments que nous avons déjà abordés dans les leçons précédentes :
- Le composant ScrollControls pour gérer le défilement ainsi que le mouvement et les animations associés de la caméra. Si vous avez besoin d'un rappel, vous pouvez consulter la leçon dédiée au défilement.
- Des effets de postprocessing comme Bloom et Vignette, avec un ajout agréable de l'effet GodRays. Consultez la leçon sur le postprocessing si vous avez besoin d'un rappel.
- Le
<StarrySky />que nous avons créé dans la leçon Particles avec des paramètres ajustés.
De plus, j'ai utilisé Tailwind CSS pour concevoir rapidement l'interface utilisateur. Si vous n'êtes pas familier avec Tailwind CSS, vous pouvez passer la partie interface utilisateur et vous concentrer sur la partie Threejs.
Les modèles WawaCoin et WawaCard sont réalisés en interne et sont disponibles dans le projet de départ. J'ai utilisé le MeshTransmissionMaterial de drei pour créer ce look futuriste.
N'hésitez pas à transformer la scène selon vos envies. Vous pouvez librement réutiliser toute partie du projet dans vos propres projets.
J'ai oublié de le mentionner, mais le contenu du site web est purement fictif. Je ne lance pas de nouvelle cryptomonnaie. (Pas encore ? 👀)
Curseur de traînée personnalisé
Commençons par créer un simple effet de traînée suivant le curseur.
Créez un nouveau fichier components/Cursor.jsx et ajoutez le code suivant :
import { useFrame } from "@react-three/fiber"; import { useControls } from "leva"; import { useRef } from "react"; export const Cursor = () => { const { color, intensity, opacity, size } = useControls("Cursor", { size: { value: 0.2, min: 0.1, max: 3, step: 0.01 }, color: "#dfbcff", intensity: { value: 4.6, min: 1, max: 10, step: 0.1 }, opacity: { value: 0.5, min: 0, max: 1, step: 0.01 }, }); const target = useRef(); useFrame(({ clock }) => { if (target.current) { const elapsed = clock.getElapsedTime(); target.current.position.x = Math.sin(elapsed) * 5; target.current.position.y = Math.cos(elapsed * 2) * 4; target.current.position.z = Math.sin(elapsed * 4) * 10; } }); return ( <> <group ref={target}> <mesh> <sphereGeometry args={[size / 2, 32, 32]} /> <meshStandardMaterial color={color} transparent opacity={opacity} emissive={color} emissiveIntensity={intensity} /> </mesh> </group> </> ); };
C'est une simple sphère qui suit une onde sinusoïdale. Vous pouvez ajuster la taille, la couleur, l'intensité et l'opacité du curseur à l'aide des contrôles Leva.
Pour l'instant, nous utilisons un mouvement fixe, cela simplifiera la visualisation de la traînée. Nous le remplacerons par la position de la souris plus tard.
Ajoutez le composant Cursor au composant Experience :
// ... import { Cursor } from "./Cursor"; export const Experience = () => { // ... return ( <> <Cursor /> {/* ... */} </> ); }; // ...
Nous pouvons voir une sphère en mouvement, ce sera la cible de notre traînée.
Composant SimpleTrail
Le groupe est la cible que notre traînée suivra. Nous allons créer un nouveau composant components/SimpleTrail.jsx pour créer l'effet de traînée :
import { useRef } from "react"; import * as THREE from "three"; export function SimpleTrail({ target = null, color = "#ffffff", intensity = 6, numPoints = 20, height = 0.42, minDistance = 0.1, opacity = 0.5, duration = 20, }) { const mesh = useRef(); return ( <> <mesh ref={mesh}> <planeGeometry args={[1, 1, 1, numPoints - 1]} /> <meshBasicMaterial color={color} side={THREE.DoubleSide} transparent={true} opacity={opacity} depthWrite={false} /> </mesh> </> ); }
Les paramètres sont les suivants :
- target : le ref de la cible à suivre.
- color : la couleur de la traînée.
- intensity : l'intensité émissive de la traînée.
- numPoints : le nombre de positions que nous stockerons dans la traînée. (Plus le nombre est élevé, plus la traînée est longue).
- height : la hauteur de la traînée.
- minDistance : la distance minimale entre deux points.
- opacity : l'opacité de la traînée.
- duration : le temps avant que la traînée commence à s'estomper à partir de son extrémité.
Pas d'inquiétude si vous ne comprenez pas encore tous les paramètres. Nous les expliquerons lors de l'implémentation de la traînée.
Importez le composant SimpleTrail dans le composant Cursor :
// ... import { SimpleTrail } from "./SimpleTrail"; export const Cursor = () => { // ... return ( <> <group ref={target}>{/* ... */}</group> <SimpleTrail target={target} color={color} intensity={intensity} opacity={opacity} height={size} /> </> ); };
Le mesh est composé d'un <planeGeometry /> avec un nombre de segments égal à numPoints. Nous mettrons à jour la position de chaque segment pour suivre la cible.

Visuellement, comme notre plane a une taille de 1x1, nous pouvons voir un carré, mais grâce au nombre de segments, nous pourrons manipuler les vertices pour créer l'effet de traînée.
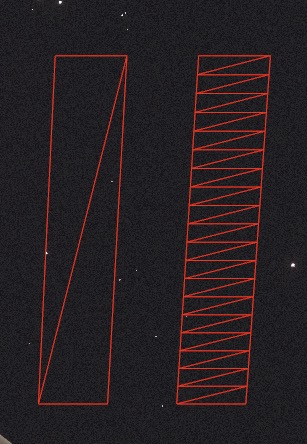
Comparons côte à côte un plane avec un segment et un plane avec 20 segments :
<group position-x={5}> <mesh position-x={4} scale-y={5}> <planeGeometry args={[1, 1, 1, numPoints - 1]} /> <meshBasicMaterial color={"red"} wireframe /> </mesh> <mesh position-x={2} scale-y={5}> <planeGeometry args={[1, 1, 1, 1]} /> <meshBasicMaterial color={"red"} wireframe /> </mesh> </group>
Ce code est uniquement à des fins de visualisation. Vous pouvez le retirer après avoir compris le concept.
Nous les avons mis à l'échelle sur l'axe y pour voir la différence dans le nombre de segments.

Vous pouvez voir que le plane de gauche n'a que 4 vertices alors que le plane de droite en a beaucoup plus. Nous manipulerons ces vertices pour créer l'effet de traînée.
Nous pourrions utiliser une line au lieu d'un plane pour créer la traînée, mais utiliser un plane nous permet de créer un effet intéressant (Mieux pour le vent par exemple).
Le composant Trail de drei utilise une line, nous ne voulons pas recoder la même chose.
Manipulation des sommets
Nous allons mettre à jour la position des sommets du plan pour suivre la cible au fil du temps.
Tout d'abord, nous devrons stocker toutes les positions de la cible dans un tableau. Nous utiliserons une ref pour stocker les positions.
// ... import * as THREE from "three"; export function SimpleTrail( { // ... } ) { const mesh = useRef(); const positions = useRef( new Array(numPoints).fill(new THREE.Vector3(0, 0, 0)) ); // ... }
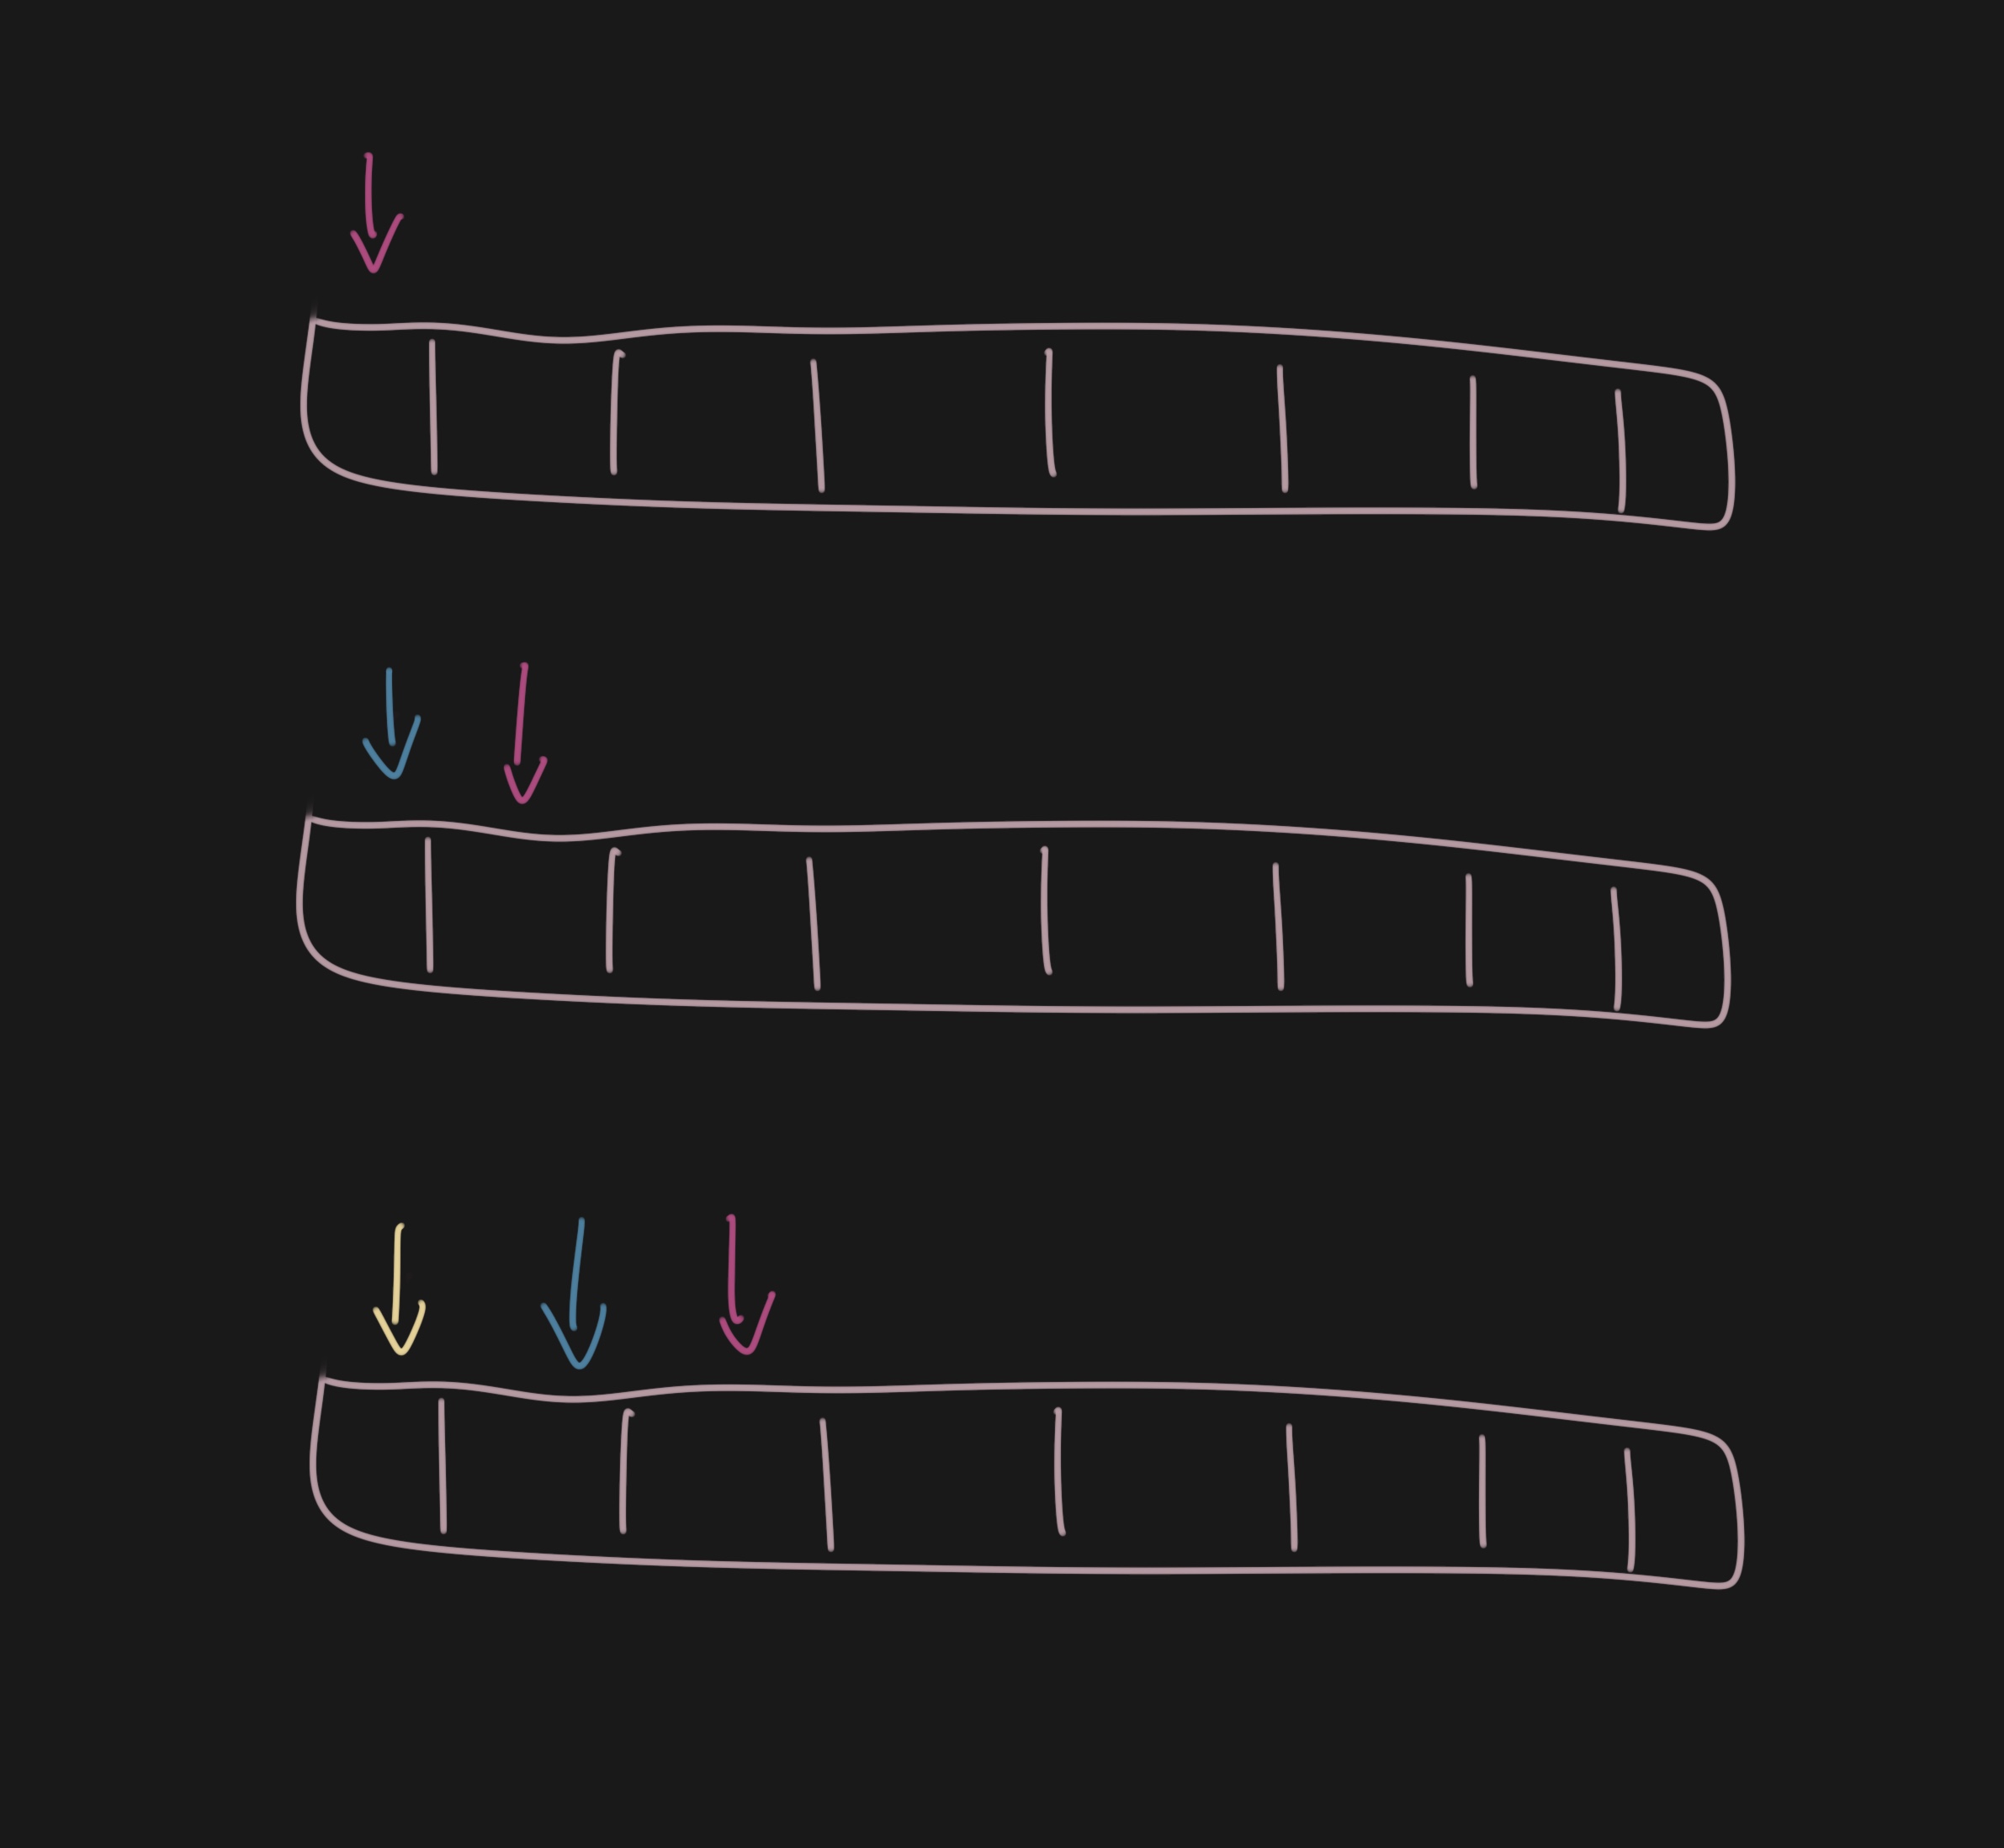
Ce tableau aura toujours une longueur de numPoints et stockera les positions de la cible.
Lorsque la cible se déplace, nous ajouterons la nouvelle position à l'avant du tableau, poussant les autres positions vers l'arrière.

Pour implémenter cela, nous utiliserons le hook useFrame pour mettre à jour la position des sommets.
// ... import { useFrame } from "@react-three/fiber"; export function SimpleTrail( { // ... } ) { // ... useFrame(() => { if (!mesh.current || !target?.current) { return; } const curPoint = target.current.position; const lastPoint = positions.current[0]; const distanceToLastPoint = lastPoint.distanceTo(target.current.position); if (distanceToLastPoint > minDistance) { positions.current.unshift(curPoint.clone()); positions.current.pop(); } }); // ... }
Tout d'abord, nous calculons la distance entre le dernier point et le point actuel. Si la distance est supérieure à minDistance, nous ajoutons le point actuel à l'avant du tableau avec unshift et supprimons le dernier point avec pop.
Maintenant, nous devons mettre à jour la position des sommets du plan pour suivre les positions de la cible.
React Three Fiber: The Ultimate Guide to 3D Web Development
✨ You have reached the end of the preview ✨
Go to the next level with Three.js and React Three Fiber!
Get full access to this lesson and the complete course when you enroll:
- 🔓 Full lesson videos with no limits
- 💻 Access to the final source code
- 🎓 Course progress tracking & completion
- 💬 Invite to our private Discord community
One-time payment. Lifetime updates included.