Particules
Les particules sont un excellent moyen d'ajouter de la vie à votre scène. Elles peuvent être utilisées de différentes manières, telles que la neige, la pluie, le feu, la fumée ou des effets magiques. Elles sont souvent utilisées pour créer des effets atmosphériques, tels que du brouillard, de la poussière ou des étincelles.
Dans cette leçon, nous allons explorer différentes manières de créer des particules en utilisant Threejs et React Three Fiber pour créer cette scène nocturne enneigée avec un ciel étoilé et un effet de chute de neige :
Voyez comment les flocons de neige tombent et les étoiles scintillent dans le ciel. ❄️✨
Étoiles
Notre code de départ contient cette "Low Poly Winter Scene" par EdwiixGG sur un cube et une source de lumière animée.
C'est joli, mais nous pouvons le rendre plus intéressant en ajoutant des étoiles dans le ciel.
Commençons par ajouter des étoiles dans le ciel. Le moyen le plus simple avec React Three Fiber est d'utiliser le composant Stars de la bibliothèque drei.
Dans components/Experience.jsx :
// ... import { Stars } from "@react-three/drei"; export const Experience = () => { // ... return ( <> <Stars /> {/* ... */} </> ); };
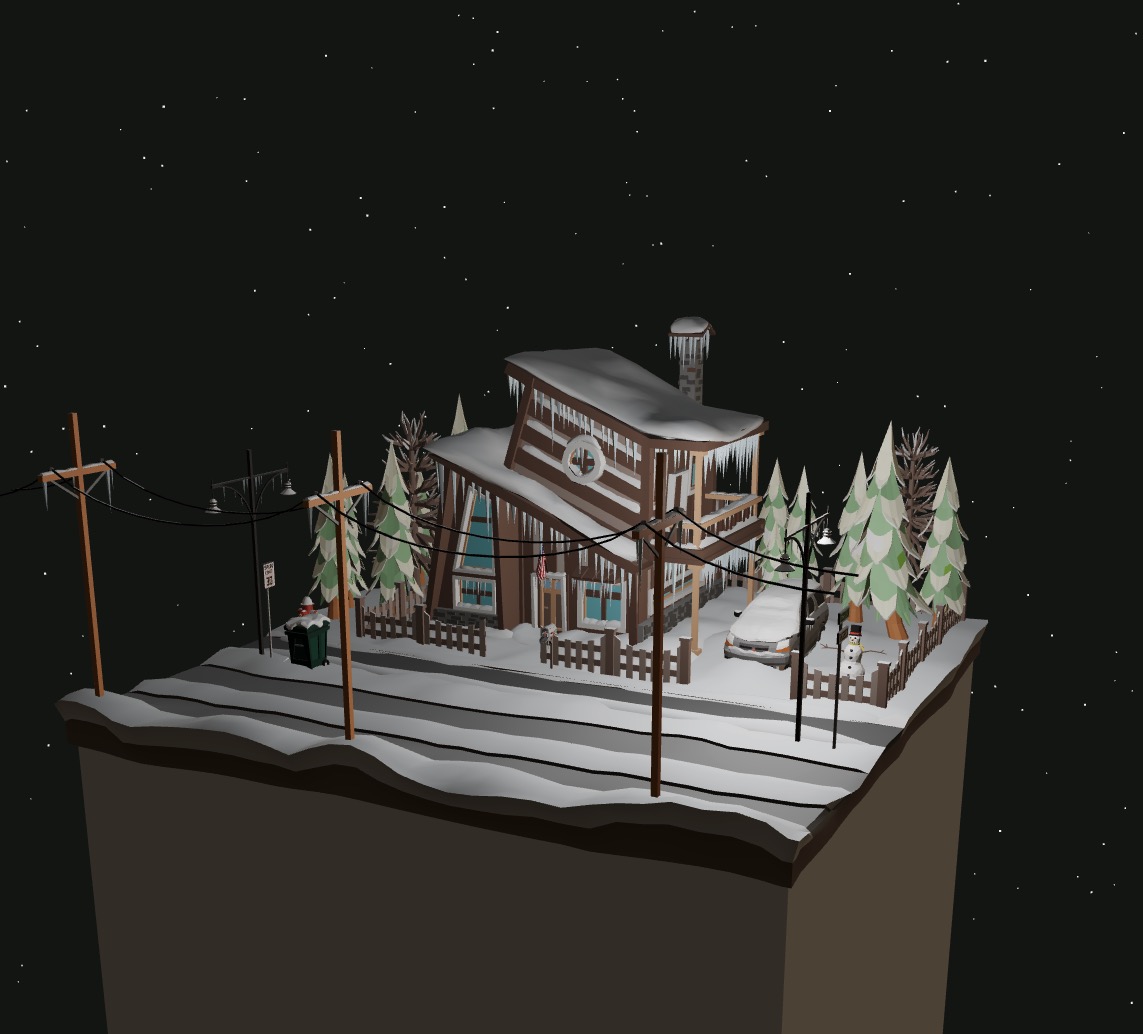
Et voilà, notre ciel est maintenant rempli de belles étoiles scintillantes !
Nous pouvons jouer avec ses paramètres tels que factor pour ajuster la taille en fonction de la distance ou speed pour ajuster le timing de l'effet de fade.
Reportez-vous à la documentation pour tous les paramètres disponibles.
Voyons comment il fonctionne sous le capot en parcourant le code source du composant Stars.
Nous pouvons voir que pour rendre les étoiles, ils utilisent des points remplis de trois attributs sur la géométrie :
position: pour déterminer la position de chaque étoilecolors: pour déterminer la couleur de chaque étoilesize: pour déterminer la taille de chaque étoile
Ensuite, un ShaderMaterial personnalisé nommé StarfieldMaterial est responsable de l'affichage correct des points en fonction de ces valeurs d'attributs et de l'uniforme de temps pour l'effet de fading.
Tout d'abord, cette approche est excellente, elle est légère et complètement traitée sur le GPU, ce qui signifie que vous pourriez potentiellement afficher un très grand nombre d'étoiles.
Mais visuellement, je vois deux choses qui pourraient être améliorées :
- Les étoiles sont représentées sous forme de carrés.
- L'effet de fading est synchronisé entre toutes les étoiles, entraînant un effet de clignotement.
Comme nous n'avons pas de contrôle sur ces aspects avec le composant Stars, créons notre propre système d'étoiles !
Étoiles Personnalisées
Pour avoir un contrôle plus facile sur les étoiles, nous gérerons leur logique du côté CPU en utilisant l'instanciation.
Ne vous inquiétez pas si ce n'est pas la façon la plus optimisée, pour un nombre raisonnable d'étoiles, ce sera correct et beaucoup plus flexible. Nous apprendrons comment gérer nos particules du côté GPU lorsque nous construirons notre simple moteur VFX et en apprenant TSL plus tard dans ce chapitre.
PS : L'instanciation reste un moyen efficace de rendre un grand nombre d'objets avec la même géométrie, comme vu dans la leçon d'optimisation.
Instances
Commençons par créer notre propre composant StarrySky dans un nouveau fichier components/StarrySky.jsx :
import { Instance, Instances } from "@react-three/drei"; import { useMemo, useRef } from "react"; import { randFloatSpread } from "three/src/math/MathUtils.js"; export const StarrySky = ({ nbParticles = 1000 }) => { const particles = useMemo( () => Array.from({ length: nbParticles }, (_, idx) => ({ position: [ randFloatSpread(20), randFloatSpread(20), randFloatSpread(20), ], })), [] ); return ( <Instances range={nbParticles} limit={nbParticles} frustumCulled={false}> <planeGeometry args={[1, 1]} /> <meshBasicMaterial /> {particles.map((props, i) => ( <Particle key={i} {...props} /> ))} </Instances> ); }; const Particle = ({ position }) => { const ref = useRef(); return <Instance ref={ref} position={position} />; };
Nous créons un InstancedMesh utilisant une plane geometry combinée à un mesh basic material.
Grâce au composant <Instance /> de Drei, nous sommes capables de créer des instances de ce mesh et de contrôler chaque particule (instance) individuellement.
Maintenant, remplaçons le composant Stars par notre composant personnalisé dans components/Experience.jsx :
// ... import { StarrySky } from "./StarrySky"; export const Experience = () => { // ... return ( <> <StarrySky /> {/* ... */} </> ); };
Nous avons maintenant ce ciel chaotique :
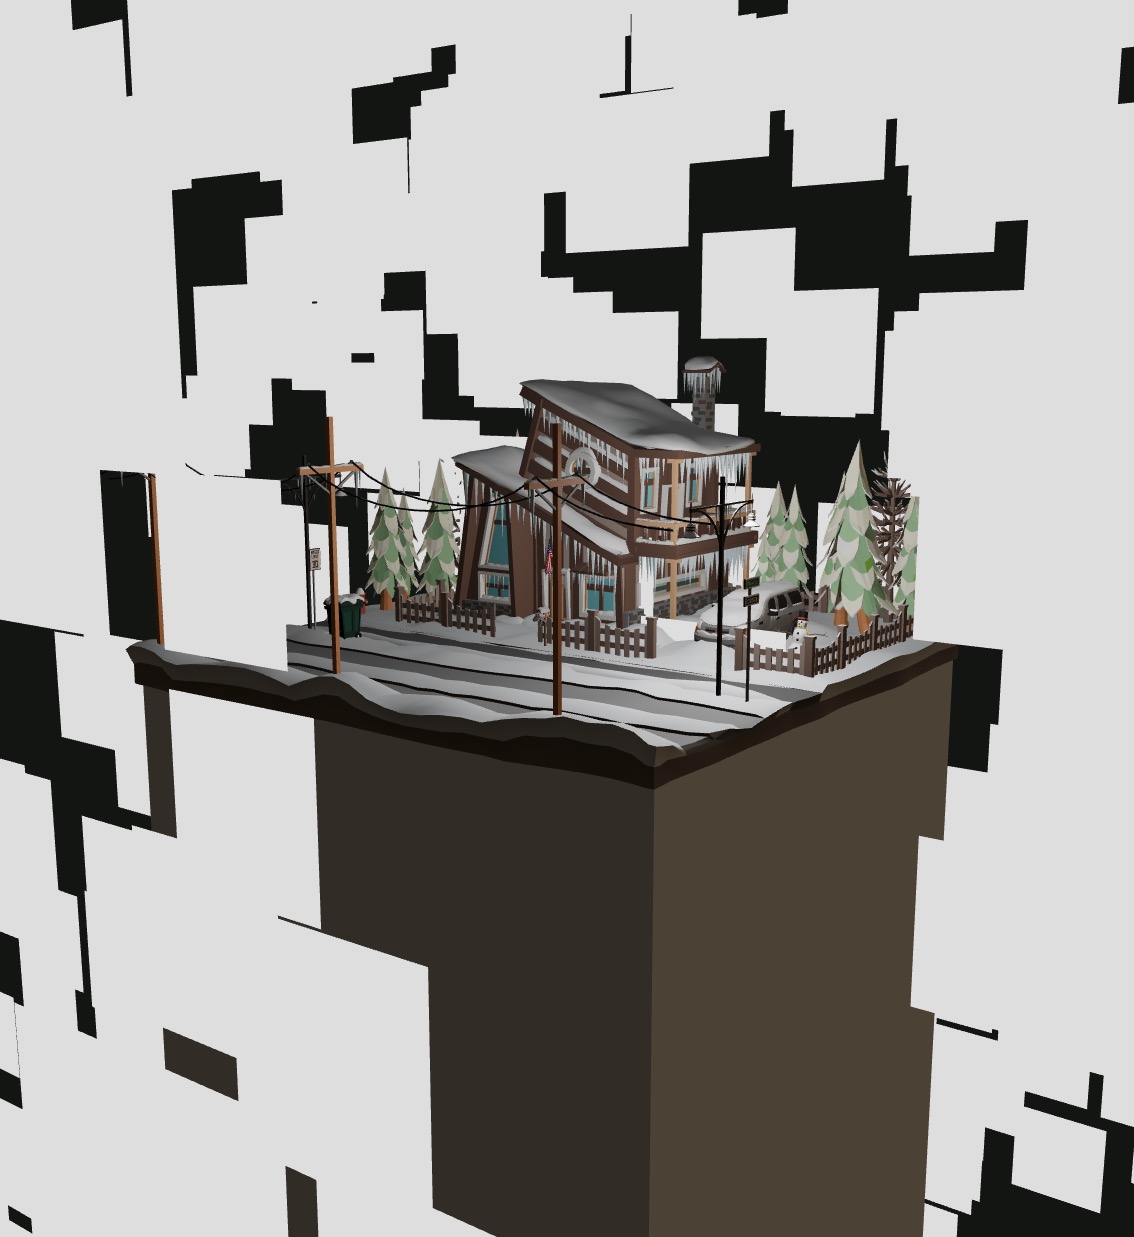
C'est un bon point de départ !
Ajustons la taille des étoiles. Dans le useMemo responsable de la définition des positions des particules, nous pouvons ajouter un attribut size :
import { randFloat, randFloatSpread } from "three/src/math/MathUtils.js"; // ... const particles = useMemo( () => Array.from({ length: nbParticles }, (_, idx) => ({ position: [randFloatSpread(20), randFloatSpread(20), randFloatSpread(20)], size: randFloat(0.1, 0.25), })), [] );
Et dans le composant Particle, nous pouvons passer cet attribut size au composant Instance :
const Particle = ({ position, size }) => { const ref = useRef(); return <Instance ref={ref} position={position} scale={size} />; };
Maintenant c'est mieux, nous avons des étoiles de tailles différentes :
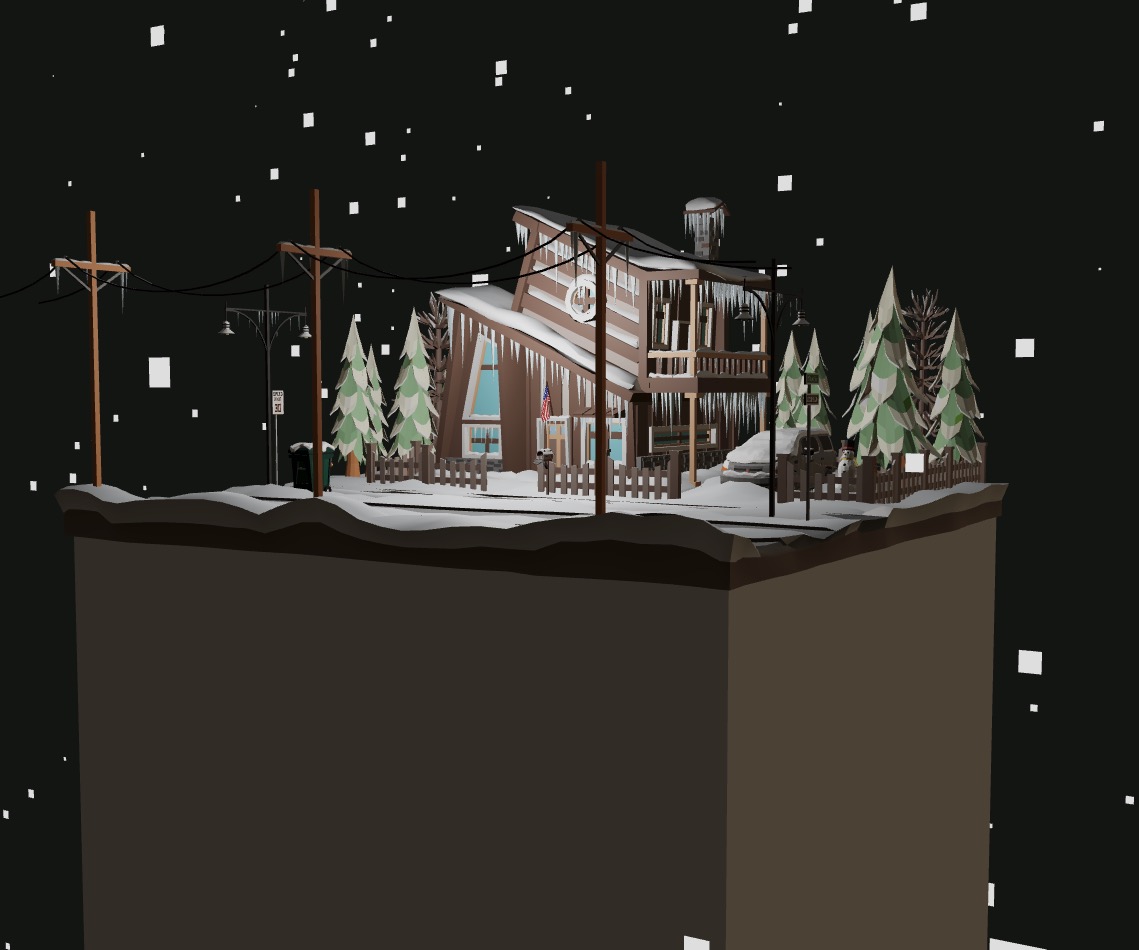
Mais nous avons un problème, les étoiles sont positionnées entre -20 et 20 en utilisant randFloatSpread(20) mais nous voulons que les étoiles soient positionnées loin dans le ciel.
Pour ce faire, gardons le z toujours à 0 et ajustons la position x pour être entre 5 et 15.
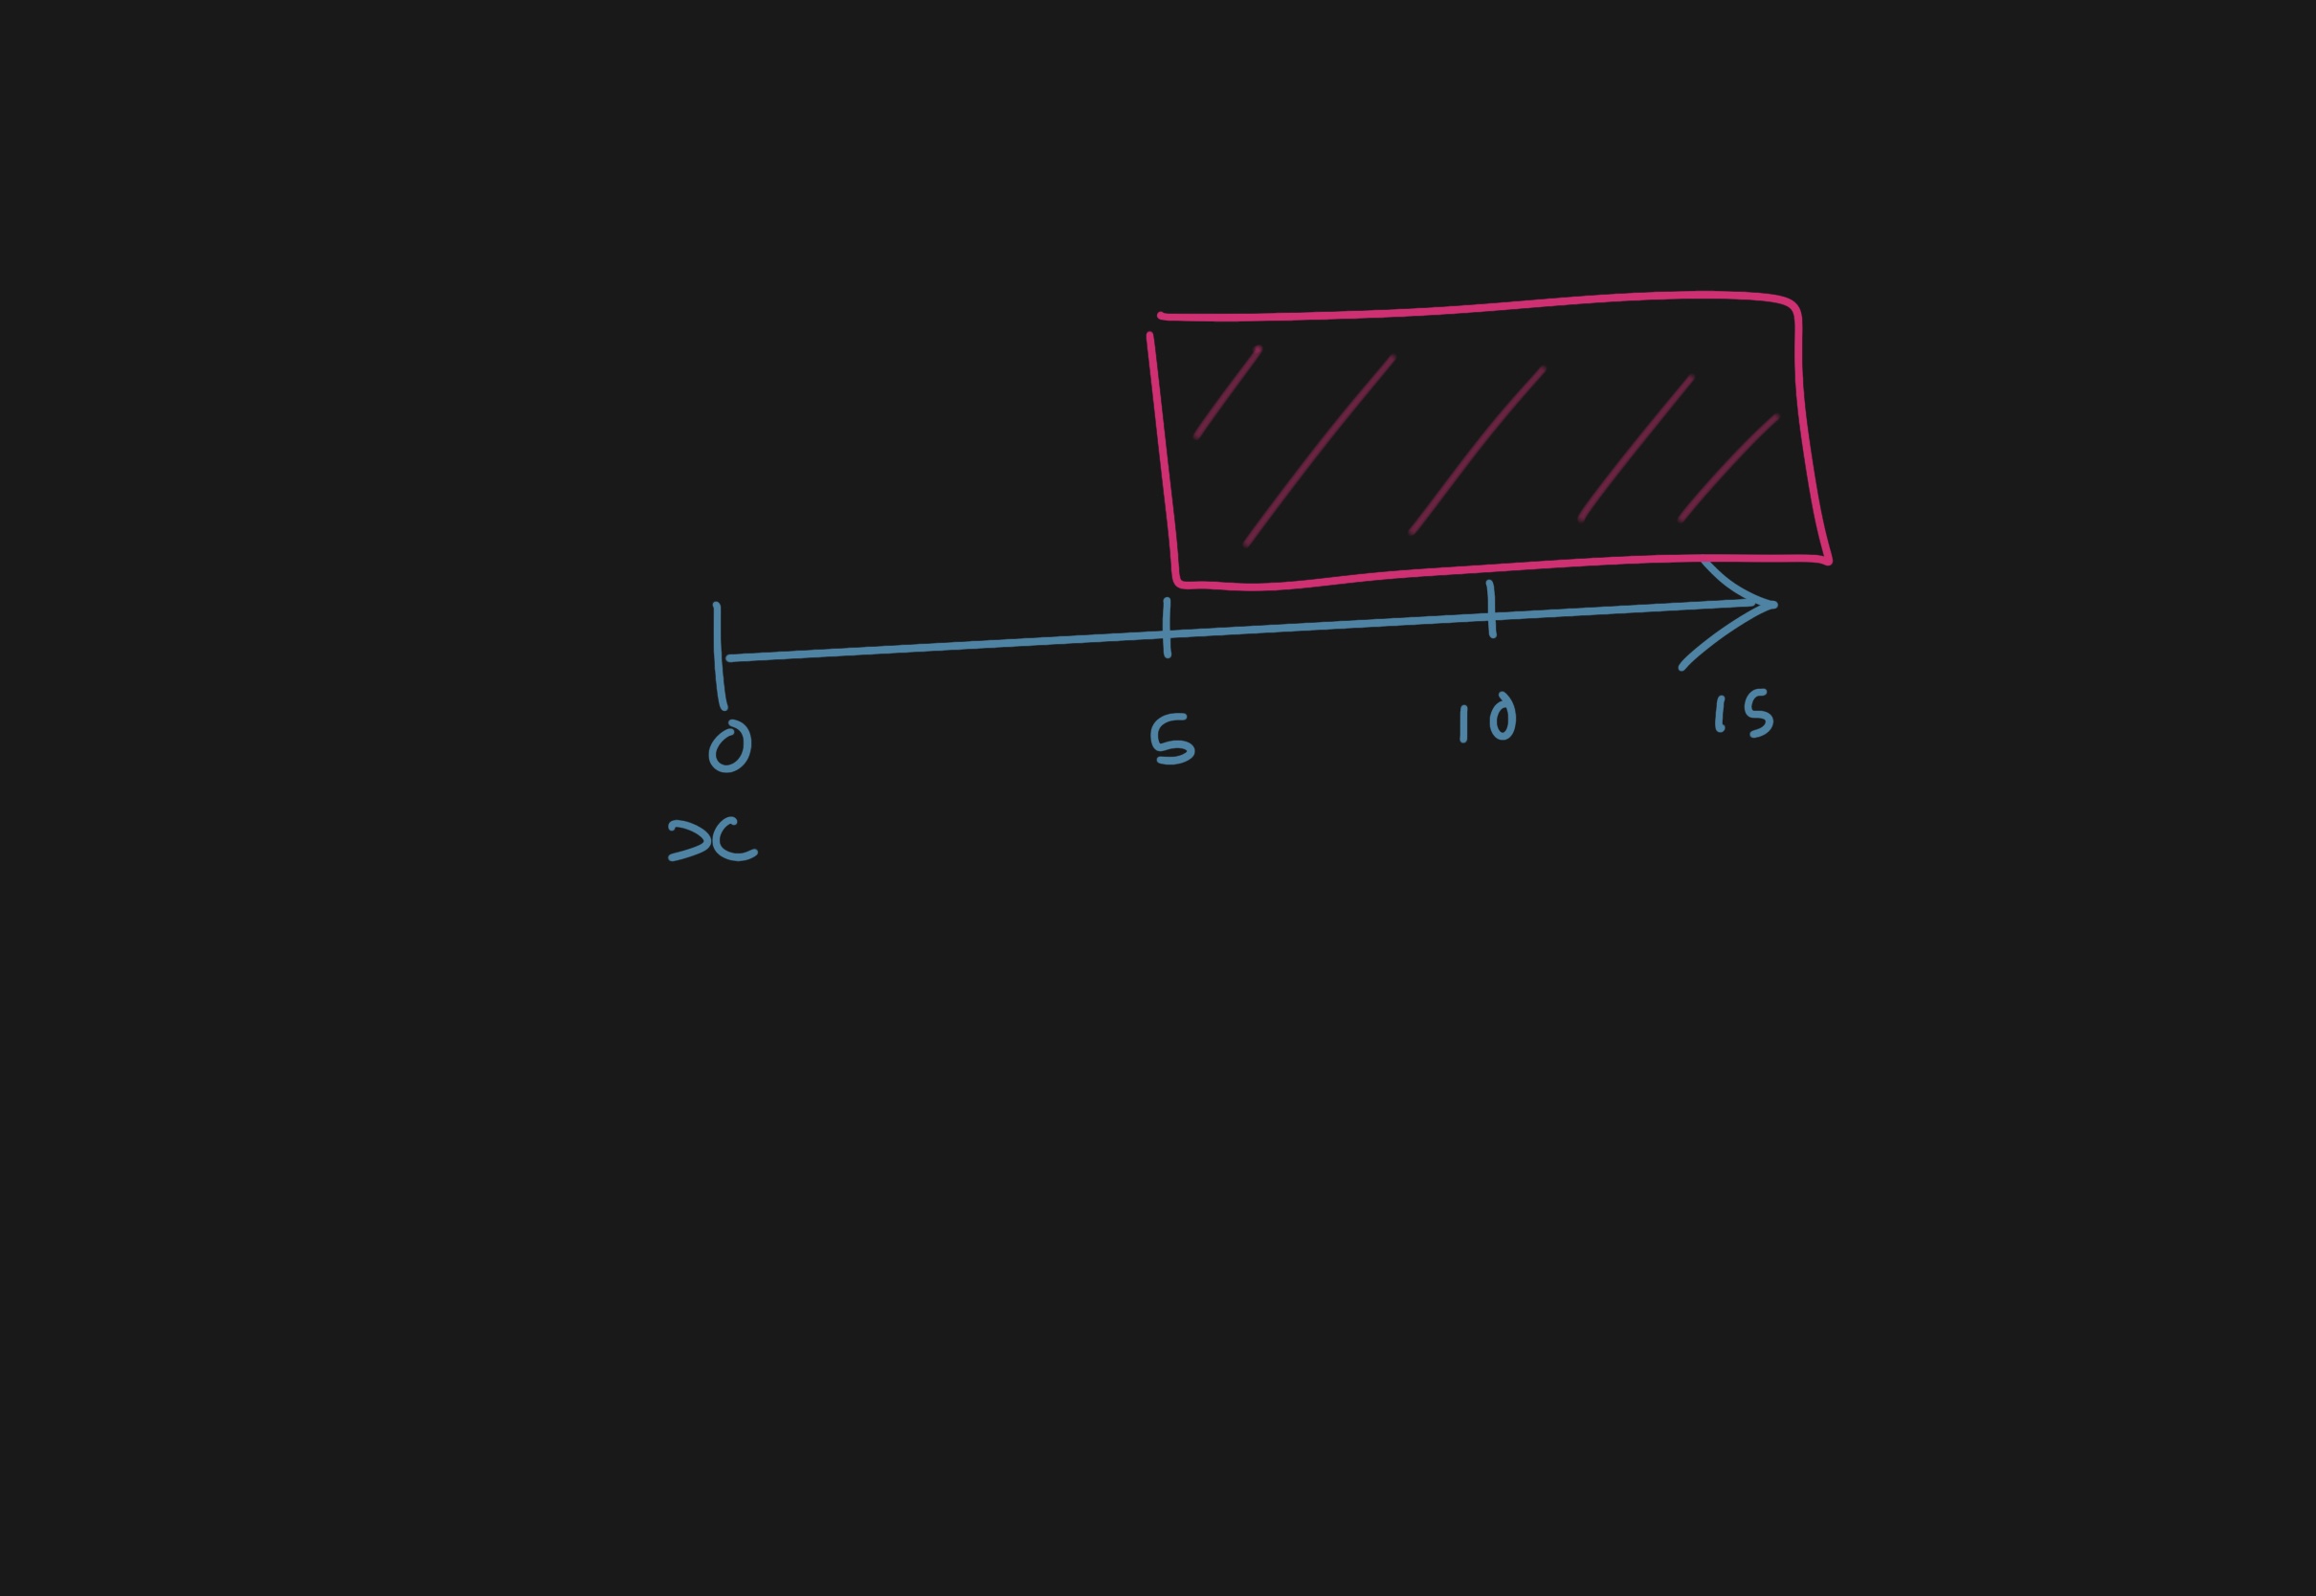
Nos étoiles seront positionnées aléatoirement entre 5 et 15 sur l'axe x.
Et pour être tout autour du centre, nous faisons pivoter la position y entre 0 et 2 * Math.PI.
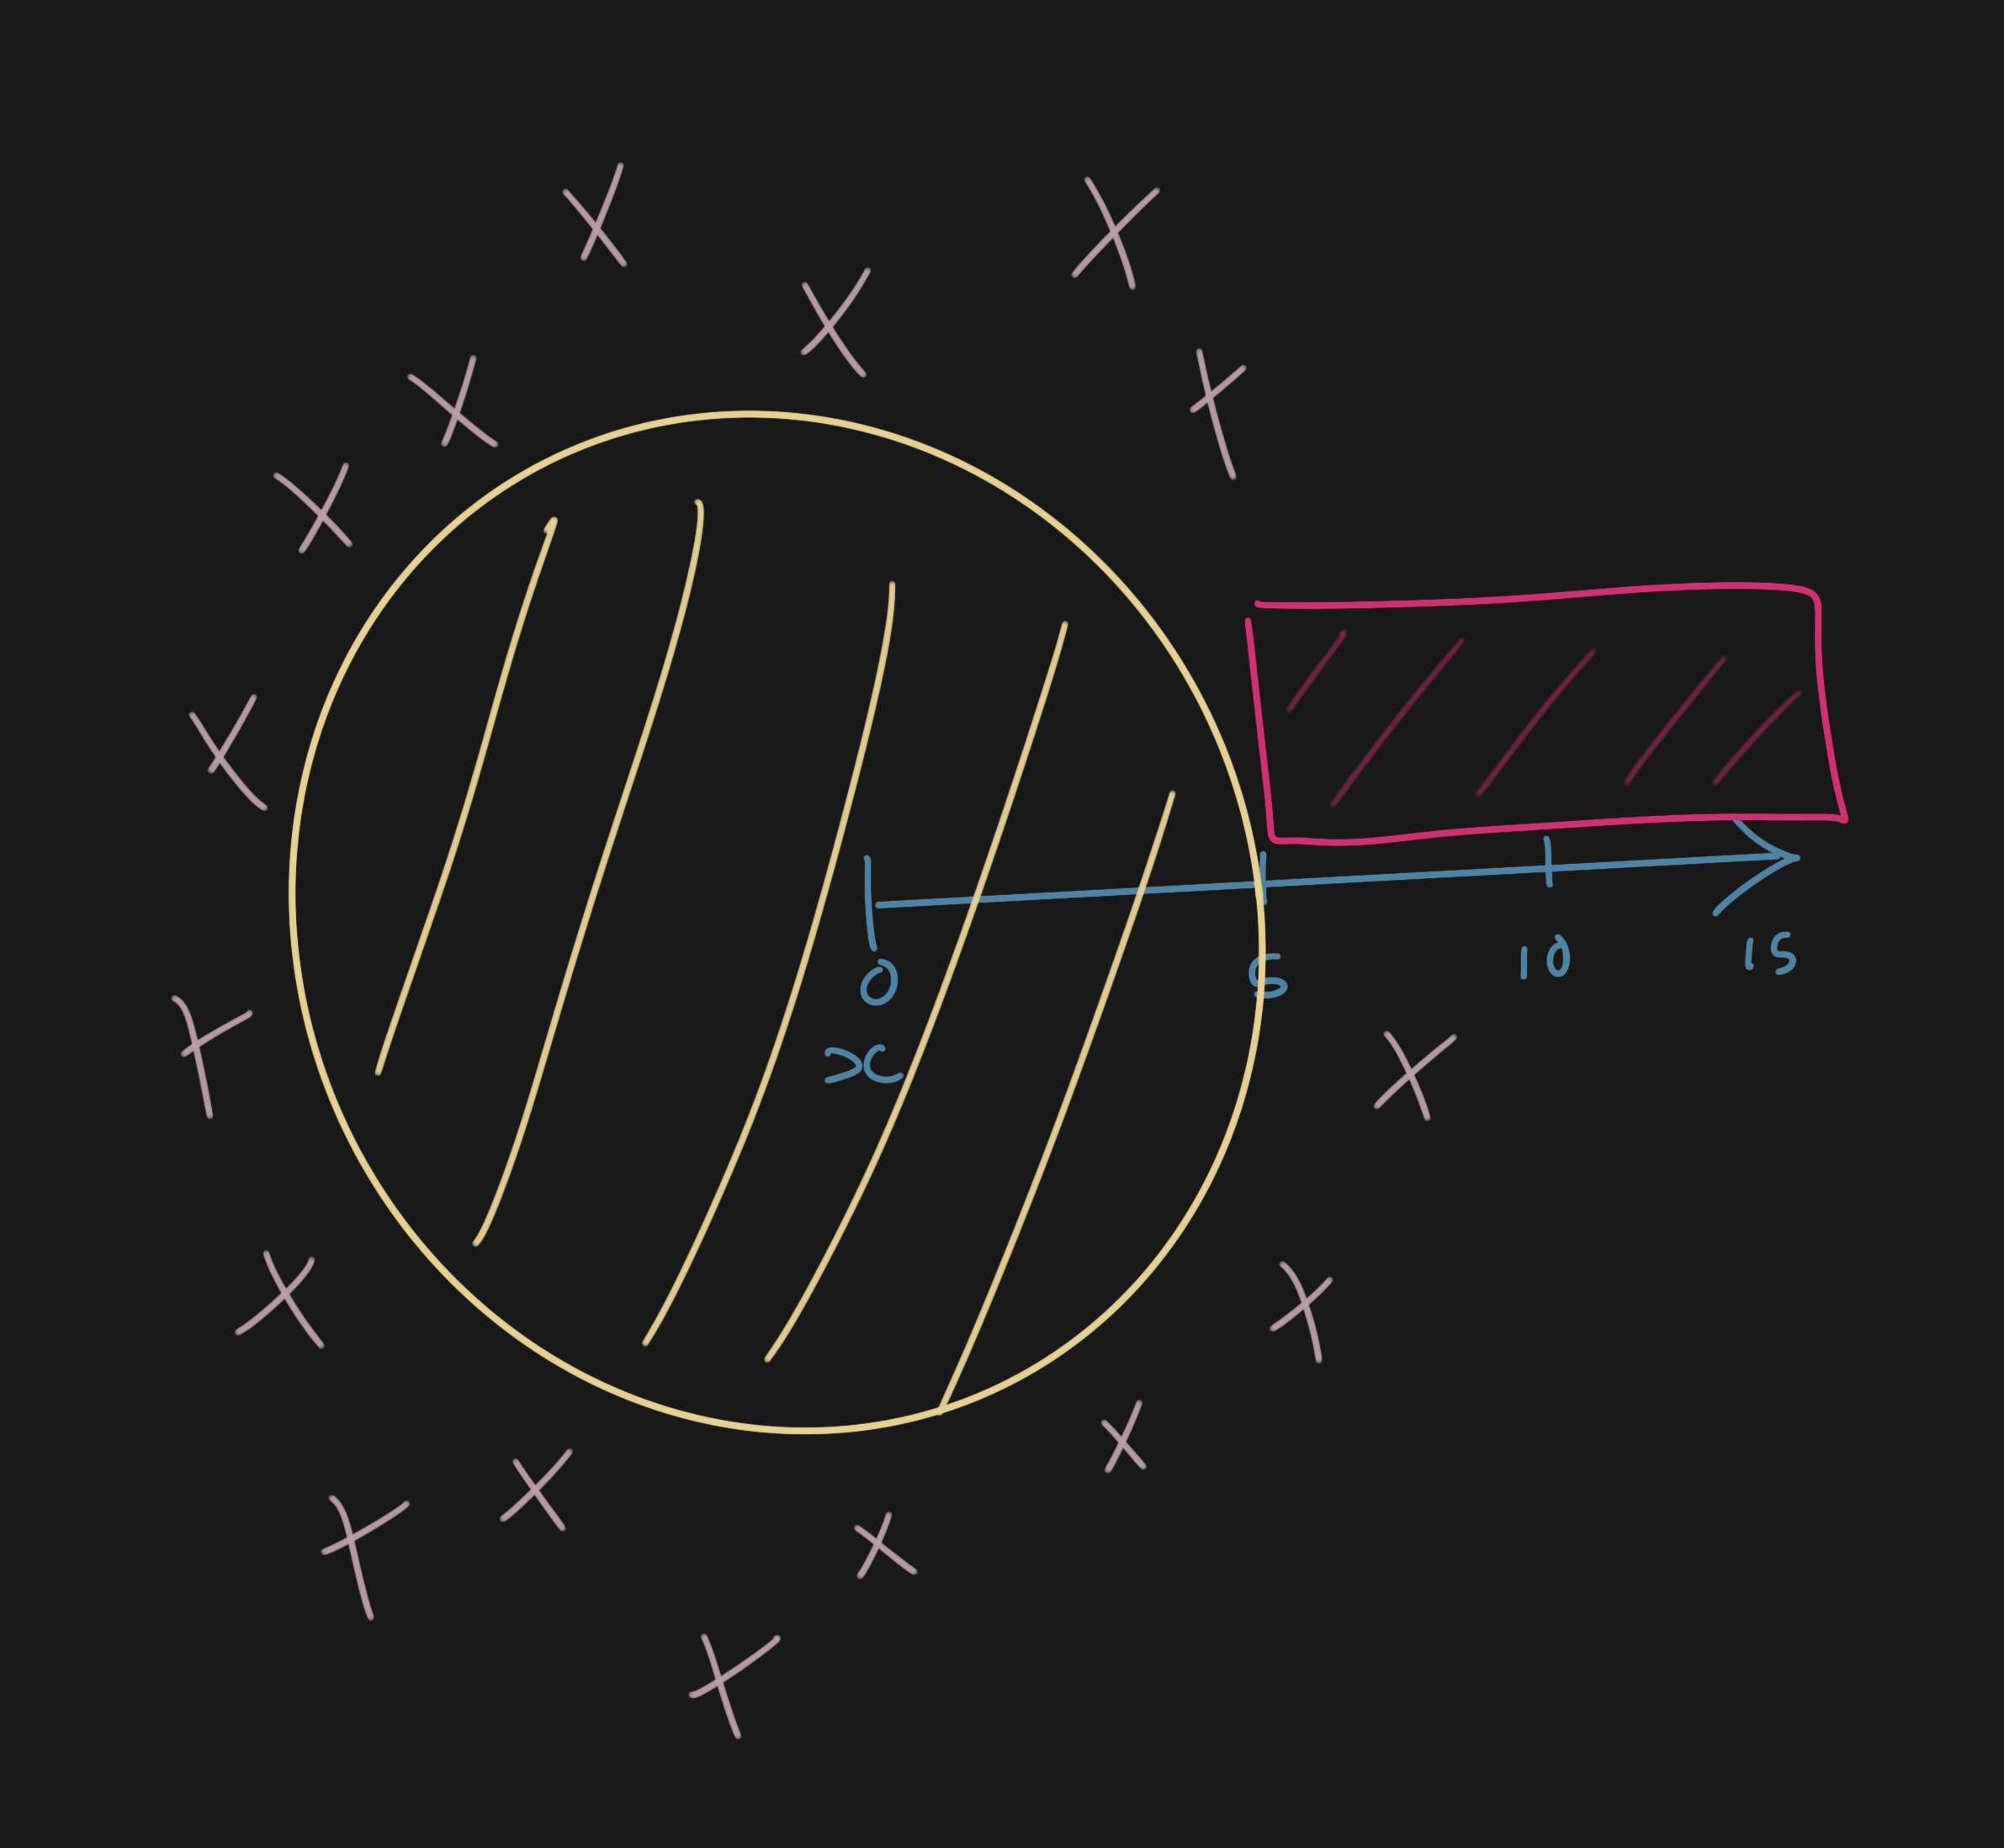
Le centre ne contiendra jamais d'étoiles et les étoiles seront dispersées dans toutes les directions.
Dans le useMemo responsable de la définition des positions des particules, nous pouvons ajuster l'attribut position et ajouter un attribut rotation :
const particles = useMemo( () => Array.from({ length: nbParticles }, (_, idx) => ({ position: [randFloat(5, 15), randFloatSpread(20), 0], rotation: [0, randFloat(0, Math.PI * 2), 0], size: randFloat(0.1, 0.25), })), [] );
React Three Fiber: The Ultimate Guide to 3D Web Development
✨ You have reached the end of the preview ✨
Go to the next level with Three.js and React Three Fiber!
Get full access to this lesson and the complete course when you enroll:
- 🔓 Full lesson videos with no limits
- 💻 Access to the final source code
- 🎓 Course progress tracking & completion
- 💬 Invite to our private Discord community
One-time payment. Lifetime updates included.