Water Shader
Mùa hè đang đến (ít nhất là khi tôi viết bài học này), đã đến lúc tổ chức một bữa tiệc tại hồ bơi! 🩳
Trong bài học này, chúng ta sẽ tạo hiệu ứng nước sau đây sử dụng React Three Fiber và GLSL:
Bọt nước tập trung dày hơn xung quanh các cạnh của hồ bơi và xung quanh vịt.
Để tạo ra hiệu ứng này, chúng ta sẽ khám phá Lygia Shader library để đơn giản hóa việc tạo shader và áp dụng kỹ thuật render target để tạo hiệu ứng bọt nước.
Gói khởi đầu
Gói khởi đầu cho bài học này bao gồm các tài nguyên sau:
- Mô hình hồ bơi từ Poly by Google CC-BY thông qua Poly Pizza
- Mô hình vịt từ Pmndrs marketplace
- Phông chữ Inter từ Google Fonts
Phần còn lại là thiết lập ánh sáng và camera đơn giản.
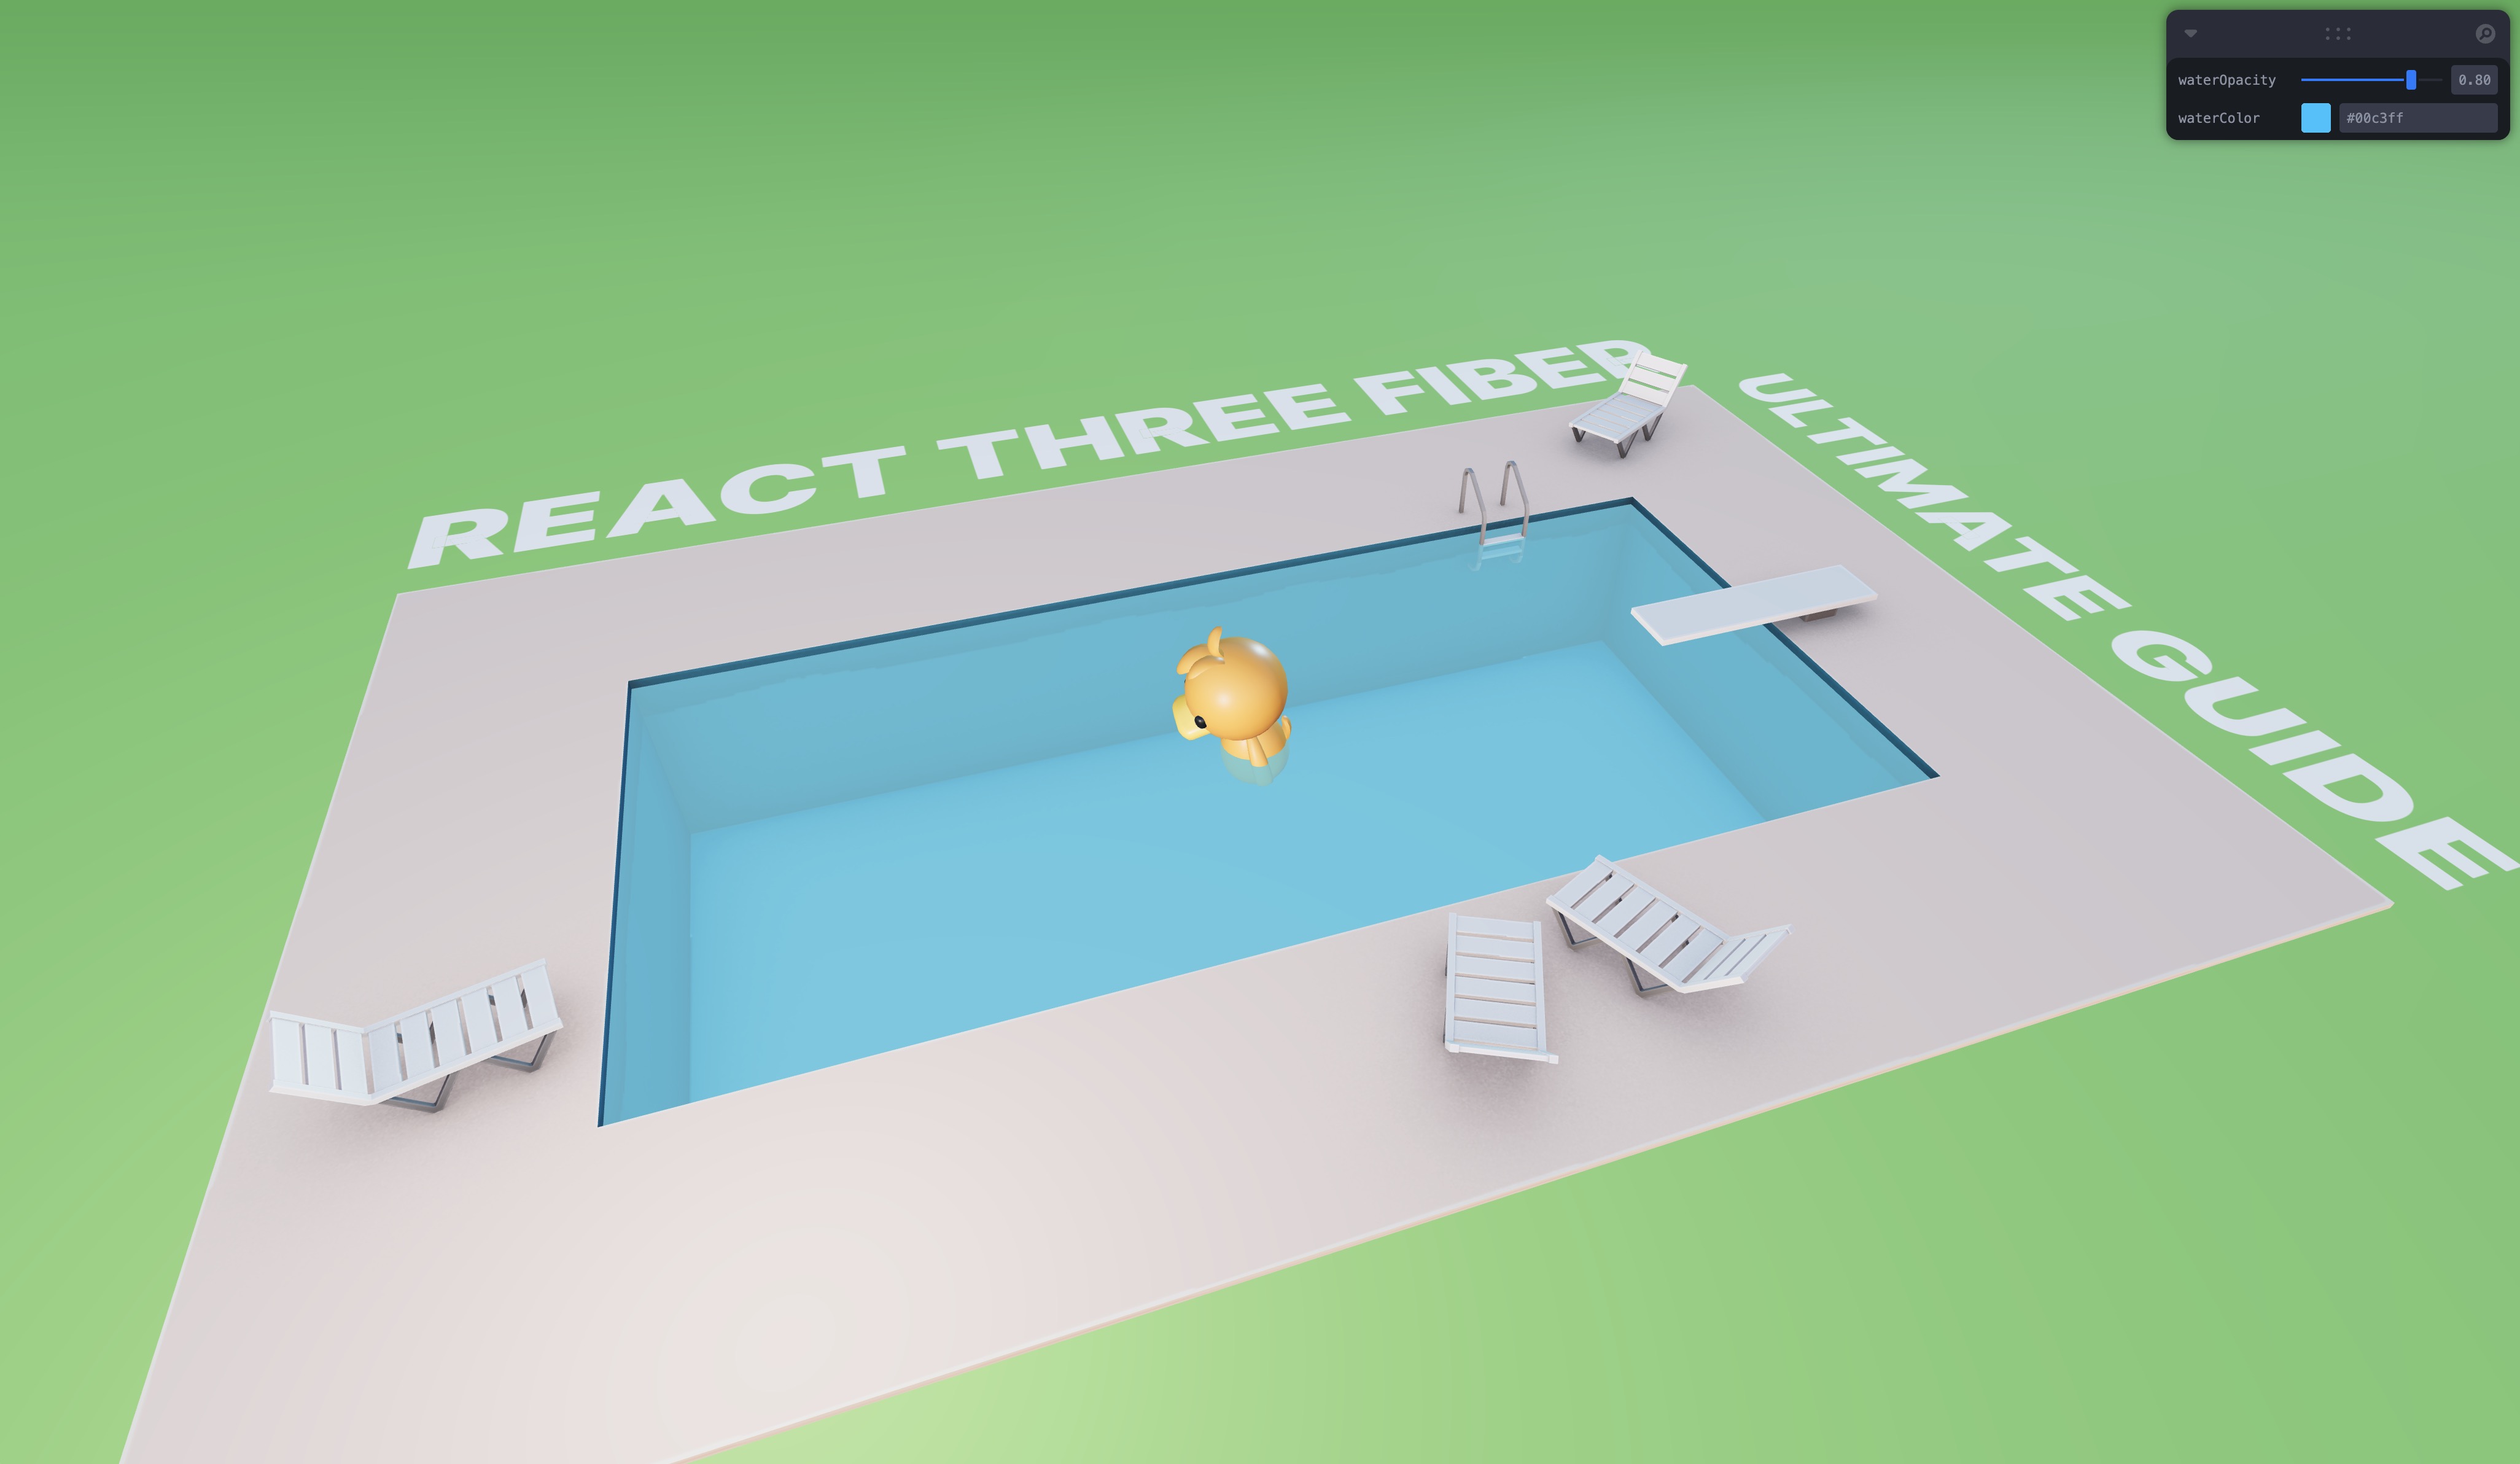
Một ngày nắng tại hồ bơi 🏊
Bộ đổ bóng nước
Mặt nước chỉ là một mặt phẳng đơn giản với một <meshBasicMaterial /> được áp dụng vào. Chúng ta sẽ thay thế material này bằng một shader tùy chỉnh.
Hãy tạo một tệp mới WaterMaterial.jsx với một đoạn mã khởi động cho một shader material:
import { shaderMaterial } from "@react-three/drei"; import { Color } from "three"; export const WaterMaterial = shaderMaterial( { uColor: new Color("skyblue"), uOpacity: 0.8, }, /*glsl*/ ` varying vec2 vUv; void main() { vUv = uv; gl_Position = projectionMatrix * modelViewMatrix * vec4(position, 1.0); }`, /*glsl*/ ` varying vec2 vUv; uniform vec3 uColor; uniform float uOpacity; void main() { gl_FragColor = vec4(uColor, uOpacity); #include <tonemapping_fragment> #include <encodings_fragment> }` );
Material của chúng ta có hai uniforms: uColor và uOpacity.
Để có thể sử dụng material tùy chỉnh của chúng ta một cách khai báo, hãy sử dụng hàm extend từ @react-three/fiber trong tệp main.jsx:
// ... import { extend } from "@react-three/fiber"; import { WaterMaterial } from "./components/WaterMaterial.jsx"; extend({ WaterMaterial }); // ...
Chúng ta cần thực hiện lời gọi
extendtừ một tệp được nhập trước khi component sử dụng material tùy chỉnh được nhập. Bằng cách này, chúng ta sẽ có thể sử dụngWaterMaterialmột cách khai báo trong các component của mình.Đó là lý do tại sao chúng ta thực hiện thao tác này trong tệp
main.jsxthay vì tệpWaterMaterial.jsx.
Bây giờ trong Water.jsx, chúng ta có thể thay thế <meshBasicMaterial /> bằng material tùy chỉnh của mình và điều chỉnh các thuộc tính với các uniforms tương ứng:
import { useControls } from "leva"; import { Color } from "three"; export const Water = ({ ...props }) => { const { waterColor, waterOpacity } = useControls({ waterOpacity: { value: 0.8, min: 0, max: 1 }, waterColor: "#00c3ff", }); return ( <mesh {...props}> <planeGeometry args={[15, 32, 22, 22]} /> <waterMaterial uColor={new Color(waterColor)} transparent uOpacity={waterOpacity} /> </mesh> ); };
Chúng ta đã thay thế thành công material cơ bản bằng shader material tùy chỉnh của mình.
Thư Viện Shader Lygia
Để tạo hiệu ứng bọt nước động, chúng ta sẽ sử dụng thư viện Shader Lygia. Thư viện này làm đơn giản hóa việc tạo shaders bằng cách cung cấp một tập hợp các tiện ích và hàm để tạo shaders theo cách mô tả hơn.
Phần mà chúng ta quan tâm là generative. Nó chứa một tập hợp các hàm hữu ích để tạo các hiệu ứng generative như noise, curl, fbm.
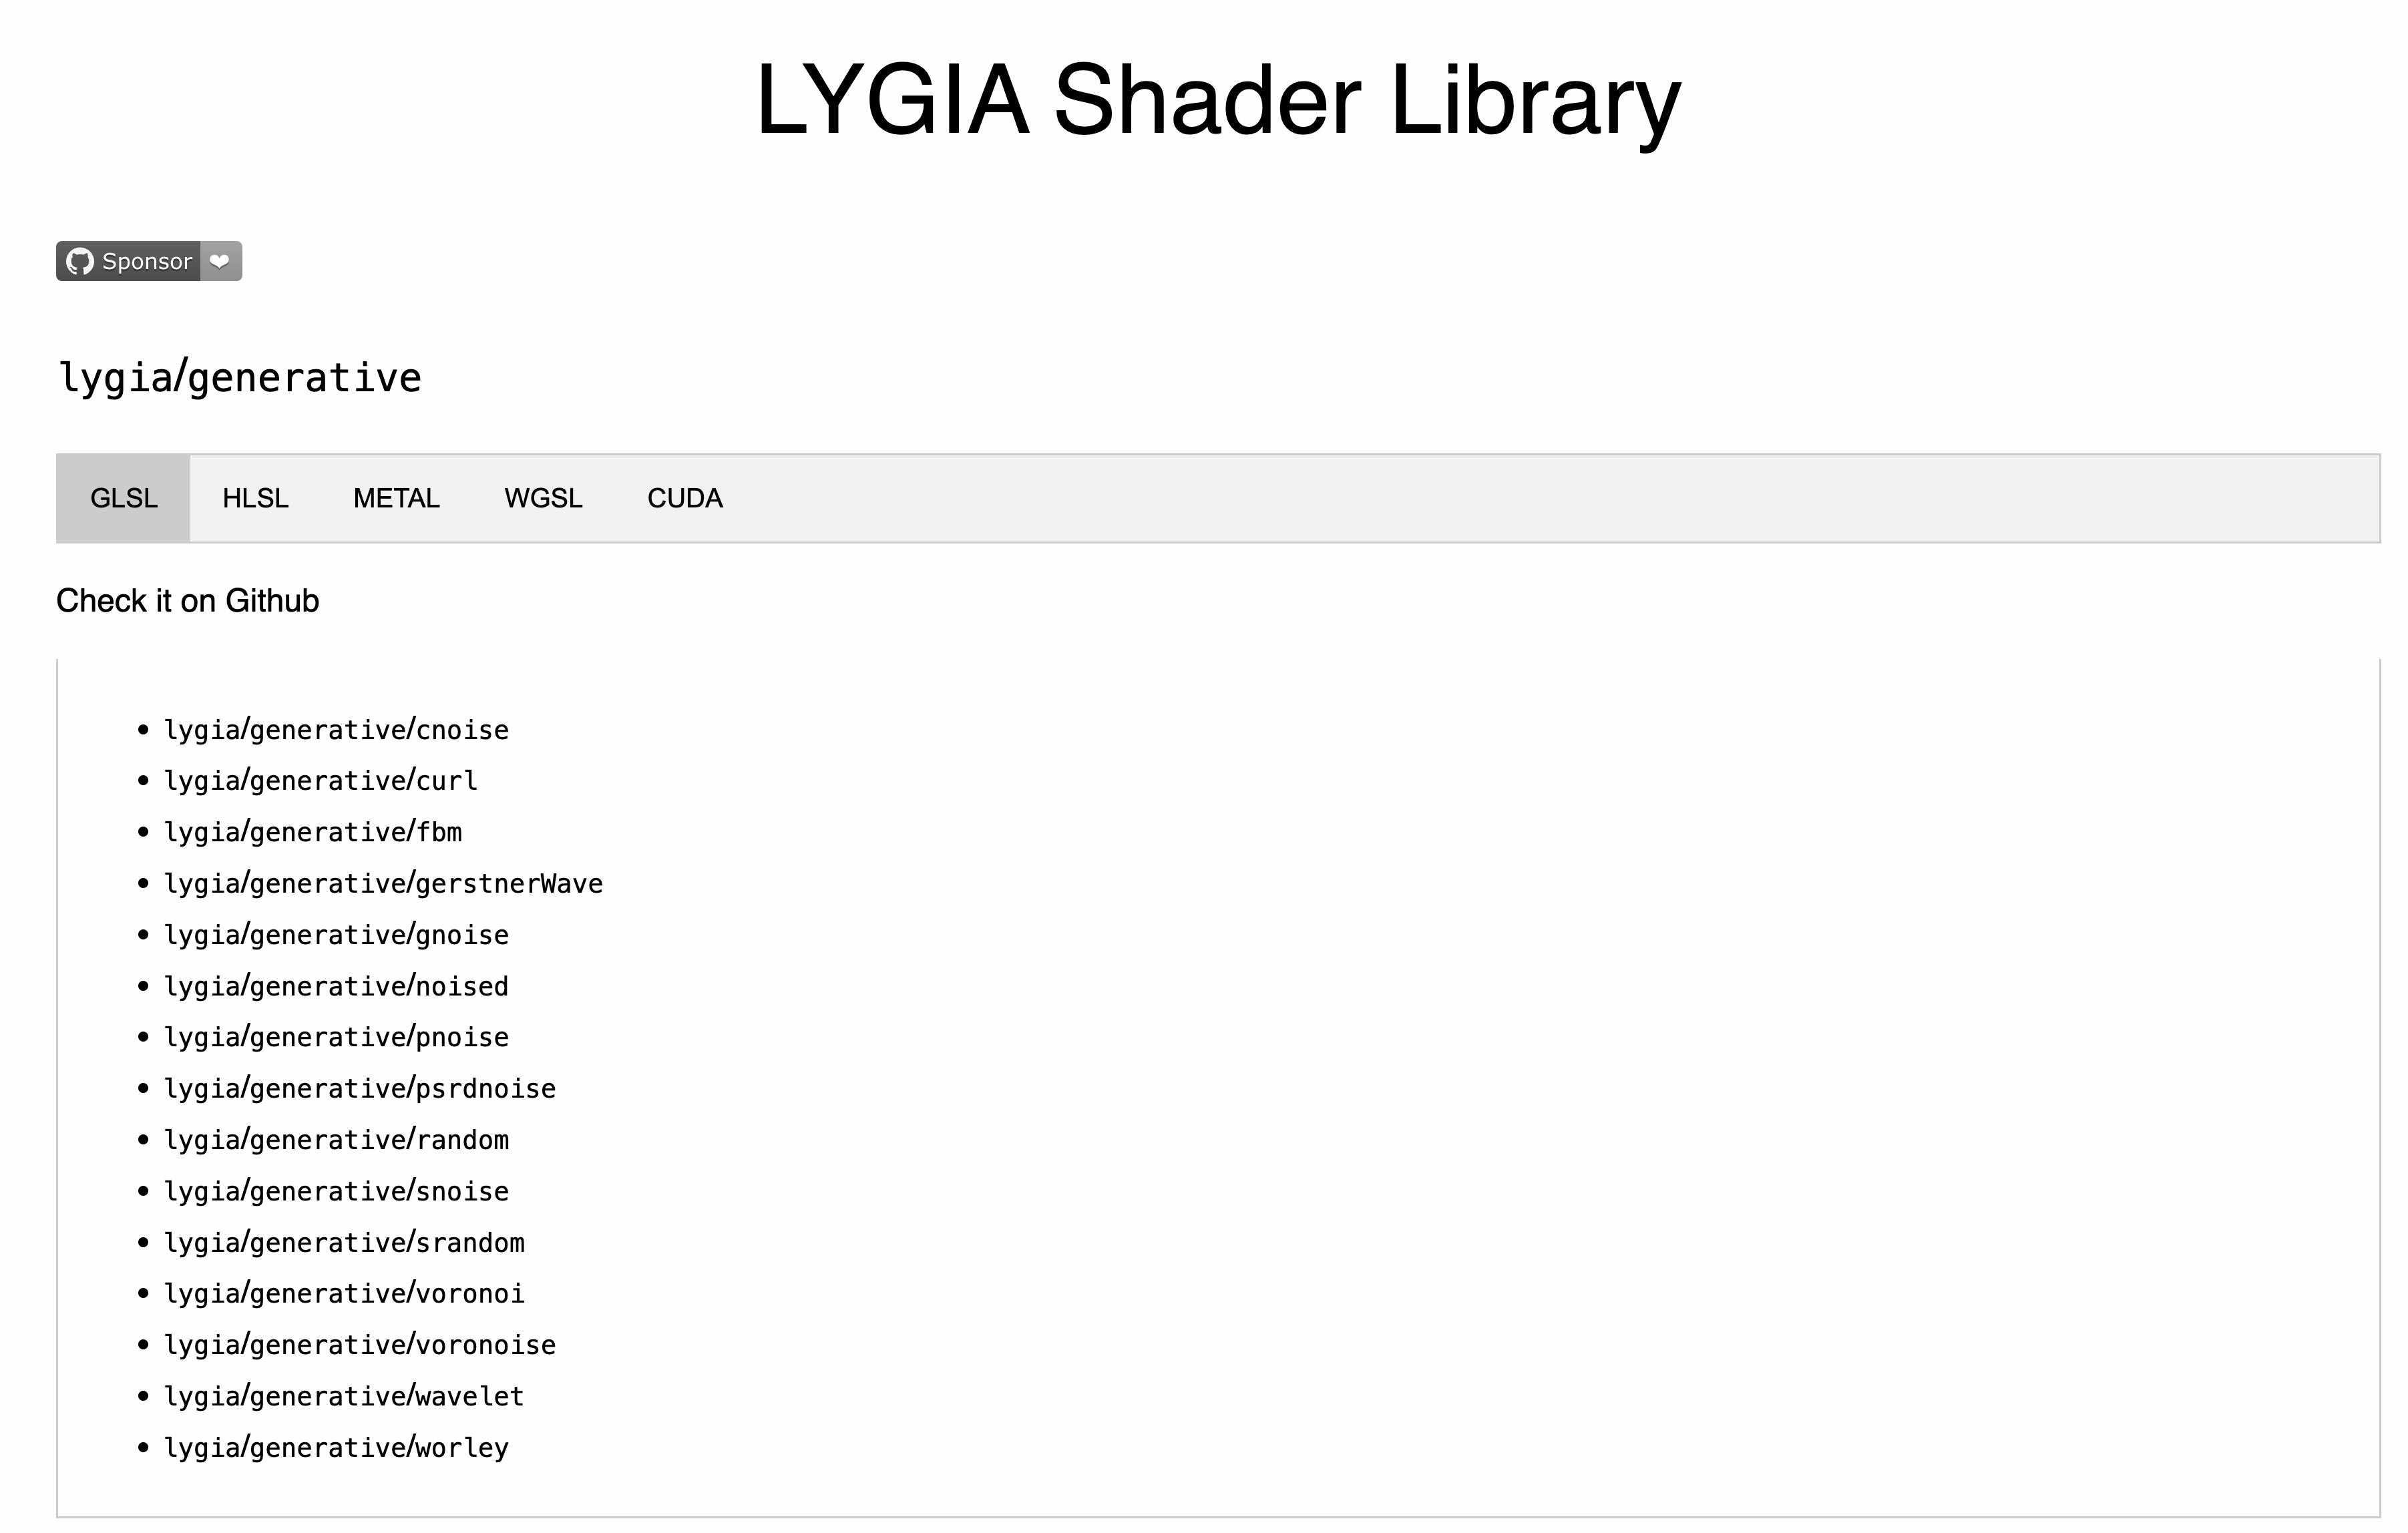
Trong phần generative, bạn có thể tìm thấy danh sách các hàm có sẵn.
Bằng cách mở một trong số các hàm, bạn có thể xem đoạn mã mẫu để sử dụng trong shader của bạn và một bản xem trước của hiệu ứng.
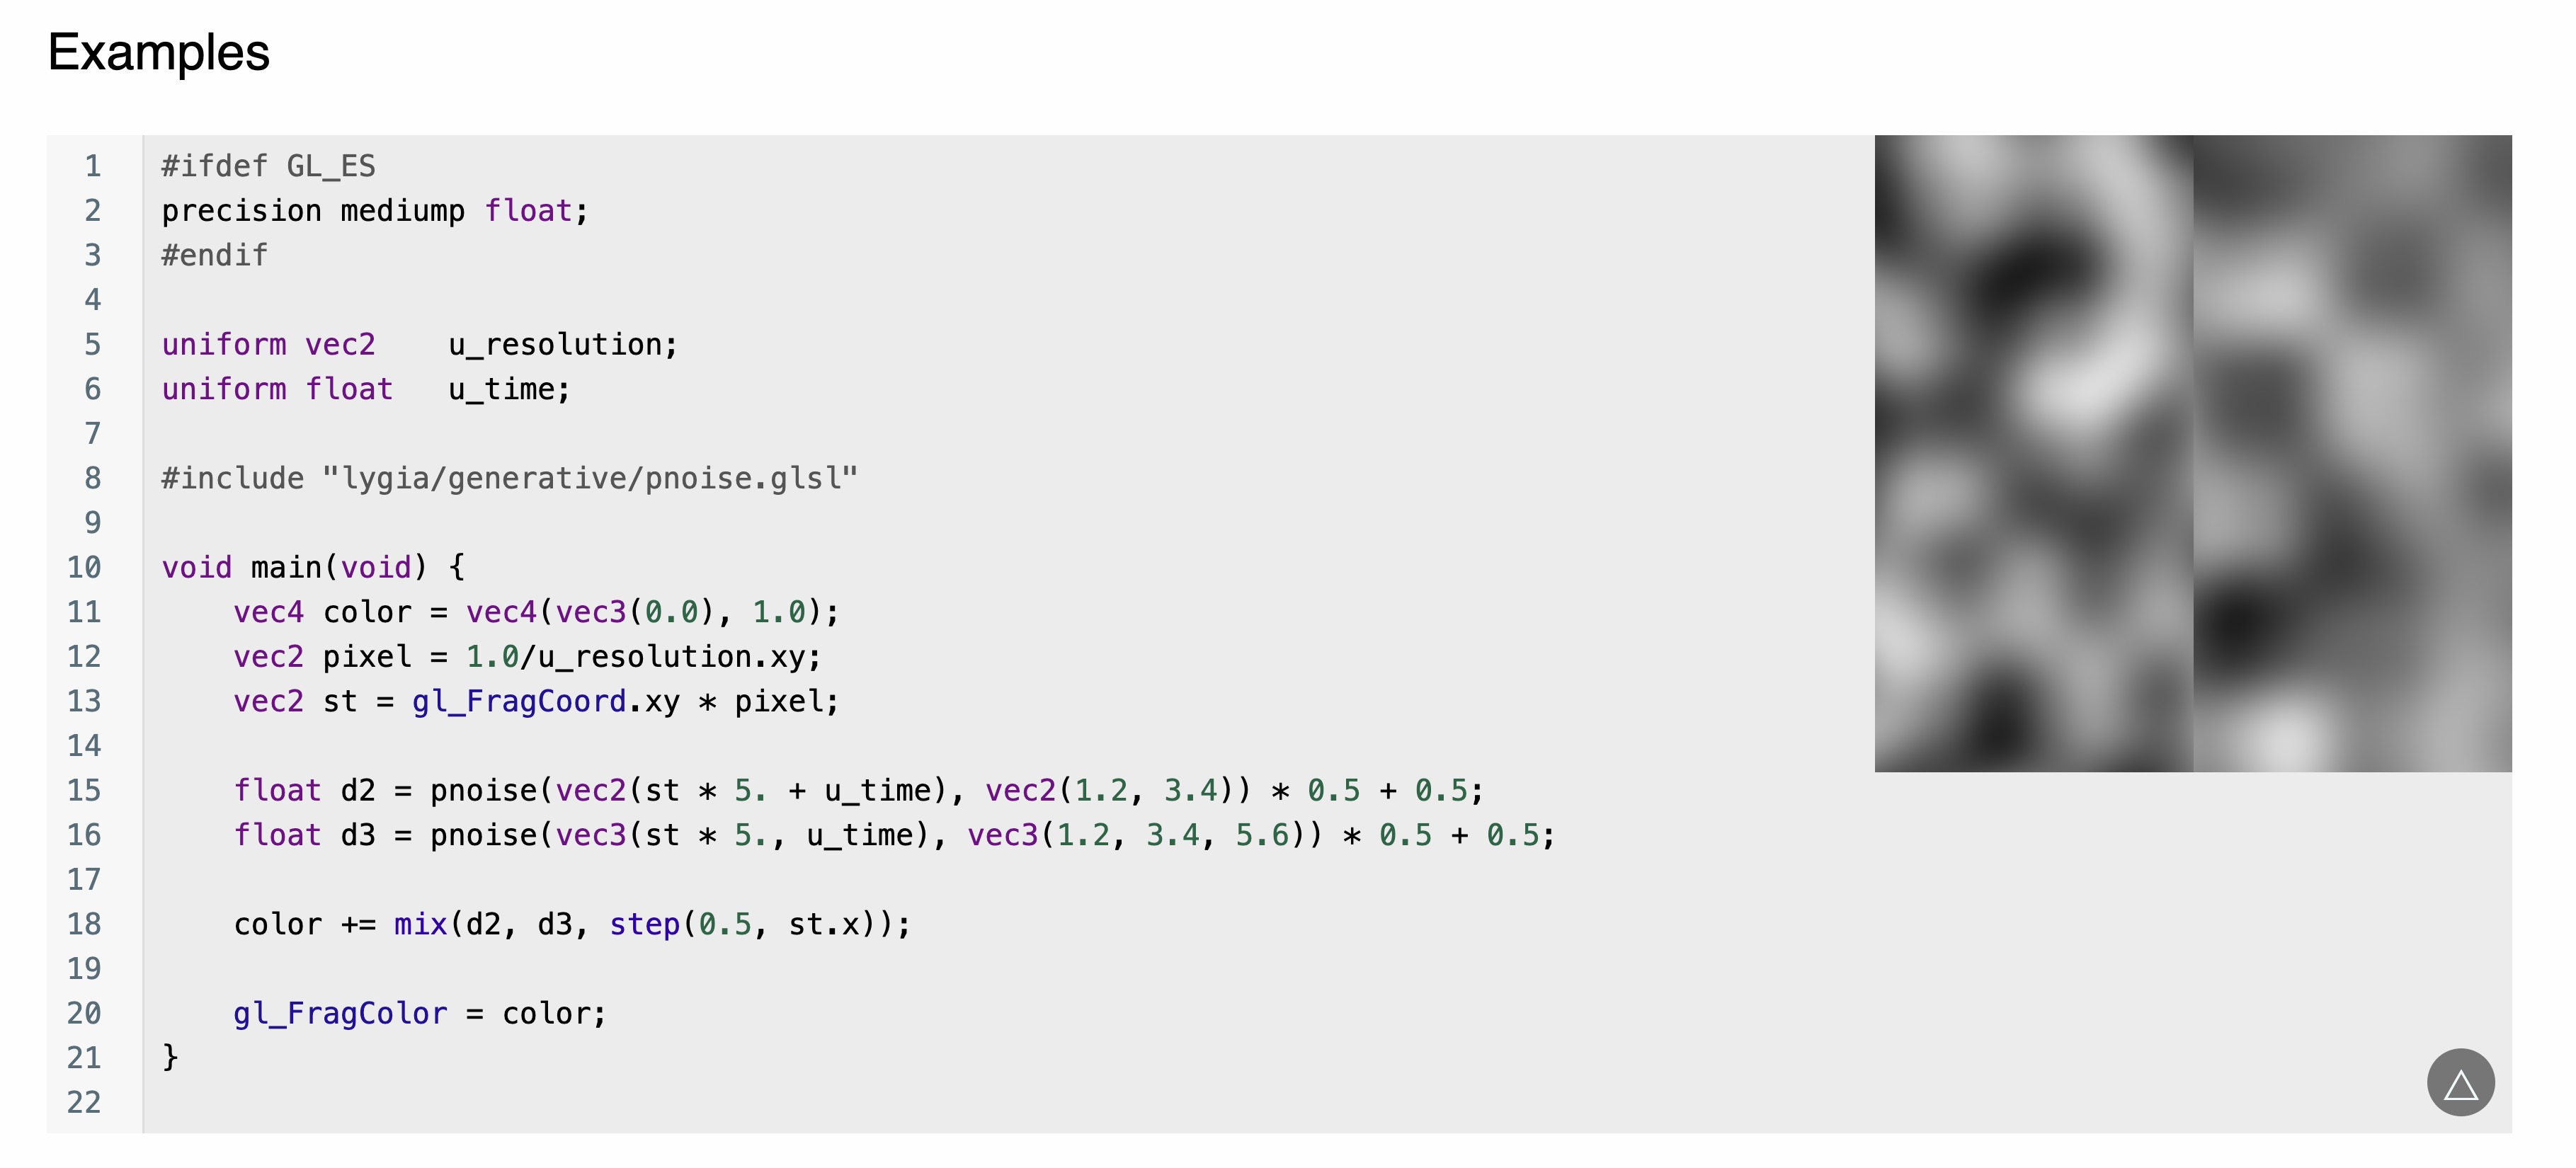
Trang hàm pnoise
Đây là hiệu ứng mà chúng ta muốn sử dụng. Bạn có thể thấy trong ví dụ rằng để có thể sử dụng hàm pnoise, họ bao gồm file shader pnoise. Chúng ta sẽ làm tương tự.
Resolve Lygia
Để có thể sử dụng thư viện Shader Lygia trong dự án của chúng ta, chúng ta có hai lựa chọn:
- Sao chép nội dung của thư viện vào dự án và import các file cần thiết. (Chúng ta đã thấy cách import các file GLSL trong bài học giới thiệu shaders)
- Sử dụng một thư viện tên là
resolve-lygiagiúp giải quyết thư viện Shader Lygia từ web và tự động thay thế chỉ thị#includeliên quan đến lygia với nội dung của các file.
Tùy thuộc vào dự án của bạn, có bao nhiêu hiệu ứng bạn muốn sử dụng, và nếu bạn đang sử dụng các shader library khác, bạn có thể thích một giải pháp này hơn giải pháp khác.
Trong bài học này, chúng ta sẽ sử dụng thư viện resolve-lygia. Để cài đặt nó, chạy lệnh sau:
yarn add resolve-lygia
Sau đó, để sử dụng nó, chúng ta chỉ cần bao bọc mã shader fragment và/hoặc vertex của mình với hàm resolveLygia:
// ... import { resolveLygia } from "resolve-lygia"; export const WaterMaterial = shaderMaterial( { uColor: new Color("skyblue"), uOpacity: 0.8, }, /*glsl*/ ` varying vec2 vUv; void main() { vUv = uv; gl_Position = projectionMatrix * modelViewMatrix * vec4(position, 1.0); }`, resolveLygia(/*glsl*/ ` varying vec2 vUv; uniform vec3 uColor; uniform float uOpacity; void main() { gl_FragColor = vec4(uColor, uOpacity); #include <tonemapping_fragment> #include <encodings_fragment> }`) );
Chúng ta chỉ cần sử dụng hàm resolveLygia cho shader fragment trong bài học này.
Bây giờ chúng ta có thể sử dụng hàm pnoise trong shader của mình:
#include "lygia/generative/pnoise.glsl" varying vec2 vUv; uniform vec3 uColor; uniform float uOpacity; void main() { float noise = pnoise(vec3(vUv * 10.0, 1.0), vec3(100.0, 24.0, 112.0)); vec3 black = vec3(0.0); vec3 finalColor = mix(uColor, black, noise); gl_FragColor = vec4(finalColor, uOpacity); #include <tonemapping_fragment> #include <encodings_fragment> }
Chúng ta nhân vUv với 10.0 để làm cho noise rõ hơn và chúng ta sử dụng hàm pnoise để tạo hiệu ứng noise. Chúng ta phối uColor với màu đen dựa trên giá trị noise để tạo ra màu cuối cùng.
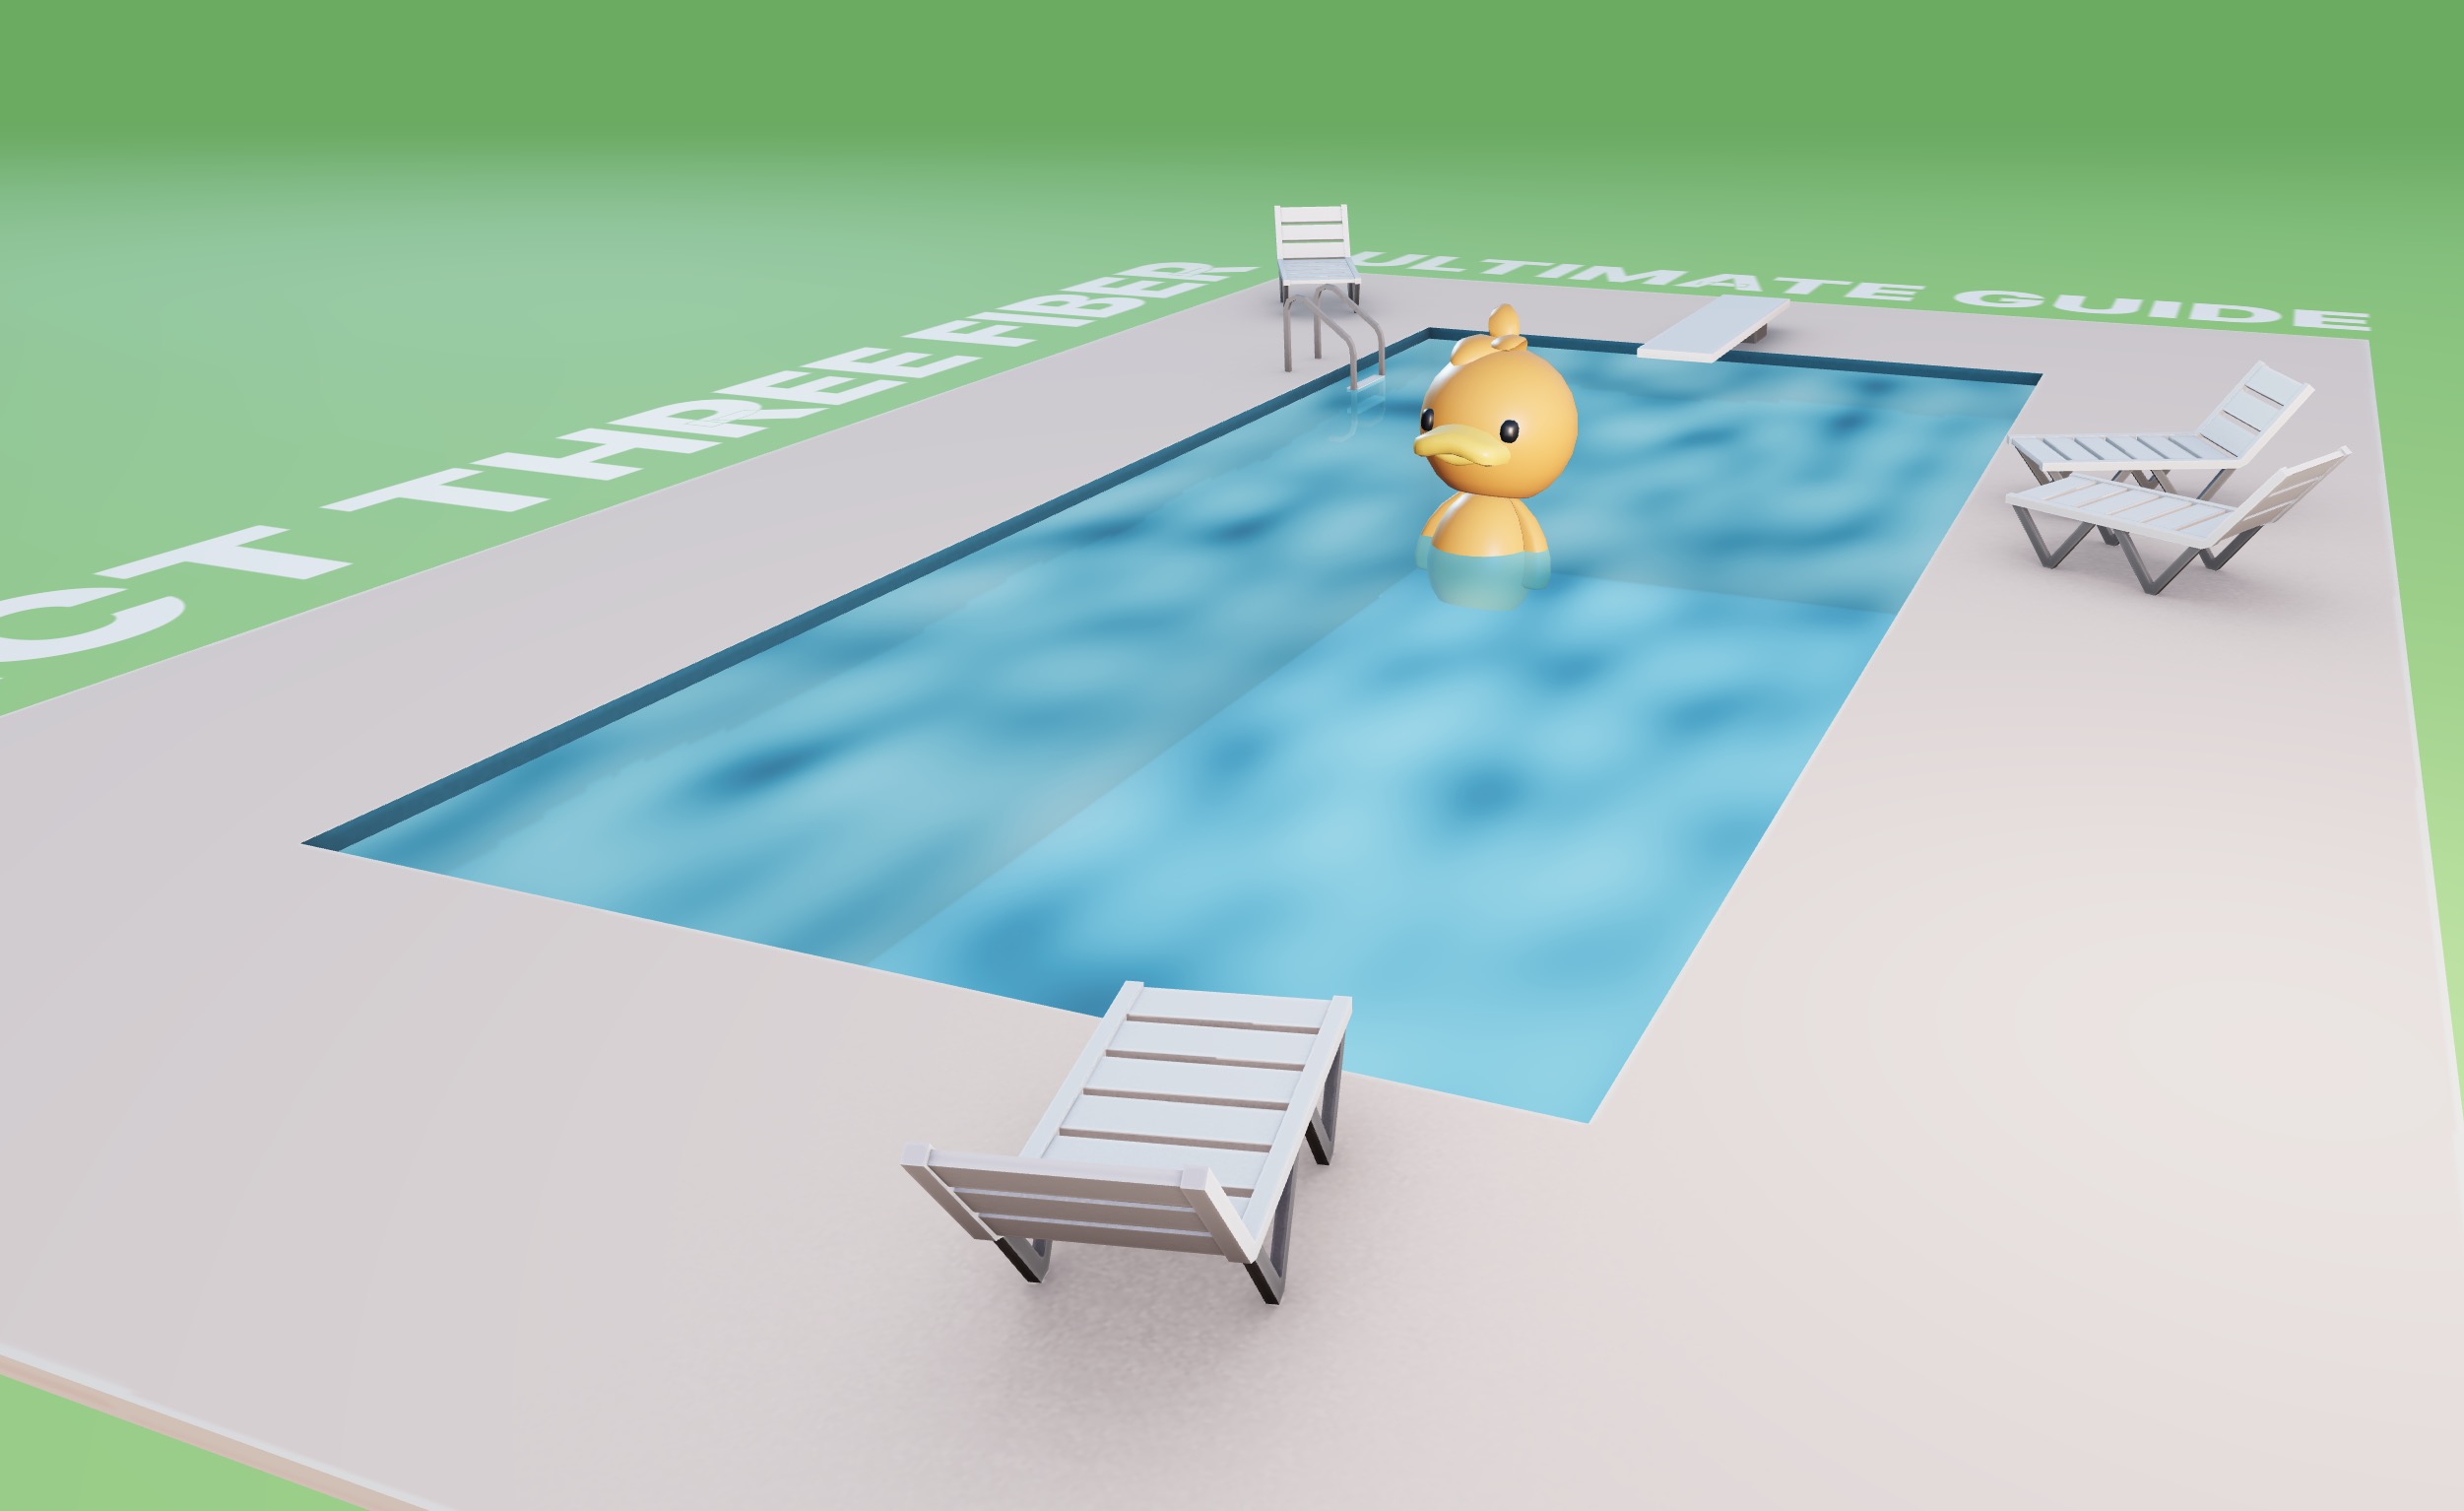
Chúng ta có thể thấy hiệu ứng noise được áp dụng lên nước.
⚠️ Resolve Lygia dường như có một số vấn đề gián đoạn từ lúc này đến lúc khác. Nếu bạn gặp bất kỳ sự cố nào, bạn có thể sử dụng thư viện Glslify hoặc sao chép các file từ thư viện Shader Lygia mà bạn cần và sử dụng các file glsl như chúng ta đã thực hiện trong bài học giới thiệu shaders.
Hiệu ứng bọt
Hiệu ứng nhiễu là nền tảng của hiệu ứng bọt. Trước khi tinh chỉnh hiệu ứng, hãy tạo các uniforms cần thiết để kiểm soát hoàn toàn hiệu ứng bọt.
WaterMaterial.jsx:
import { shaderMaterial } from "@react-three/drei"; import { resolveLygia } from "resolve-lygia"; import { Color } from "three"; export const WaterMaterial = shaderMaterial( { uColor: new Color("skyblue"), uOpacity: 0.8, uTime: 0, uSpeed: 0.5, uRepeat: 20.0, uNoiseType: 0, uFoam: 0.4, uFoamTop: 0.7, }, /*glsl*/ ` varying vec2 vUv; void main() { vUv = uv; gl_Position = projectionMatrix * modelViewMatrix * vec4(position, 1.0); }`, resolveLygia(/*glsl*/ ` #include "lygia/generative/pnoise.glsl" varying vec2 vUv; uniform vec3 uColor; uniform float uOpacity; uniform float uTime; uniform float uSpeed; uniform float uRepeat; uniform int uNoiseType; uniform float uFoam; uniform float uFoamTop; void main() { float noise = pnoise(vec3(vUv * 10.0, 1.0), vec3(100.0, 24.0, 112.0)); vec3 black = vec3(0.0); vec3 finalColor = mix(uColor, black, noise); gl_FragColor = vec4(finalColor, uOpacity); #include <tonemapping_fragment> #include <encodings_fragment> }`) );
Chúng tôi đã thêm các uniforms sau:
uTime: để tạo hiệu ứng bọt độnguSpeed: để kiểm soát tốc độ của hiệu ứng độnguRepeat: để điều chỉnh tỉ lệ hiệu ứng nhiễuuNoiseType: để chuyển đổi giữa các hàm nhiễu khác nhauuFoam: để kiểm soát ngưỡng khi hiệu ứng bọt bắt đầuuFoamTop: để kiểm soát ngưỡng khi bọt trở nên dày đặc hơn
Bây giờ chúng ta cần áp dụng các uniforms này vào material.
Water.jsx:
import { useFrame } from "@react-three/fiber"; import { useControls } from "leva"; import { useRef } from "react"; import { Color } from "three"; export const Water = ({ ...props }) => { const waterMaterialRef = useRef(); const { waterColor, waterOpacity, speed, noiseType, foam, foamTop, repeat } = useControls({ waterOpacity: { value: 0.8, min: 0, max: 1 }, waterColor: "#00c3ff", speed: { value: 0.5, min: 0, max: 5 }, repeat: { value: 30, min: 1, max: 100, }, foam: { value: 0.4, min: 0, max: 1, }, foamTop: { value: 0.7, min: 0, max: 1, }, noiseType: { value: 0, options: { Perlin: 0, Voronoi: 1, }, }, }); useFrame(({ clock }) => { if (waterMaterialRef.current) { waterMaterialRef.current.uniforms.uTime.value = clock.getElapsedTime(); } }); return ( <mesh {...props}> <planeGeometry args={[15, 32, 22, 22]} /> <waterMaterial ref={waterMaterialRef} uColor={new Color(waterColor)} transparent uOpacity={waterOpacity} uNoiseType={noiseType} uSpeed={speed} uRepeat={repeat} uFoam={foam} uFoamTop={foamTop} /> </mesh> ); };
Bây giờ chúng ta có thể tạo logic cho bọt trong shader.
Chúng ta tính toán thời gian điều chỉnh bằng cách nhân uTime với uSpeed:
float adjustedTime = uTime * uSpeed;
Sau đó, chúng ta tạo hiệu ứng nhiễu bằng cách sử dụng hàm pnoise:
float noise = pnoise(vec3(vUv * uRepeat, adjustedTime * 0.5), vec3(100.0, 24.0, 112.0));
Chúng ta áp dụng hiệu ứng bọt bằng hàm smoothstep:
noise = smoothstep(uFoam, uFoamTop, noise);
Sau đó, chúng ta tạo các màu sáng hơn để đại diện cho bọt. Chúng ta tạo intermediateColor và topColor:
vec3 intermediateColor = uColor * 1.8; vec3 topColor = intermediateColor * 2.0;
Chúng ta điều chỉnh màu dựa trên giá trị nhiễu:
vec3 finalColor = uColor; finalColor = mix(uColor, intermediateColor, step(0.01, noise)); finalColor = mix(finalColor, topColor, step(1.0, noise));
Khi nhiễu nằm trong khoảng từ 0.01 đến 1.0, màu sẽ là màu trung gian. Khi nhiễu lớn hơn hoặc bằng 1.0, màu sẽ là màu trên cùng.
Dưới đây là mã shader cuối cùng:
#include "lygia/generative/pnoise.glsl" varying vec2 vUv; uniform vec3 uColor; uniform float uOpacity; uniform float uTime; uniform float uSpeed; uniform float uRepeat; uniform int uNoiseType; uniform float uFoam; uniform float uFoamTop; void main() { float adjustedTime = uTime * uSpeed; // NOISE GENERATION float noise = pnoise(vec3(vUv * uRepeat, adjustedTime * 0.5), vec3(100.0, 24.0, 112.0)); // FOAM noise = smoothstep(uFoam, uFoamTop, noise); // COLOR vec3 intermediateColor = uColor * 1.8; vec3 topColor = intermediateColor * 2.0; vec3 finalColor = uColor; finalColor = mix(uColor, intermediateColor, step(0.01, noise)); finalColor = mix(finalColor, topColor, step(1.0, noise)); gl_FragColor = vec4(finalColor, uOpacity); #include <tonemapping_fragment> #include <encodings_fragment> }
Chúng ta đã tạo được một hiệu ứng bọt đẹp trên nước.
Nhiễu Voronoi
Chúng ta có thể chuyển đổi giữa các hàm nhiễu khác nhau bằng cách thay đổi uniform uNoiseType. Hãy thêm hàm nhiễu Voronoi vào shader của chúng ta:
#include "lygia/generative/pnoise.glsl" #include "lygia/generative/voronoise.glsl" // ...
Để có ví dụ về hàm nhiễu Voronoi hoạt động, bạn có thể truy cập trang Voronoise trên trang web thư viện Lygia Shader. Sau đó điều chỉnh mã với các uniforms và logic của bạn.
Hãy áp dụng có điều kiện một trong các hàm nhiễu dựa trên uniform uNoiseType:
// ... // TẠO NHIỄU float noise = 0.0; if (uNoiseType == 0) { noise = pnoise(vec3(vUv * uRepeat, adjustedTime * 0.5), vec3(100.0, 24.0, 112.0)); } else if (uNoiseType == 1) { vec2 p = 0.5 - 0.5*cos(adjustedTime *vec2(1.0,0.5)); p = p*p*(3.0-2.0*p); p = p*p*(3.0-2.0*p); p = p*p*(3.0-2.0*p); noise = voronoise(vec3(vUv * uRepeat, adjustedTime), p.x, 1.0); } // ...
Chúng ta hiện có một hiệu ứng bọt thay thế đẹp mắt sử dụng hàm nhiễu Voronoi. Nhờ các điều khiển, chúng ta có thể điều chỉnh hiệu ứng theo thời gian thực.
Mật độ bọt quanh các cạnh
Để làm cho nó thực tế hơn, chúng ta sẽ làm cho bọt dày hơn quanh các cạnh của hồ bơi và các vật thể khác cắt ngang với nước.
Để đạt được điều này, chúng ta sẽ sử dụng một render target để tính toán khoảng cách của một vật thể tới camera của chúng ta. Sau đó, chúng ta sẽ sử dụng khoảng cách này để điều chỉnh mật độ bọt.
Depth texture
Để lưu trữ thông tin depth, chúng ta cần tạo một MeshDepthMaterial và render cảnh đến một render target.
Hãy khai báo depth material trong Water.jsx:
// ... import { // ... FloatType, MeshDepthMaterial, NoBlending, RGBADepthPacking, } from "three"; const depthMaterial = new MeshDepthMaterial(); depthMaterial.depthPacking = RGBADepthPacking; depthMaterial.blending = NoBlending; // ...
Chúng ta đặt depthPacking thành RGBADepthPacking để lưu trữ độ sâu trong các kênh RGB của texture. Chúng ta đặt blending thành NoBlending để tránh pha trộn các giá trị độ sâu.
Sau đó, chúng ta cần tạo một render target, một reference của water mesh để có thể ẩn nó khi tính toán độ sâu, và một maxDepth điều chỉnh cho đến độ sâu tối đa mà chúng ta muốn tính toán khoảng cách:
// ... export const Water = ({ ...props }) => { // ... const { // ... maxDepth, } = useControls({ // ... maxDepth: { value: 2, min: 0, max: 5 }, }); const renderTarget = useFBO({ depth: true, type: FloatType, }); const waterRef = useRef(); // ... return ( <mesh {...props} ref={waterRef}> <planeGeometry args={[15, 32, 22, 22]} /> <waterCellShading // ... uMaxDepth={maxDepth} /> </mesh> ); };
Và trong useFrame chúng ta sẽ render cảnh tới render target và thiết lập các uniforms cần thiết trong shader:
// ... export const Water = ({ ...props }) => { // ... useFrame(({ gl, scene, camera, clock }) => { // Chúng ta ẩn water mesh và render cảnh tới render target waterRef.current.visible = false; gl.setRenderTarget(renderTarget); scene.overrideMaterial = depthMaterial; gl.render(scene, camera); // Chúng ta thiết lập lại cảnh và hiển thị water mesh scene.overrideMaterial = null; waterRef.current.visible = true; gl.setRenderTarget(null); // Thiết lập uniforms if (waterMaterialRef.current) { // ... waterMaterialRef.current.uniforms.uDepth.value = renderTarget.texture; const pixelRatio = gl.getPixelRatio(); waterMaterialRef.current.uniforms.uResolution.value = [ window.innerWidth * pixelRatio, window.innerHeight * pixelRatio, ]; waterMaterialRef.current.uniforms.uCameraNear.value = camera.near; waterMaterialRef.current.uniforms.uCameraFar.value = camera.far; } }); // ... };
Chúng ta thiết lập các uniforms uDepth, uMaxDepth, uResolution, uCameraNear, và uCameraFar trong shader mà chúng ta sẽ sử dụng để tính toán khoảng cách. Hãy khai báo những uniforms này trong shader:
WaterMaterial.jsx:
// ... export const WaterMaterial = shaderMaterial( { // ... uDepth: null, uMaxDepth: 1.0, uResolution: [0, 0], uCameraNear: 0, uCameraFar: 0, }, /*glsl*/ ` // ... `, resolveLygia(/*glsl*/ ` // ... uniform sampler2D uDepth; uniform float uMaxDepth; uniform vec2 uResolution; uniform float uCameraNear; uniform float uCameraFar; // ... `) );
Hoàn hảo, chúng ta đã có mọi thứ cần thiết để lấy giá trị độ sâu từ render target.
Trong shader fragment, chúng ta sẽ tính toán khoảng cách từ fragment hiện tại tới camera:
// ... #include <packing> float getViewZ(const in float depth) { return perspectiveDepthToViewZ(depth, uCameraNear, uCameraFar); } float getDepth(const in vec2 screenPosition ) { return unpackRGBAToDepth(texture2D(uDepth, screenPosition)); } void main() { float adjustedTime = uTime * uSpeed; // NOISE GENERATION // ... // DEPTH vec2 screenUV = gl_FragCoord.xy / uResolution; float fragmentLinearEyeDepth = getViewZ(gl_FragCoord.z); float linearEyeDepth = getViewZ(getDepth(screenUV)); float depth = fragmentLinearEyeDepth - linearEyeDepth; // ... if (depth > uMaxDepth) { finalColor = vec3(1.0, 0.0, 0.0); } else { finalColor = vec3(depth); } gl_FragColor = vec4(finalColor, uOpacity); }
Trong ví dụ này, chúng ta tô màu fragment thành màu đỏ nếu độ sâu vượt quá uMaxDepth, nếu không, chúng ta tô màu fragment dựa trên giá trị độ sâu để trực quan hóa các giá trị.
Chúng ta có thể nhìn thấy các giá trị độ sâu được trực quan hóa trong nước.
Khi độ sâu vượt quá uMaxDepth, chúng ta sẽ bỏ qua các giá trị đó nhưng khi chúng ta nằm giữa 0 (đen) và uMaxDepth, chúng ta sẽ điều chỉnh mật độ bọt từ rất cao đến nhẹ:
// DEPTH // ... float depth = fragmentLinearEyeDepth - linearEyeDepth; noise += smoothstep(uMaxDepth, 0.0, depth);
Chúng ta có thể loại bỏ việc hiển thị màu độ sâu và mọi thứ sẽ ổn định:
// if (depth > uMaxDepth) { // finalColor = vec3(1.0, 0.0, 0.0); // } else { // finalColor = vec3(depth); // }
Chúng ta bây giờ có hiệu ứng mật độ bọt đẹp quanh các cạnh của vịt và hồ bơi 🎉
Kết luận
Chúng ta đã học cách tạo một water shader nâng cao sử dụng React Three Fiber và GLSL.
Chúng ta đã sử dụng thư viện Lygia Shader để đơn giản hóa việc tạo shaders và thực hành kỹ thuật render target để tạo ra các hiệu ứng tinh chỉnh hơn.
React Three Fiber: The Ultimate Guide to 3D Web Development
✨ You have reached the end of the preview ✨
Go to the next level with Three.js and React Three Fiber!
Get full access to this lesson and the complete course when you enroll:
- 🔓 Full lesson videos with no limits
- 💻 Access to the final source code
- 🎓 Course progress tracking & completion
- 💬 Invite to our private Discord community
One-time payment. Lifetime updates included.