GPGPU 입자 시스템 TSL & WebGPU
이 강의에서는 Three Shading Language (TSL)와 WebGPU를 사용하여 3D 모델과 3D 텍스트를 렌더링하기 위해 수십만 개의 부유하는 입자를 생성할 것입니다.
우리는 면 대신 많은 입자를 사용하여 서로 다른 모델 간에 부드럽게 전환할 수 있습니다.
GPGPU 입자로 렌더링된 여우, 책의 3D 모델 및 3D 텍스트! 🚀
GPGPU 입자 시스템
코드로 들어가기 전에, GPGPU가 무엇인지 그리고 Three.js에서 어떻게 사용될 수 있는지 이해해봅시다.
GPGPU란 무엇인가?
GPGPU (일반 목적 GPU 컴퓨팅)는 GPU의 병렬 처리 능력을 활용하여 일반적으로 CPU가 처리하는 계산을 수행하는 기술입니다.
Three.js에서 GPGPU는 실시간 시뮬레이션, 입자 시스템 및 물리 계산에서 종종 사용되며, 데이터를 CPU에 의존한 계산 대신 텍스처에 저장하고 업데이트합니다.
이 기술은 셰이더가 메모리와 계산 기능을 가지게 하여, 복잡한 계산을 수행하고 결과를 텍스처에 저장할 수 있게 해주며 이는 CPU 개입이 필요 없습니다.
이것은 GPU 상에서 직접 대규모 고효율 계산을 가능하게 합니다.
TSL 덕분에 GPGPU 시뮬레이션을 만드는 과정이 더 쉽고 직관적입니다. 스토리지 및 버퍼 노드를 컴퓨트 함수에 결합함으로써 최소한의 코드로 복잡한 시뮬레이션을 만들 수 있습니다.
GPGPU가 사용될 수 있는 프로젝트 아이디어는 다음과 같습니다:
이제 이론에서 실습으로 넘어갈 시간입니다! TSL 및 WebGPU를 사용하여 GPGPU 입자 시스템을 만들어봅시다.
입자 시스템
스타터 팩은 WebGPU/TSL 강의 구현을 기반으로 한 WebGPU 대응 템플릿입니다.
이제 분홍색 mesh를 GPGPUParticles라는 새로운 컴포넌트로 교체하겠습니다. src/components 폴더에 GPGPUParticles.jsx라는 새 파일을 만들고 다음 코드를 추가하세요:
import { extend } from "@react-three/fiber"; import { useMemo } from "react"; import { color, uniform } from "three/tsl"; import { AdditiveBlending, SpriteNodeMaterial } from "three/webgpu"; export const GPGPUParticles = ({ nbParticles = 1000 }) => { const { nodes, uniforms } = useMemo(() => { // uniforms const uniforms = { color: uniform(color("white")), }; return { uniforms, nodes: { colorNode: uniforms.color, }, }; }, []); return ( <> <sprite count={nbParticles}> <spriteNodeMaterial {...nodes} transparent depthWrite={false} blending={AdditiveBlending} /> </sprite> </> ); }; extend({ SpriteNodeMaterial });
여기서 우리는 입자를 렌더링하기 위해 Sprite와 SpriteNodeMaterial을 사용하는 GPGPUParticles 컴포넌트를 만들고 있습니다.
Sprite를 InstancedMesh 대신 사용하는 이점은 더 가볍고 기본적으로 billboard 효과를 제공한다는 것입니다.
이제 GPGPUParticles 컴포넌트를 Experience 컴포넌트에 추가해 보겠습니다:
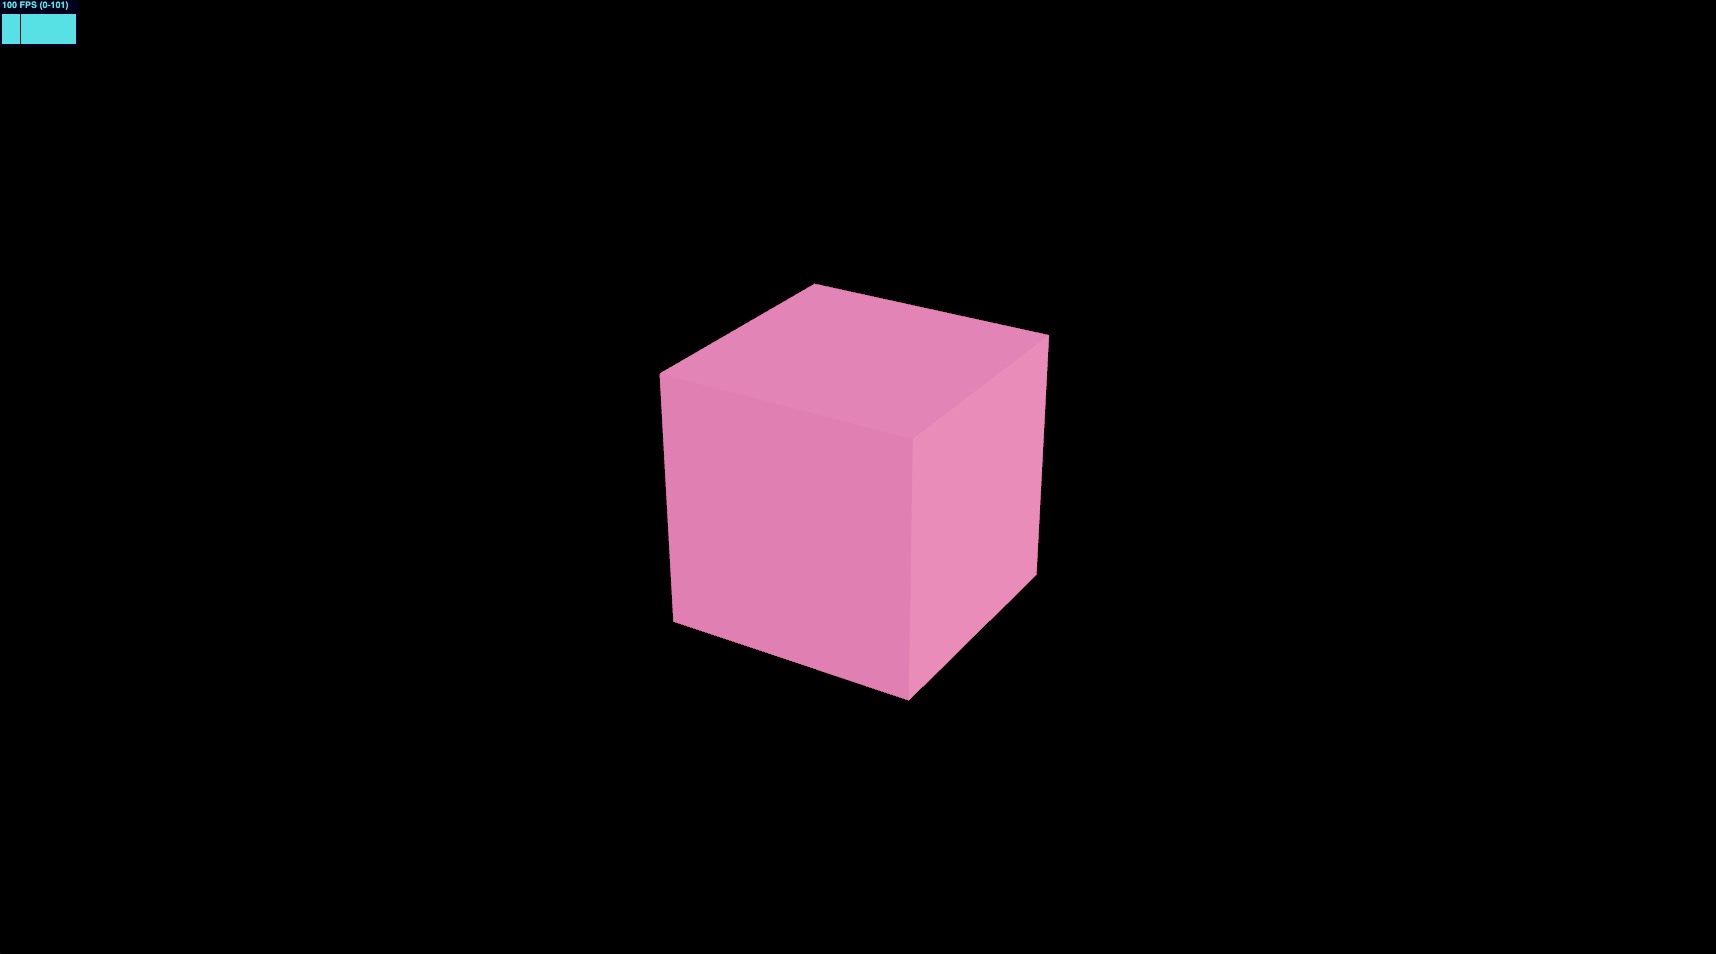
import { OrbitControls } from "@react-three/drei"; import { GPGPUParticles } from "./GPGPUParticles"; export const Experience = () => { return ( <> {/* <Environment preset="warehouse" /> */} <OrbitControls /> <GPGPUParticles /> {/* <mesh> <boxGeometry /> <meshStandardMaterial color="hotpink" /> </mesh> */} </> ); };
우리는 mesh와 environment 컴포넌트를 제거할 수 있습니다.
![]()
화면 중심에 사각형이 보입니다. 이것은 white sprite 입자입니다. 모두 같은 위치에 있습니다.
이제 입자 시스템을 설정할 시간입니다!
Buffer / 저장소 / Instanced Array
우리의 GPGPU 시뮬레이션에서는 입자들이 위치, 속도, 수명, 색상을 CPU를 사용하지 않고 기억해야 합니다.
몇 가지는 데이터를 저장하지 않아도 됩니다. 수명과 uniforms를 결합하여 색상을 계산할 수 있습니다. 그리고 고정된 seed 값을 사용해 속도를 랜덤으로 생성할 수 있습니다.
하지만 위치의 경우, 목표 위치가 변화할 수 있기 때문에 버퍼에 저장해야 합니다. 수명도 마찬가지로, 입자의 생명 주기를 GPU에서 처리하고 싶습니다.
GPU에 데이터를 저장하기 위해 우리는 storage node를 사용할 수 있습니다. 이것은 GPU에서 업데이트할 수 있는 대규모 구조화된 데이터를 저장할 수 있게 해 줍니다.
최소한의 코드로 이를 사용하기 위해 storage node에 의존하는 InstancedArray TSL 함수를 사용할 것입니다.
이 부분의 Three.js nodes는 아직 문서화되어 있지 않으며, 예제와 소스 코드를 분석하여 작동 방식을 이해할 수 있습니다.
useMemo 안에 셰이더 노드를 넣어 버퍼를 준비해 봅시다:
// ... import { instancedArray } from "three/tsl"; export const GPGPUParticles = ({ nbParticles = 1000 }) => { const { nodes, uniforms } = useMemo(() => { // uniforms const uniforms = { color: uniform(color("white")), }; // buffers const spawnPositionsBuffer = instancedArray(nbParticles, "vec3"); const offsetPositionsBuffer = instancedArray(nbParticles, "vec3"); const agesBuffer = instancedArray(nbParticles, "float"); return { uniforms, nodes: { colorNode: uniforms.color, }, }; }, []); // ... }; // ...
instancedArray는 지정된 크기와 타입의 버퍼를 생성하는 TSL 함수입니다.
동일한 코드를 storage node를 사용하여 작성하면 다음과 같습니다:
import { storage } from "three/tsl"; import { StorageInstancedBufferAttribute } from "three/webgpu"; const spawnPositionsBuffer = storage( new StorageInstancedBufferAttribute(nbParticles, 3), "vec3", nbParticles );
이러한 버퍼로, 각 입자의 위치와 수명을 저장하고 이를 GPU에서 업데이트할 수 있습니다.
버퍼의 데이터를 액세스하려면 .element(index)를 사용하여 지정된 인덱스의 값을 가져올 수 있습니다.
우리의 경우 각 입자의 instancedIndex를 사용하여 버퍼의 데이터를 액세스할 것입니다:
// ... import { instanceIndex } from "three/tsl"; export const GPGPUParticles = ({ nbParticles = 1000 }) => { const { nodes, uniforms } = useMemo(() => { // ... // buffers const spawnPositionsBuffer = instancedArray(nbParticles, "vec3"); const offsetPositionsBuffer = instancedArray(nbParticles, "vec3"); const agesBuffer = instancedArray(nbParticles, "float"); const spawnPosition = spawnPositionsBuffer.element(instanceIndex); const offsetPosition = offsetPositionsBuffer.element(instanceIndex); const age = agesBuffer.element(instanceIndex); return { uniforms, nodes: { colorNode: uniforms.color, }, }; }, []); // ... }; // ...
instanceIndex는 현재 처리 중인 인스턴스의 인덱스를 반환하는 내장 TSL 함수입니다.
이를 통해 각 입자의 버퍼 데이터를 액세스할 수 있습니다.
이 프로젝트에서는 필요 없겠지만, 다른 인스턴스의 데이터를 액세스할 수 있음으로써 입자 간 복잡한 상호작용을 만들 수 있습니다. 예를 들어, 서로를 따라가는 새 떼를 만들 수 있습니다.
초기 계산
입자의 위치와 나이를 설정하기 위해, 시뮬레이션의 시작 시 GPU에서 실행될 compute 함수를 생성해야 합니다.
TSL로 compute 함수를 생성하기 위해 Fn 노드를 사용하여 함수를 호출하고, 반환된 compute 메서드를 입자의 수와 함께 사용해야 합니다:
// ... import { Fn } from "three/src/nodes/TSL.js"; export const GPGPUParticles = ({ nbParticles = 1000 }) => { const { nodes, uniforms } = useMemo(() => { // ... const spawnPosition = spawnPositionsBuffer.element(instanceIndex); const offsetPosition = offsetPositionsBuffer.element(instanceIndex); const age = agesBuffer.element(instanceIndex); // init Fn const lifetime = randValue({ min: 0.1, max: 6, seed: 13 }); const computeInit = Fn(() => { spawnPosition.assign( vec3( randValue({ min: -3, max: 3, seed: 0 }), randValue({ min: -3, max: 3, seed: 1 }), randValue({ min: -3, max: 3, seed: 2 }) ) ); offsetPosition.assign(0); age.assign(randValue({ min: 0, max: lifetime, seed: 11 })); })().compute(nbParticles); // ... }, []); // ... }; // ...
우리는 random 값으로 버퍼를 할당하는 computeInit 함수를 생성합니다.
randValue 함수는 존재하지 않으므로 우리가 직접 생성해야 합니다.
사용할 수 있는 함수들은 다음과 같습니다:
hash(seed): 주어진 seed를 바탕으로 0과 1 사이의 random 값을 생성합니다.range(min, max): min과 max 사이의 random 값을 생성합니다.
더 많은 정보는 Three.js Shading Language Wiki에서 확인하세요.
그러나 range 함수는 속성을 정의하고 그 값을 저장합니다. 우리가 원하는 방식이 아닙니다.
seed를 바탕으로 min과 max 사이의 random 값을 반환하는 randValue 함수를 생성해 봅시다:
import { hash } from "three/tsl"; const randValue = /*#__PURE__*/ Fn(({ min, max, seed = 42 }) => { return hash(instanceIndex.add(seed)).mul(max.sub(min)).add(min); }); export const GPGPUParticles = ({ nbParticles = 1000 }) => { // ... }; // ...
randValue 함수는 min, max, seed 값을 받아들이고 seed를 기반으로 min과 max 사이의 random 값을 반환합니다.
/*#__PURE__*/는 tree-shaking을 위한 주석으로, 번들러에게 함수가 사용되지 않으면 제거하라고 알려줍니다. 자세한 내용은 여기를 참조하세요.
이제 computeInit 함수를 호출해야 합니다. 이것은 renderer의 작업입니다. useThree와 함께 import하고 선언 직후에 호출하세요:
// ... import { useThree } from "@react-three/fiber"; export const GPGPUParticles = ({ nbParticles = 1000 }) => { const gl = useThree((state) => state.gl); const { nodes, uniforms } = useMemo(() => { // ... const computeInit = Fn(() => { // ... })().compute(nbParticles); gl.computeAsync(computeInit); // ... }, []); // ... }; // ...
이를 시각화하려면, SpriteNodeMaterial의 positionNode를 spawnPosition 및 offsetPosition 버퍼를 사용하도록 변경해야 합니다.
// ... export const GPGPUParticles = ({ nbParticles = 1000 }) => { // ... const { nodes, uniforms } = useMemo(() => { // ... return { uniforms, nodes: { positionNode: spawnPosition.add(offsetPosition), colorNode: uniforms.color, }, }; }, []); // ... }; // ...
positionNode를 spawnPosition과 offsetPosition 벡터의 합으로 설정합니다.
작동하나요? 확인해 보세요!

에러 발생! 모두 하얗습니다! ⬜️
조금 더 확대해볼까요?
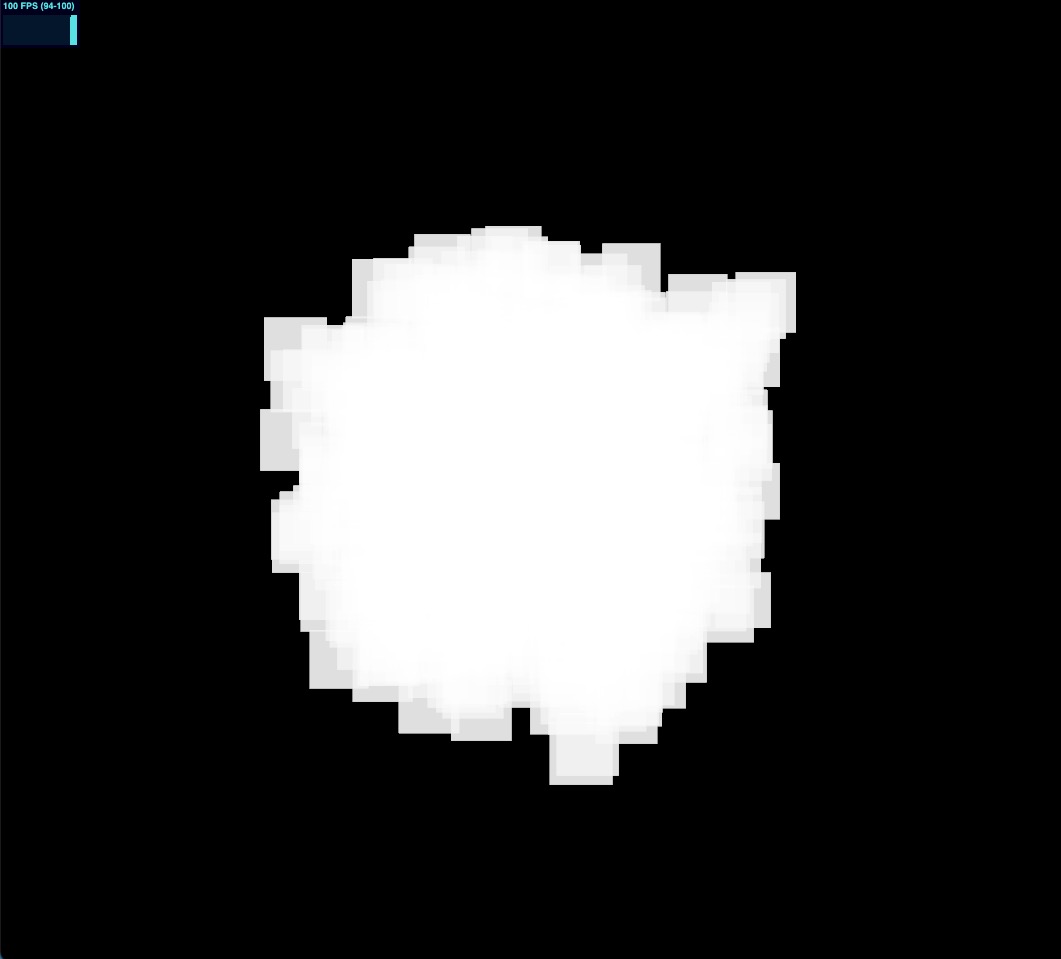
다행히도, 입자들이 너무 커서 화면 전체를 채웠던 것 같습니다! 😮💨
이제 scaleNode에 random 값을 설정하여 수정해 봅시다:
// ... import { range } from "three/tsl"; // ... export const GPGPUParticles = ({ nbParticles = 1000 }) => { // ... const { nodes, uniforms } = useMemo(() => { // ... const scale = vec3(range(0.001, 0.01)); return { uniforms, nodes: { positionNode: spawnPosition.add(offsetPosition), colorNode: uniforms.color, scaleNode: scale, }, }; }, []); return ( <> <sprite count={nbParticles}> <spriteNodeMaterial {...nodes} transparent depthWrite={false} blending={AdditiveBlending} /> </sprite> </> ); }; // ...
이 경우, range 함수를 사용하여 0.001과 0.01 사이의 random 값을 생성할 수 있습니다.
완벽합니다, 입자들이 다양한 크기와 위치로 배치되었습니다! 🎉
하지만 약간 정적입니다. 움직임을 추가할 필요가 있습니다.
Update compute
init compute function과 마찬가지로 각 frame에서 실행될 update compute function을 생성합니다.
이 함수에서는 입자의 position과 age를 업데이트할 것입니다:
// ... import { deltaTime, If } from "three/tsl"; export const GPGPUParticles = ({ nbParticles = 1000 }) => { // ... const { nodes, uniforms } = useMemo(() => { // ... const instanceSpeed = randValue({ min: 0.01, max: 0.05, seed: 12 }); // update Fn const computeUpdate = Fn(() => { age.addAssign(deltaTime); If(age.greaterThan(lifetime), () => { age.assign(0); offsetPosition.assign(0); }); offsetPosition.addAssign(vec3(instanceSpeed)); })().compute(nbParticles); // ... }, []); // ... }; // ...
React Three Fiber: The Ultimate Guide to 3D Web Development
✨ You have reached the end of the preview ✨
Go to the next level with Three.js and React Three Fiber!
Get full access to this lesson and the complete course when you enroll:
- 🔓 Full lesson videos with no limits
- 💻 Access to the final source code
- 🎓 Course progress tracking & completion
- 💬 Invite to our private Discord community
One-time payment. Lifetime updates included.