Getting Started
Let's get your 3D AI chatbot up and running! This guide will walk you through everything from cloning the repository to having your first conversation with your AI avatar.
Prerequisites
Before we begin, make sure you have:
- Node.js 20+ installed
- Git installed
- Docker installed
- A GitHub account (for repository access)
- A code editor (e.g., Visual Studio Code)
Access Your Repository
After purchasing Chatbot Kit, you'll receive an email invitation to access the private GitHub repository.
- Check your email (including spam folder)
- Click the invitation link
- Accept the repository invitation on GitHub
Once accepted, you'll have access to:
- 🎮 Complete 3D chatbot source code
- 🎨 Production-ready 3D models and animations
- 🔧 Pre-configured n8n workflows
# Clone the repository git clone https://github.com/Wawa-Sensei/chatbot-kit.git cd chatbot-kit
Set Up Backend Services
Chatbot Kit backend relies on several services:
- n8n as a no-code backend to connect different services, APIs, and LLMs.
- Valkey as a Redis alternative for the rate-limiter and sessions memory.
- Qdrant as a vector database for storing and searching embeddings for the knowledge base of your chatbots.
To simplify setup, we provide a docker-compose.yml file for a quick setup to launch all services locally with a single command.
If you are working with a team or want to quickly build a production environment, you can use the same docker-compose.yml file with some modifications for production settings or follow directly the Elestio production guide.
Install Docker and Docker Compose
To run the backend services, you need Docker and Docker Compose installed. I recommend you to use Docker Desktop for an easy setup.
If you prefer a manual setup, you can install Docker and Docker Compose separately by following the official documentation:
Start the Services
First, navigate to the backend directory containing the docker-compose.yml file:
cd backend
Then, start the services using Docker Compose:
docker-compose up -d
Quick Check: Visit these URLs to confirm everything is running:
- n8n: http://localhost:5678
- Qdrant: http://localhost:6333/dashboard
- Valkey: http://localhost:8001 (RedisInsight)
Environment Variables and API Keys
The docker-compose.yml file by default includes example security settings and API keys. While these are sufficient for local development, you should replace them with your own secrets in a production environment. Here are the environment variables you should configure:
QDRANT__SERVICE__API_KEY=your_secret_api_key_here N8N_ENCRYPTION_KEY=your-encryption-key-change-this N8N_USER_MANAGEMENT_JWT_SECRET=your-jwt-secret-change-this
To generate your own secrets, you can use the following command:
# Generate a random API key openssl rand -hex 32
n8n Setup
First open n8n and follow the steps to create your admin user. Once done, we can import the workflows and credentials. But first, let's discuss what they are:
-
Workflows: These are the automated processes that connect different services and APIs through nodes. They define the logic and sequence of actions to be performed. We use them to create our API routes for the chatbot and as services to generate the knowledge base.
-
Credentials: To separate sensitive information from workflows, n8n uses credentials. They store API keys, tokens, and other sensitive data securely. We use them to connect to services like OpenAI, Firecrawl, Qdrant, Redis (Valkey), and others.
The workflows and credentials are provided in the backend/n8n folder of the repository.
Import Workflows
Still in backend folder, let's run the following command to import the workflows:
docker-compose exec n8n n8n import:workflow --separate --input=/workflows/
It uses n8n cli to import the workflows located in backend/n8n/workflows.
The path we use in the command is the mounted path inside the container. (/workflows/)

By reloading the n8n workflows page, you should see the imported workflows.
Import Credentials
Now we can import the credentials:
docker-compose exec n8n n8n import:credentials --input /credentials/credentials.json
It calls the n8n cli to import the credentials located in backend/n8n/credentials. (This folder is mounted to /credentials in the container)
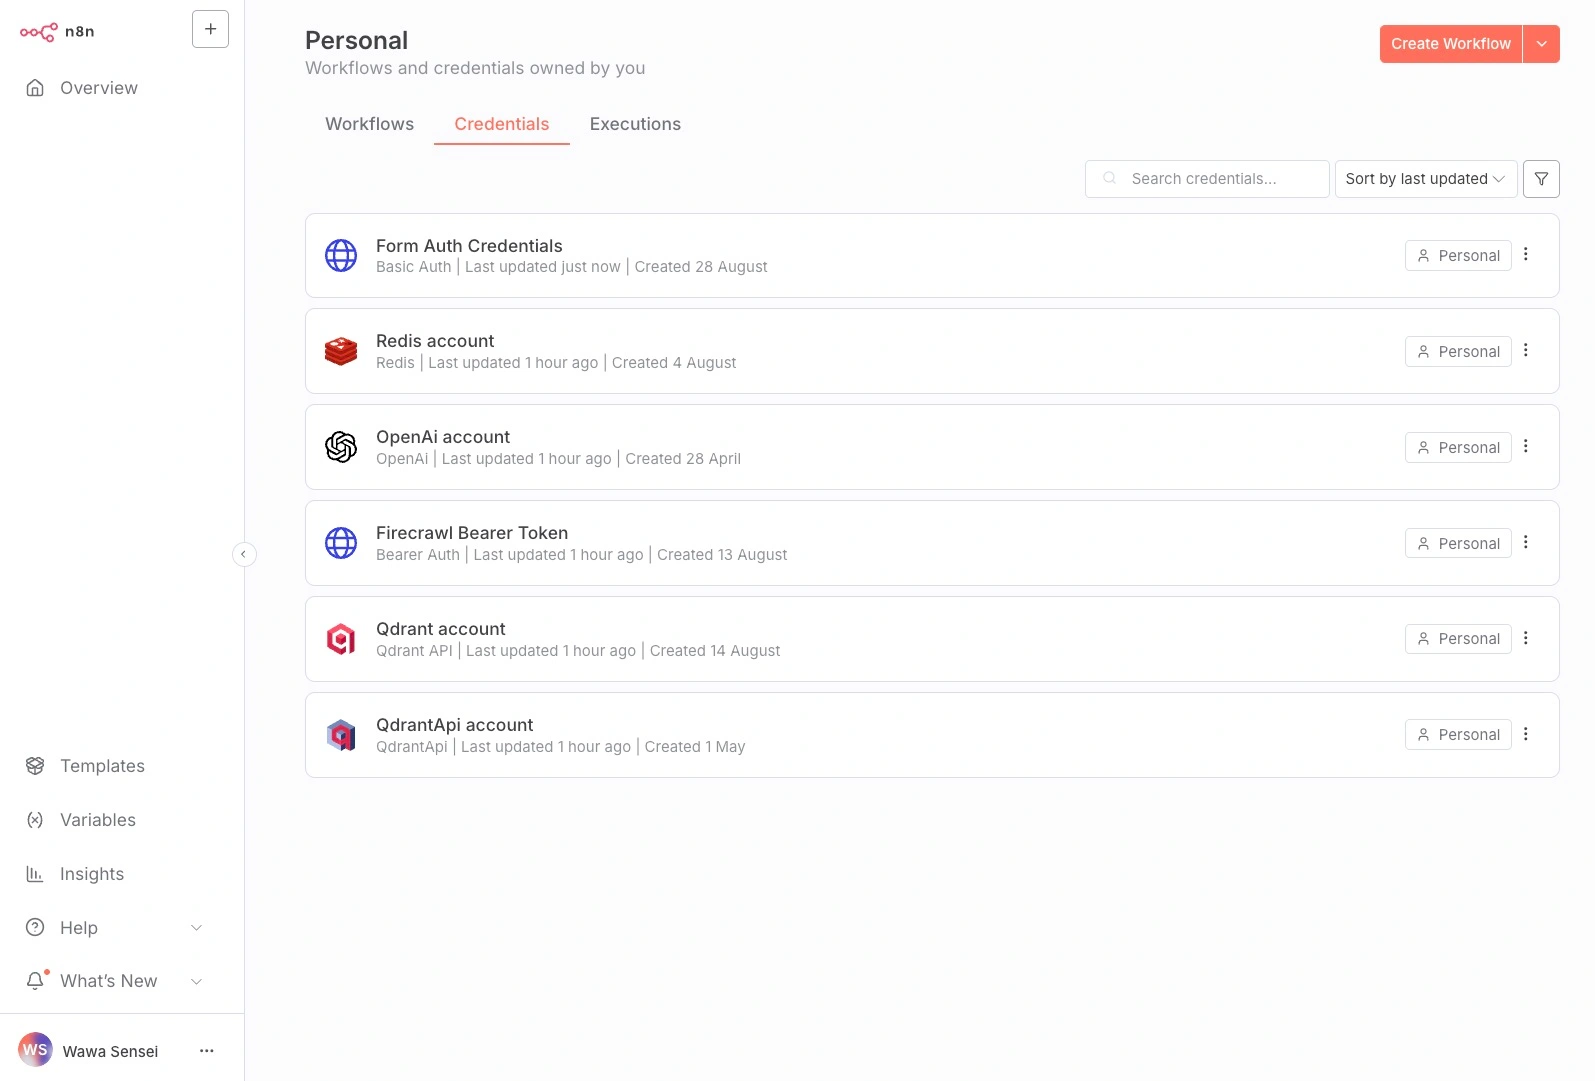
✅ Success Check: Go to Credentials (left sidebar) - you should see 6 credential entries (they need configuration).
Form Auth Credentials
It is used to secure n8n forms so only authorized users can access them. Click on Form Auth Credentials and set the Username and Password of your choice. Then hit Save.
Qdrant Credentials
Qdrant integration in n8n is split into two nodes:
- Qdrant Vector Store: used by n8n LLM Agents as a Vector Store Database. It is installed by default.
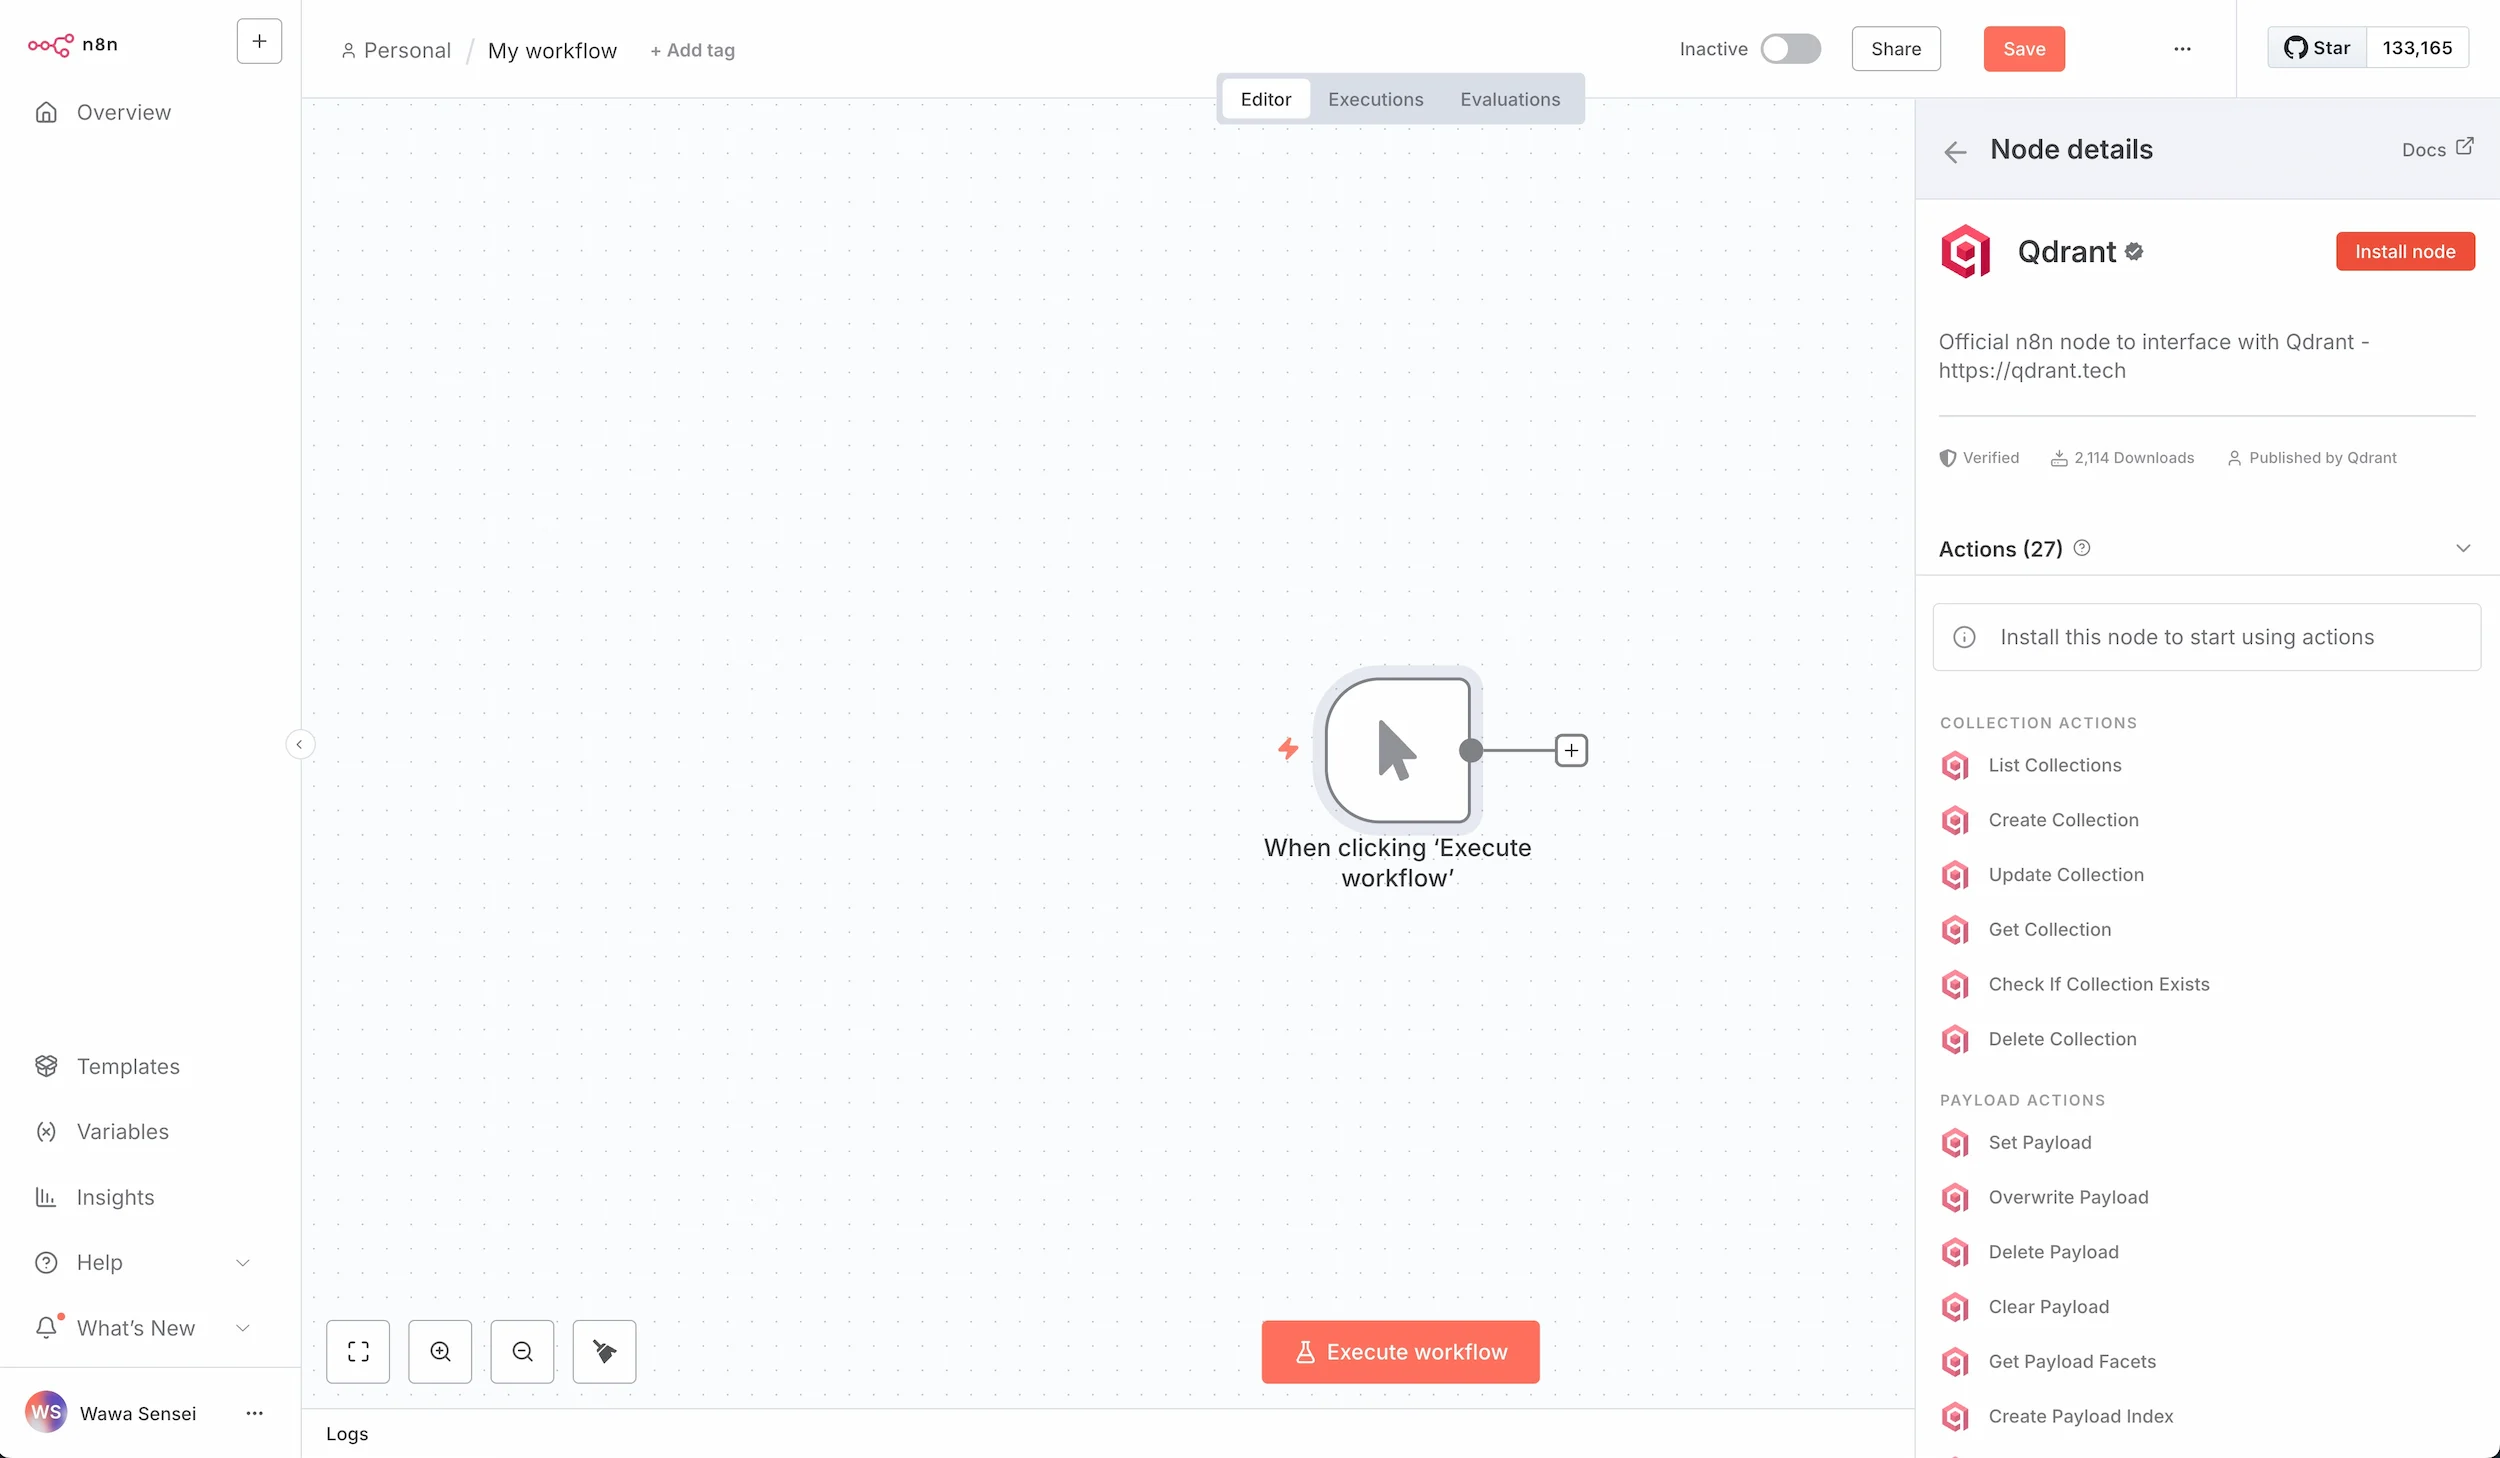
- Qdrant: The Qdrant API integration to perform operations on the Qdrant database. It is not installed by default and must be added manually.
To install the Qdrant custom node, follow these steps:
- Open n8n and create a new workflow.
- On Add first step, choose
Trigger manually - Click on
+to add a new node. - Search for
Qdrantand select it. - Click on
Install node.
After installation you can go back to the credentials page without saving the workflow.
Now we need to setup the credentials for both Qdrant nodes.
Click on Qdrant account and set the following values:
- API Key:
your_secret_api_key_here(same asQDRANT__SERVICE__API_KEYindocker-compose.yml) - REST URL:
http://qdrant:6333
Then hit Save and repeat the process for the second Qdrant node: QdrantApi account.
To access your Qdrant instance dashboard, visit: http://localhost:6333/dashboard and use the same API key to authenticate.
Valkey Credentials
Valkey is a free open-source fork of Redis. It is used as a fast in-memory database for sessions and rate-limiting.
To set our Valkey credentials in n8n click on Redis account (as we use Redis node on n8n).
Leave Password and User empty, and set the following values:
- Host:
valkey - Port:
6379 - Database Number:
0
And press Save.
To access your Valkey instance dashboard, visit: http://localhost:8001 and use the same credentials to monitor your Redis database. (
Nameis the name you want to give to this connection for exampleLocal Valkey)
OpenAI Credentials
The default setup of Chatbot Kit uses OpenAI for the LLM and TTS services. (Thanks to n8n flexibility you can easily swap to other providers if needed.)
You will need an OpenAI API key, follow n8n OpenAi credentials guide to get yours if you don't have one yet.
Then, open OpenAi account and simply paste your API key in the API Key field and Save.
If you choose to use another LLM and other Text-to-Speech services you can skip this step.
Firecrawl Credentials
Firecrawl is an API service for web crawling and data extraction. We use it to gather information from websites and extract relevant data in an easy-to-digest format for our LLM knowledge base.
In our n8n workflow we use Firecrawl through their API and not their node to allow you to use the self-hosted version. I recommend you to start with their cloud-version by creating an account on their website and to copy your API Key from the dashboard.
If you want to run Firecrawl self-hosted, follow their self-hosting guide to set it up or our Elestio production guide.
Once you get your API key, open Firecrawl Bearer Token, paste your API key inside Bearer Token field, and Save.
Enable Workflows
Back to the n8n dashboard, in the workflows section, enable the TTS and Chat workflows. They are webhooks (API endpoints) that will be triggered by the frontend.
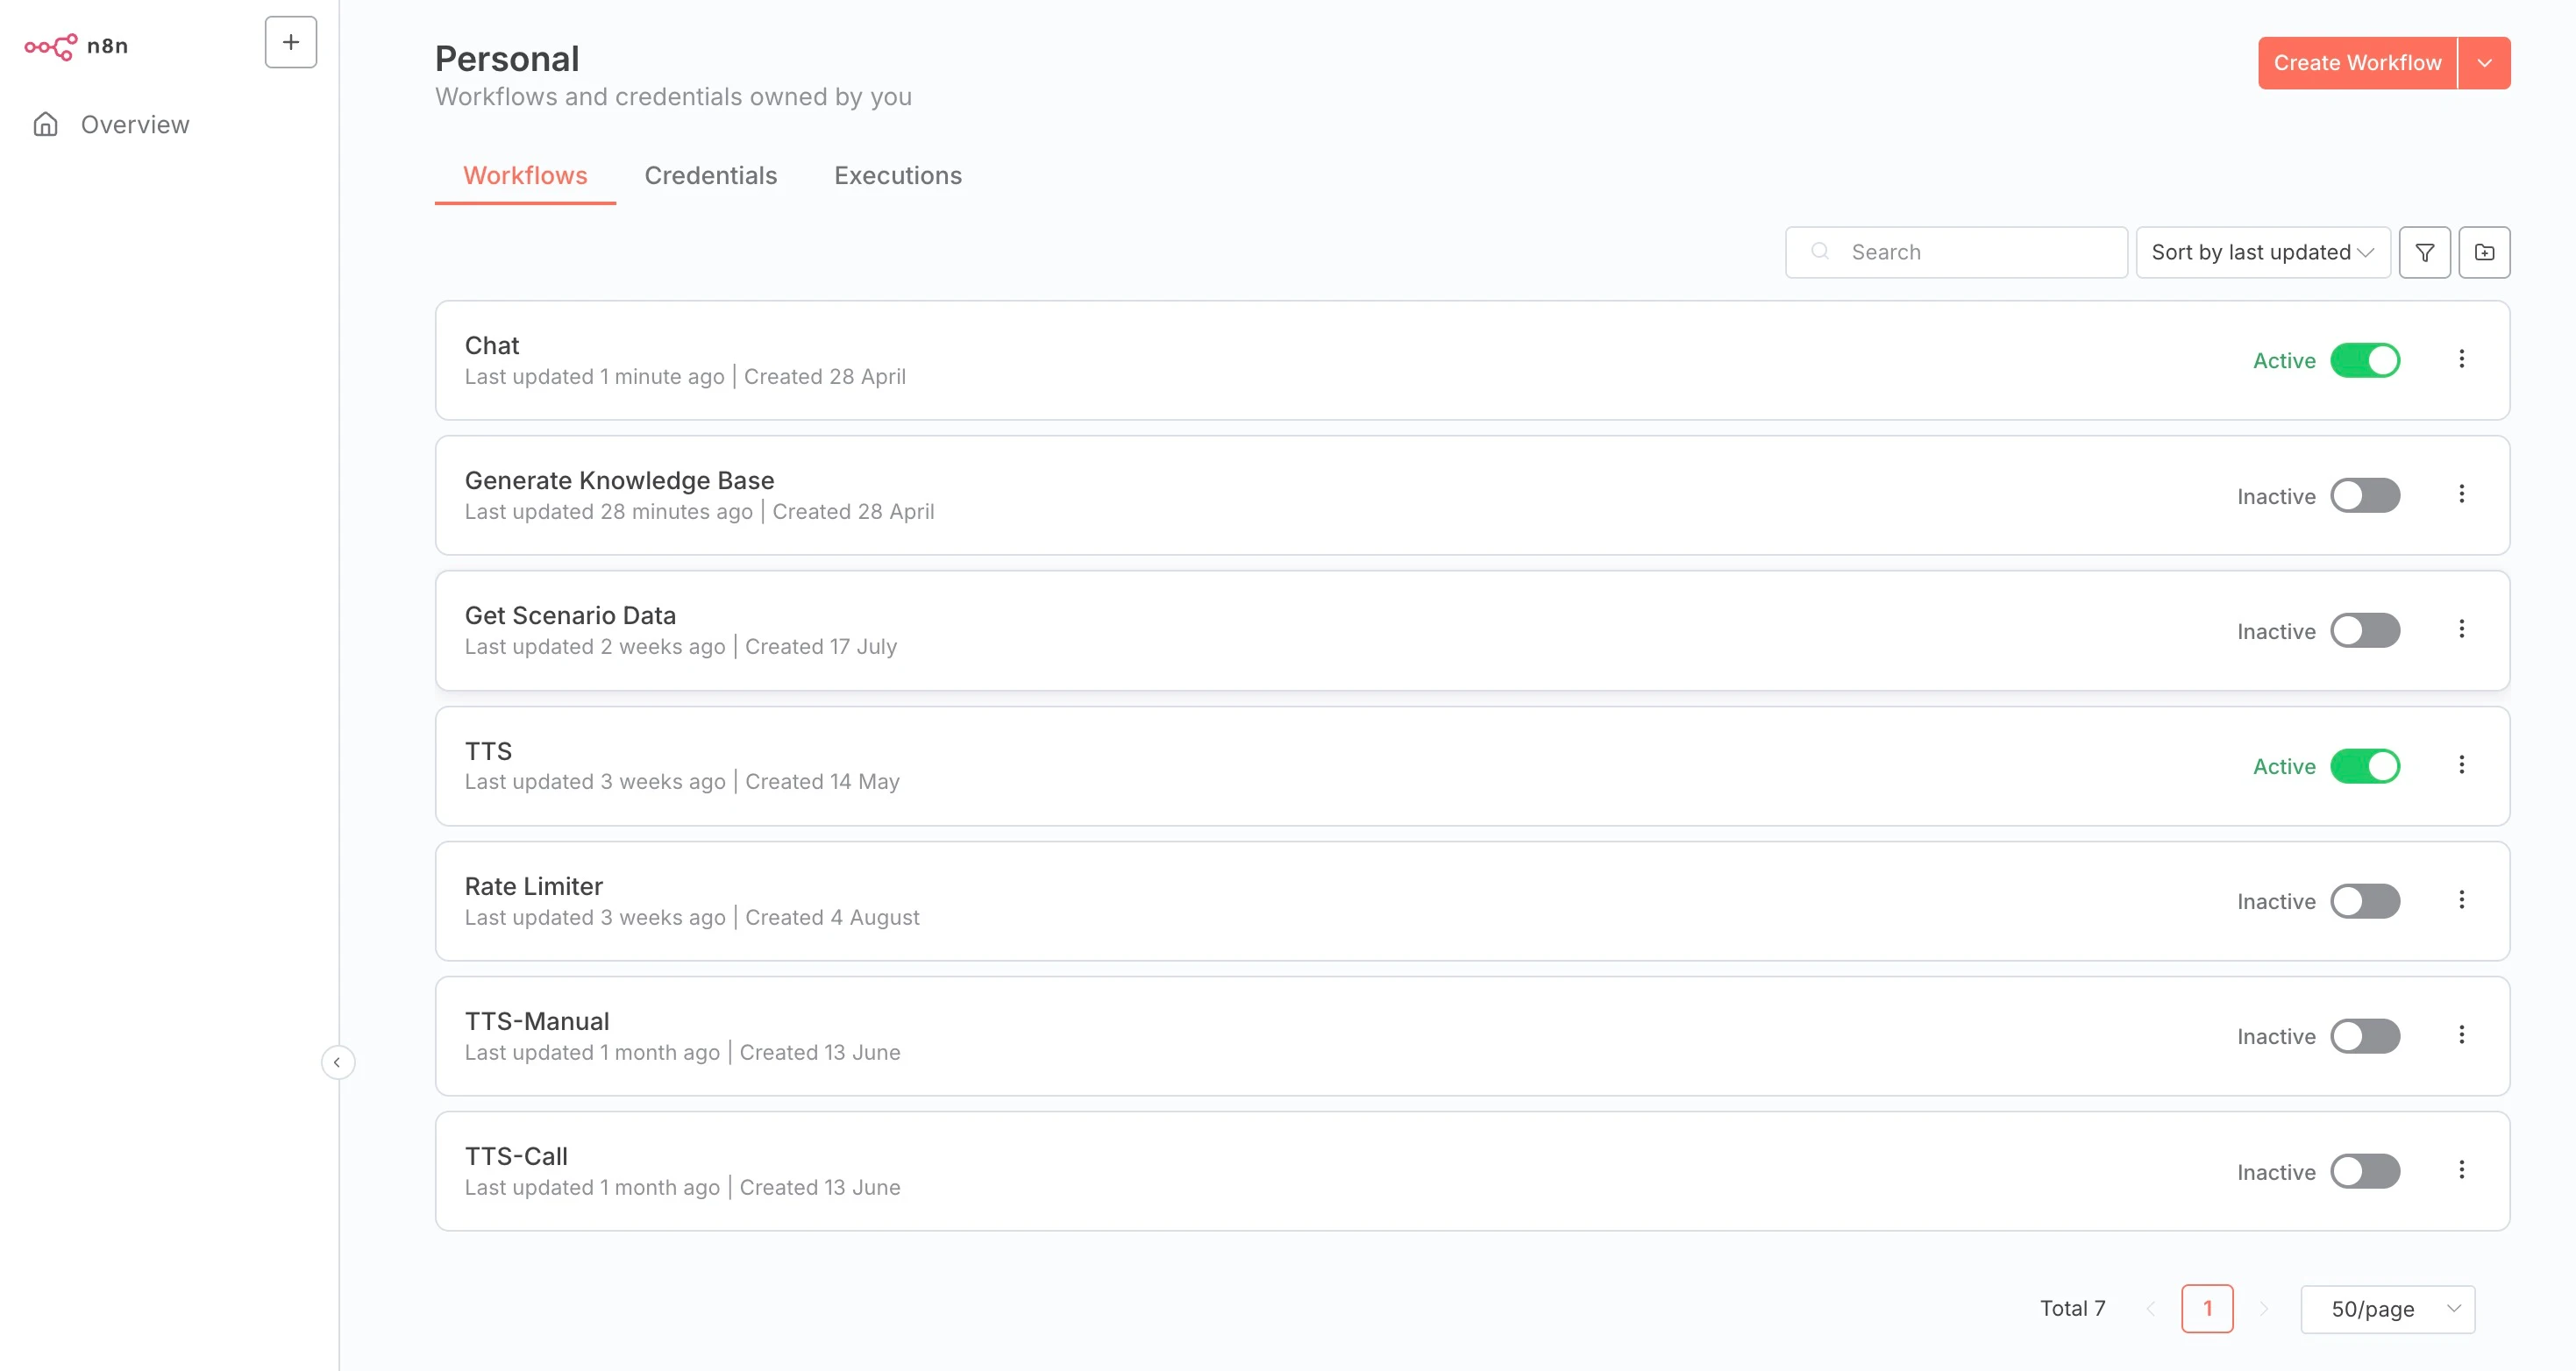
Enabling TTS and Chat workflows in n8n
Project Configuration
Now your backend is configured to work with n8n and the various services we've set up, we can configure and run the frontend.
Environment Variables
Go back to the root directory of your project and run the following command to create a .env file:
cp .env.example .env
The contents of the .env file should look like this:
NEXT_PUBLIC_API_BASE_URL=http://localhost:5678/webhook NEXT_PUBLIC_ASSETS_BASE_URL=
You can keep these variables as they are for local development. If you deploy your application, make sure to update these values to match your production environment.
Project installation
Install the project dependencies by running the following command:
npm install
and run the following command to start the development server:
npm run dev
Follow the local link http://localhost:3000 to access the application.
From there, you can pick one of the different scenario templates, start a session, and interact with the chatbot.
Congratulations, you have successfully set up your chatbot environment! You're now ready to build amazing projects with Chatbot Kit! 🚀