Elestio Deployment
Deploy your complete Chatbot Kit stack on Elestio with automatic CI/CD, SSL certificates, and managed services - all on a single server for optimal performance and cost efficiency.
Prerequisites
- GitHub account with your forked Chatbot Kit repository
- Elestio account (create one at elest.io)
- Basic understanding of environment variables and webhooks
Step 1: Create Your Elestio Account
- Visit elest.io and sign up for a new account
- Complete the verification process
- Use
WAWASENSEI10coupon code to get 10% extra credits on your first payment (example: $110 for $100) - Access your dashboard
Step 2: Deploy the Frontend Application
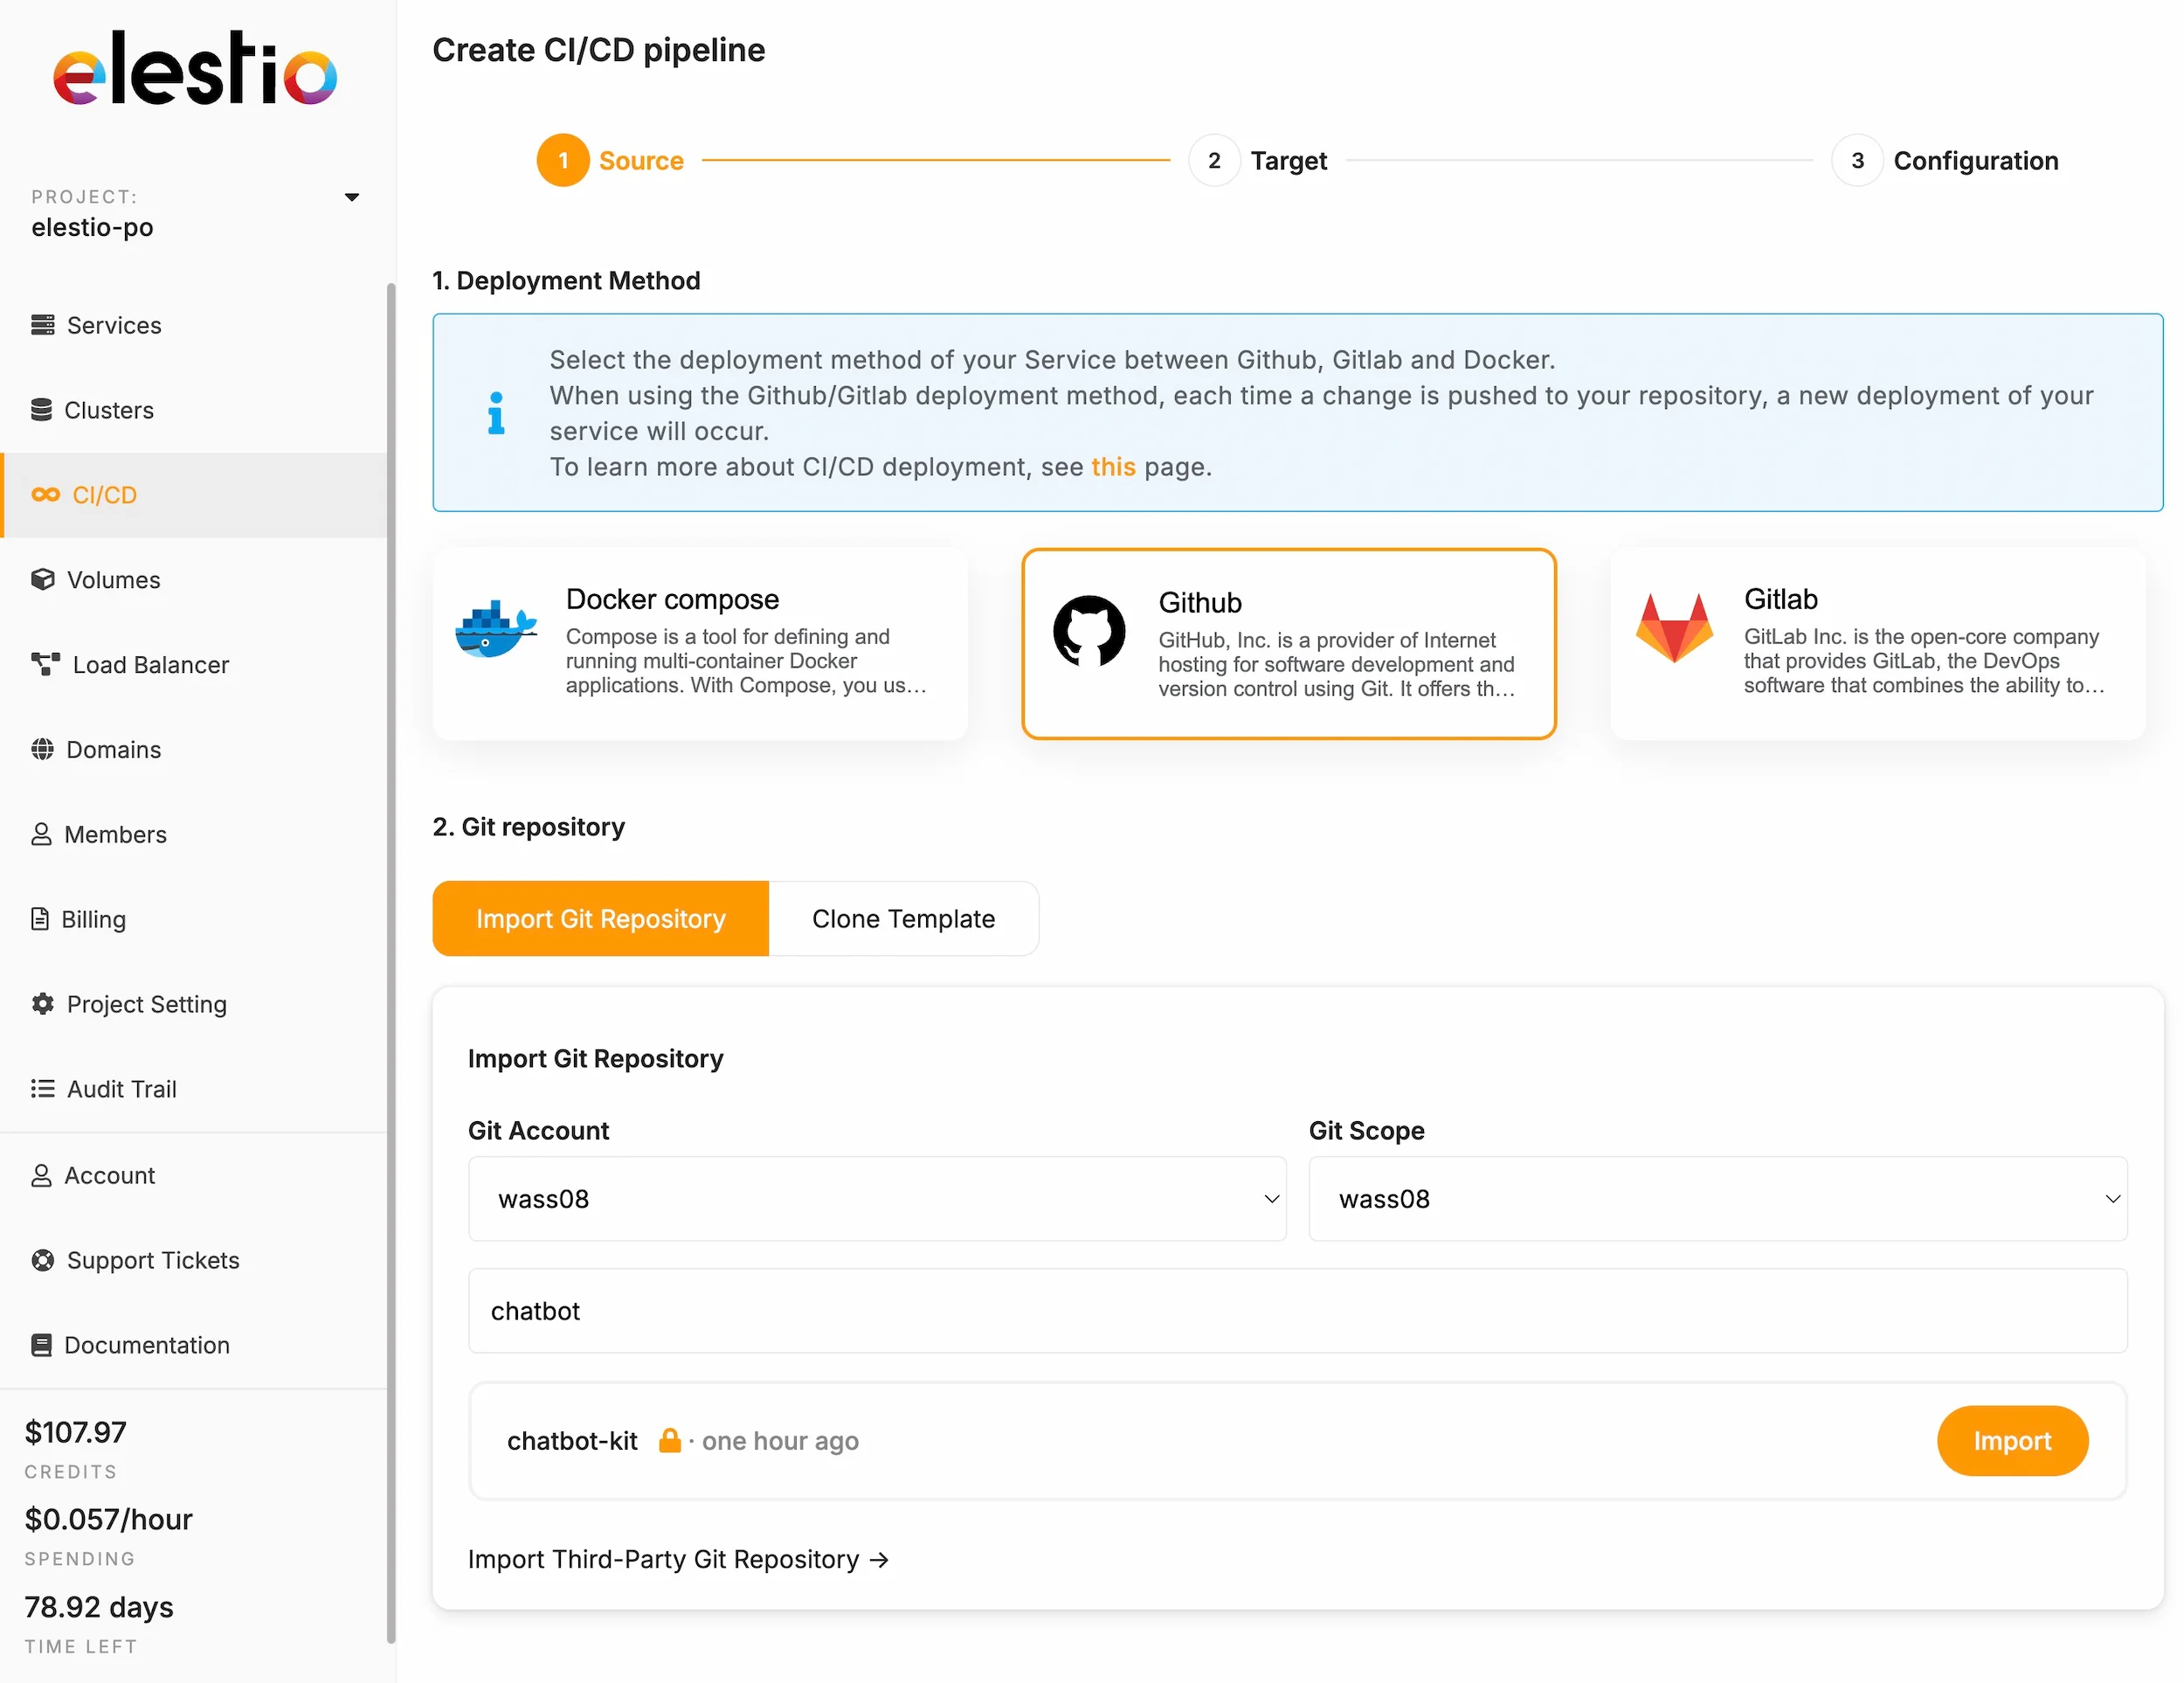
Create CI/CD Pipeline
- Navigate to CI/CD Pipelines → Deploy New Pipeline
- Select GitHub as your source
- Choose From existing repository
- Select your forked
chatbot-kitrepository
Configure Infrastructure
- Choose Cloud Provider: Select your preferred provider (AWS, Google Cloud, Azure, etc.)
- Select Region: Pick a region close to your target audience
- Service Plan:
- Minimum: 2 CPU / 4GB RAM (for the complete stack)
- Recommended: 4 CPU / 8GB RAM for production workloads
- This single server will host all services (frontend, n8n, Valkey, Qdrant)
Build Settings
Configure the build settings for your Next.js application:
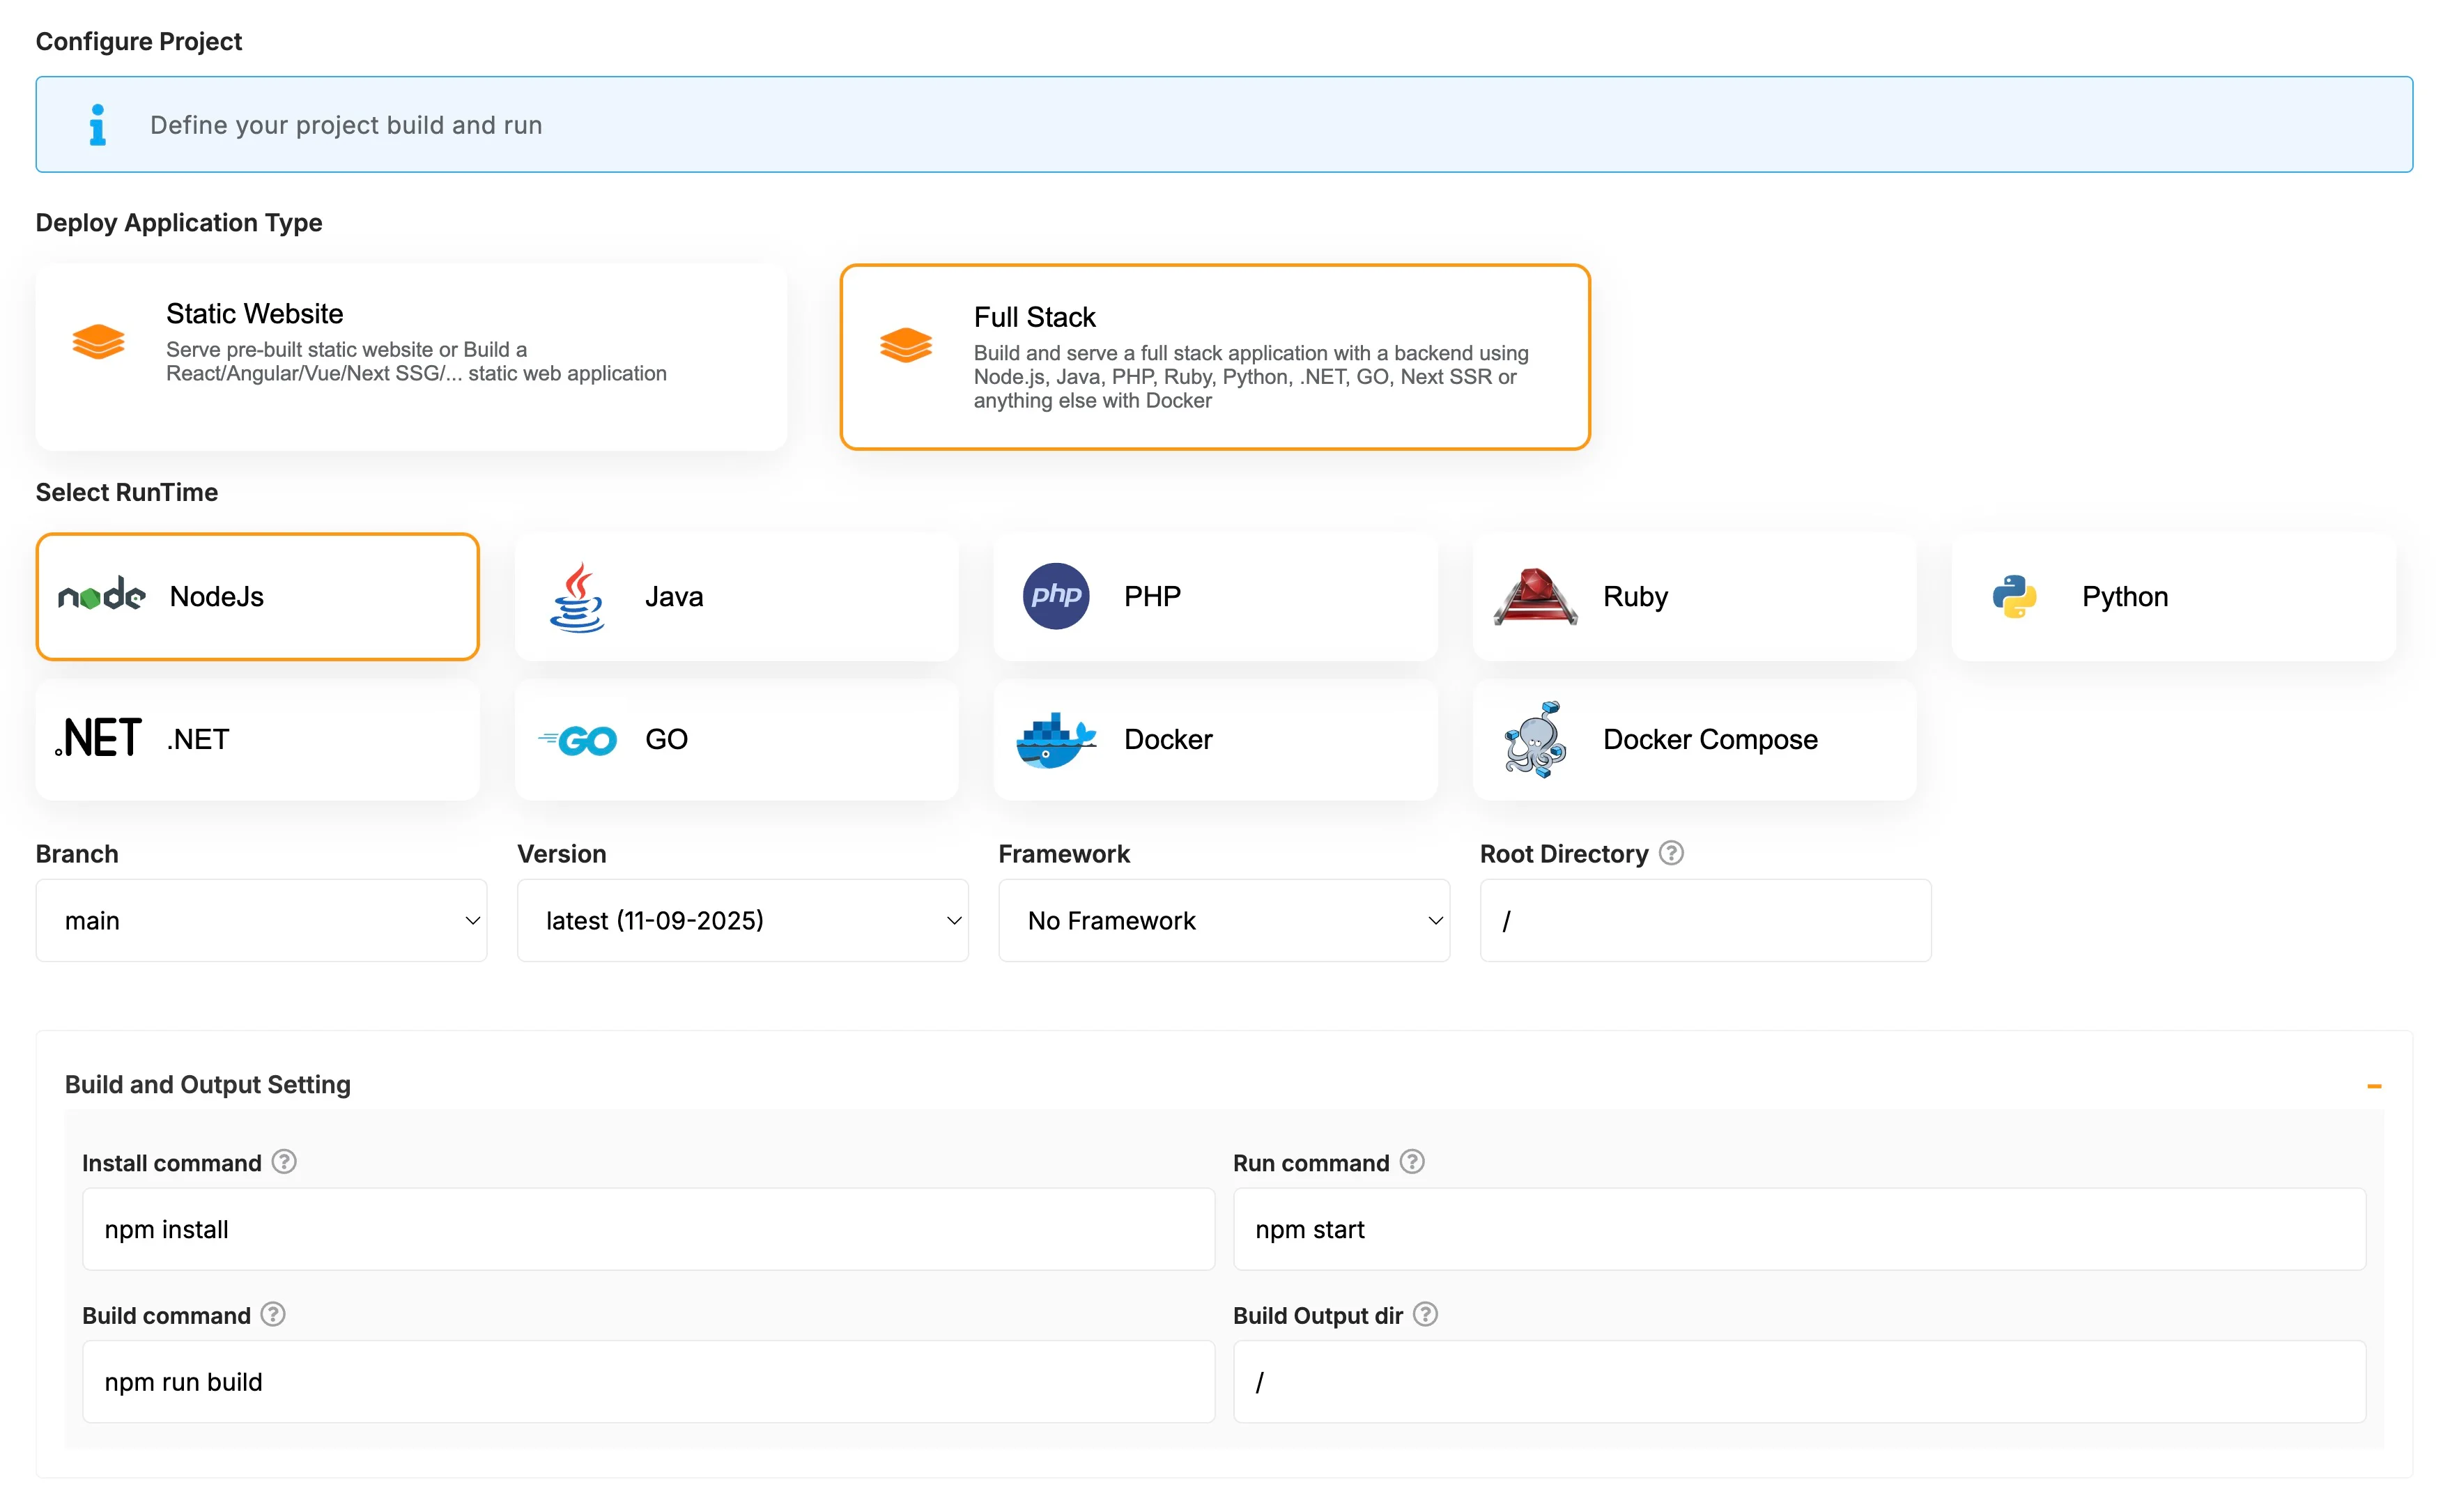
- Framework: Select Fullstack / Node.js
- Commands:
- Install:
npm install - Build:
npm run build - Run:
npm start
- Install:
- Click Deploy to start the deployment
Wait for the initial deployment to complete. Elestio will provide you with:
- A public URL for your application
- SSL certificate automatically configured
- CI/CD pipeline for automatic updates
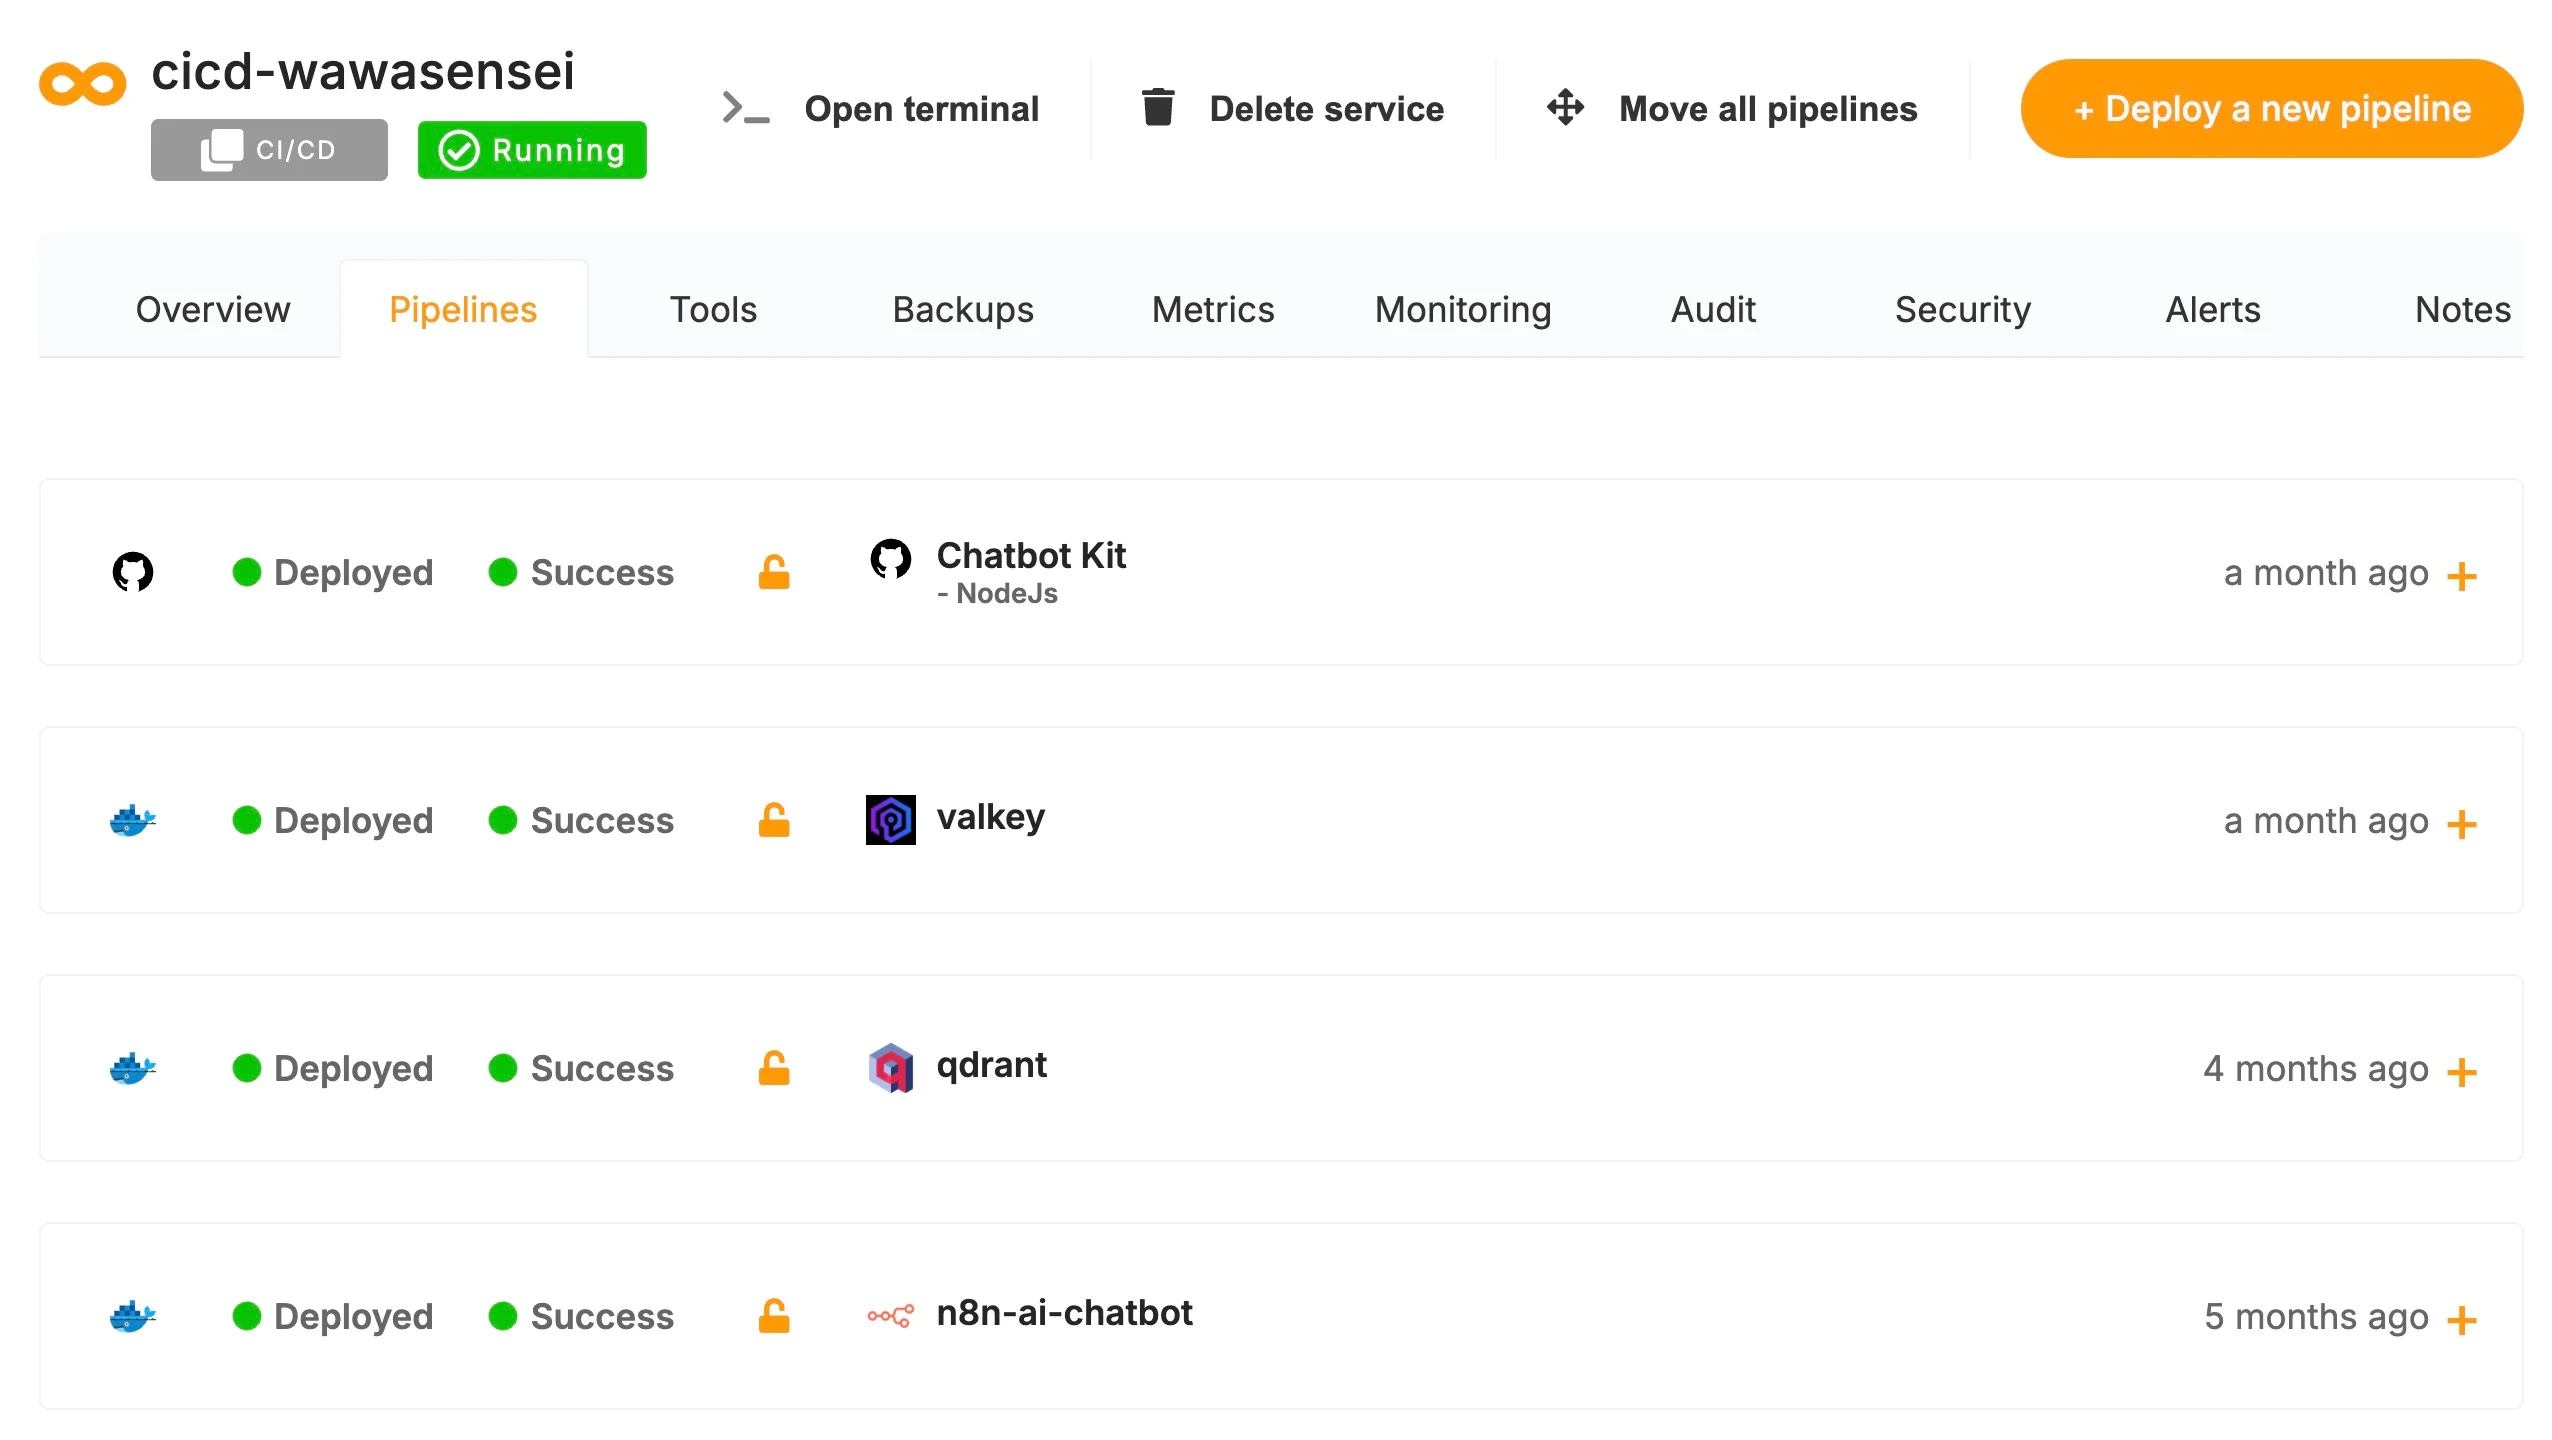
Step 3: Install Backend Services
Now we'll add the required services to the same VM for optimal performance.
Install n8n
- Go to CI/CD Pipelines → Add New Pipeline
- In the templates list, select n8n from the Docker Compose category
- Choose Install on existing VM
- Select your frontend VM from the list
- Keep the default settings
- Click Deploy
Install Valkey (Redis Alternative)
- Return to CI/CD Pipelines → Add New Pipeline
- Select Valkey from the Docker Compose templates
- Choose Install on existing VM
- Select the same VM
- Keep default settings
- Click Deploy
Install Qdrant Vector Database
- Again, CI/CD Pipelines → Add New Pipeline
- Select Qdrant from the Docker Compose templates
- Choose Install on existing VM
- Select the same VM
- Keep default settings
- Click Deploy
Optional: Install Firecrawl
If you prefer self-hosting Firecrawl instead of using their cloud service:
- CI/CD Pipelines → Add New Pipeline
- Select Firecrawl from the Docker Compose templates
- Choose Install on existing VM
- Select the same VM
- Keep default settings
- Click Deploy
Step 4: Configure Environment Variables
Once all services are deployed, configure your frontend to connect to them:
- Navigate to your Frontend project in Elestio
- Go to Build & Deploy → Environment Variables
- Add the following variables:
NEXT_PUBLIC_API_BASE_URL=https://your-n8n-domain.elest.io/webhook NEXT_PUBLIC_ASSETS_BASE_URL=https://your-cdn-domain.com
Important URLs to note:
- Your n8n instance will be available at:
https://[your-project]-n8n.elest.io - Replace
your-n8n-domainwith your actual n8n URL from Elestio - The CDN URL is optional but recommended for production
- Click Save and Rebuild to apply the changes
Step 5: Configure n8n and Services
Now that all services are running, follow the same configuration steps as the local setup:
- Access n8n: Visit your n8n URL provided by Elestio
- Create admin user: Set up your n8n admin account
- Import workflows and credentials: Follow the steps in Getting Started
When configuring credentials in n8n, use the urls provided by Elestio.
Monitoring and Backups
Elestio includes:
- Automatic backups: Daily snapshots of your services
- Monitoring: Real-time metrics and alerts
- Logs: Centralized logging for all services
- Auto-scaling: Upgrade resources as needed
CI/CD Pipeline
Your GitHub repository is now connected:
- Push to main branch triggers automatic deployment
- Build logs available in Elestio dashboard
- Rollback capability for failed deployments
Step 6: Verify Deployment
- Test Frontend: Visit your application URL
- Check n8n Workflows: Ensure all workflows are active
- Test Chat Endpoint: Try the chatbot functionality
- Verify TTS: Test text-to-speech if configured
- Knowledge Base: Test content generation workflow
Support
- Elestio Support: Available through dashboard
- Chatbot Kit Support: contact@wawasensei.dev
- Community: GitHub discussions
Your Chatbot Kit is now running in production on Elestio with automatic deployments, SSL, and managed infrastructure!